
Composting with Red Worms
This week we’re featuring a special guest blogger – Dave Victor, PEAS Farm Director. Dave is a lover of plants and the soil that sustains them. He has a Master’s degree in Environmental Studies from the University of Montana where he focused on seed saving at the River Road Farm. Off the farm, he enjoys tending to his red worms and growing mushrooms. His knowledge and passion for worm compost is well worth sharing…
————————————————————————————————————————————————————————————-
Looking for a kid-friendly backyard ecology project? Interested in making high quality compost but tired of turning that smelly pile in the backyard? Want to eliminate your paper waste stream from filling up the recycling center or landfill? Intrigued by keeping ‘livestock’ that doesn’t require much room or pasture? Tired of hunting down worms for your next fishing trip? Then red worm composting may be for you!
How It Works: Food and vegetable scraps are buried into paper bedding within a plastic or wooden bin. Red worms, with the help of invertebrates and microorganisms, break down both bedding and food scraps into a high-quality, biologically rich compost called castings. Castings are then used to fertilize garden plants that feed you, your family, and your friends.
Benefits of Worm Castings: Worm castings are biologically and chemically different than traditional compost. While the macronutrient levels (NPK) in worm castings are lower than traditional compost, castings have a profound influence on plant growth and health. Reasons for this include increased levels in humus, micronutrients, and plant growth promoters available in castings that aren’t found to the same degree in traditional compost. Because castings are biologically dynamic it is noted that plants grown with small amounts of castings germinate better, grow faster, yield better, and are more resistant to disease and insect pressures. Need proof, then try it for yourself!

The three trays in the foreground were all planted at the same time in our greenhouse. The tray in front contains worm castings while the other two do not.
The Worm Bin: A worm bin is simply a structure that holds bedding, worms, and food scraps. You can make one yourself (which is really easy) or buy one from a supplier. For your first worm bin, I recommend using an old plastic tote. Drill a series of ¼” holes on the bottom, sides, and lid to allow for air exchange as plastic bins tend to hold too much water through condensation. Or simply skip the holes and leave the lid slightly cracked. If you make a wooden worm bin then drilling holes is not necessary as wood breaths better than plastic — just be sure to cover bedding with a plastic trash bag to hold in moisture. If holes were drilled, line the bottom with screen window material to prevent stuff from coming out of the bottom.

Worm bin options
Bedding Materials: The first thing you will want to add to your new worm bin is bedding material, which is the carbon-based material that you will bury food scraps into. Shredded office paper, junk mail, and old newspaper (no glossy or lots of color) work really well and is a great alternative to recycling. Bedding should be between 5 and 12 inches deep, should be kept loose and airy, and must be moistened to the feel of a damp sponge. Your bedding will help absorb liquid from your food scraps and control stinky smells. Your worms will consume both bedding and food scraps. Be sure to mix in a handful of living soil to the paper. This helps inoculate the bin with beneficial organisms that help shred and chew materials before worms get to it.
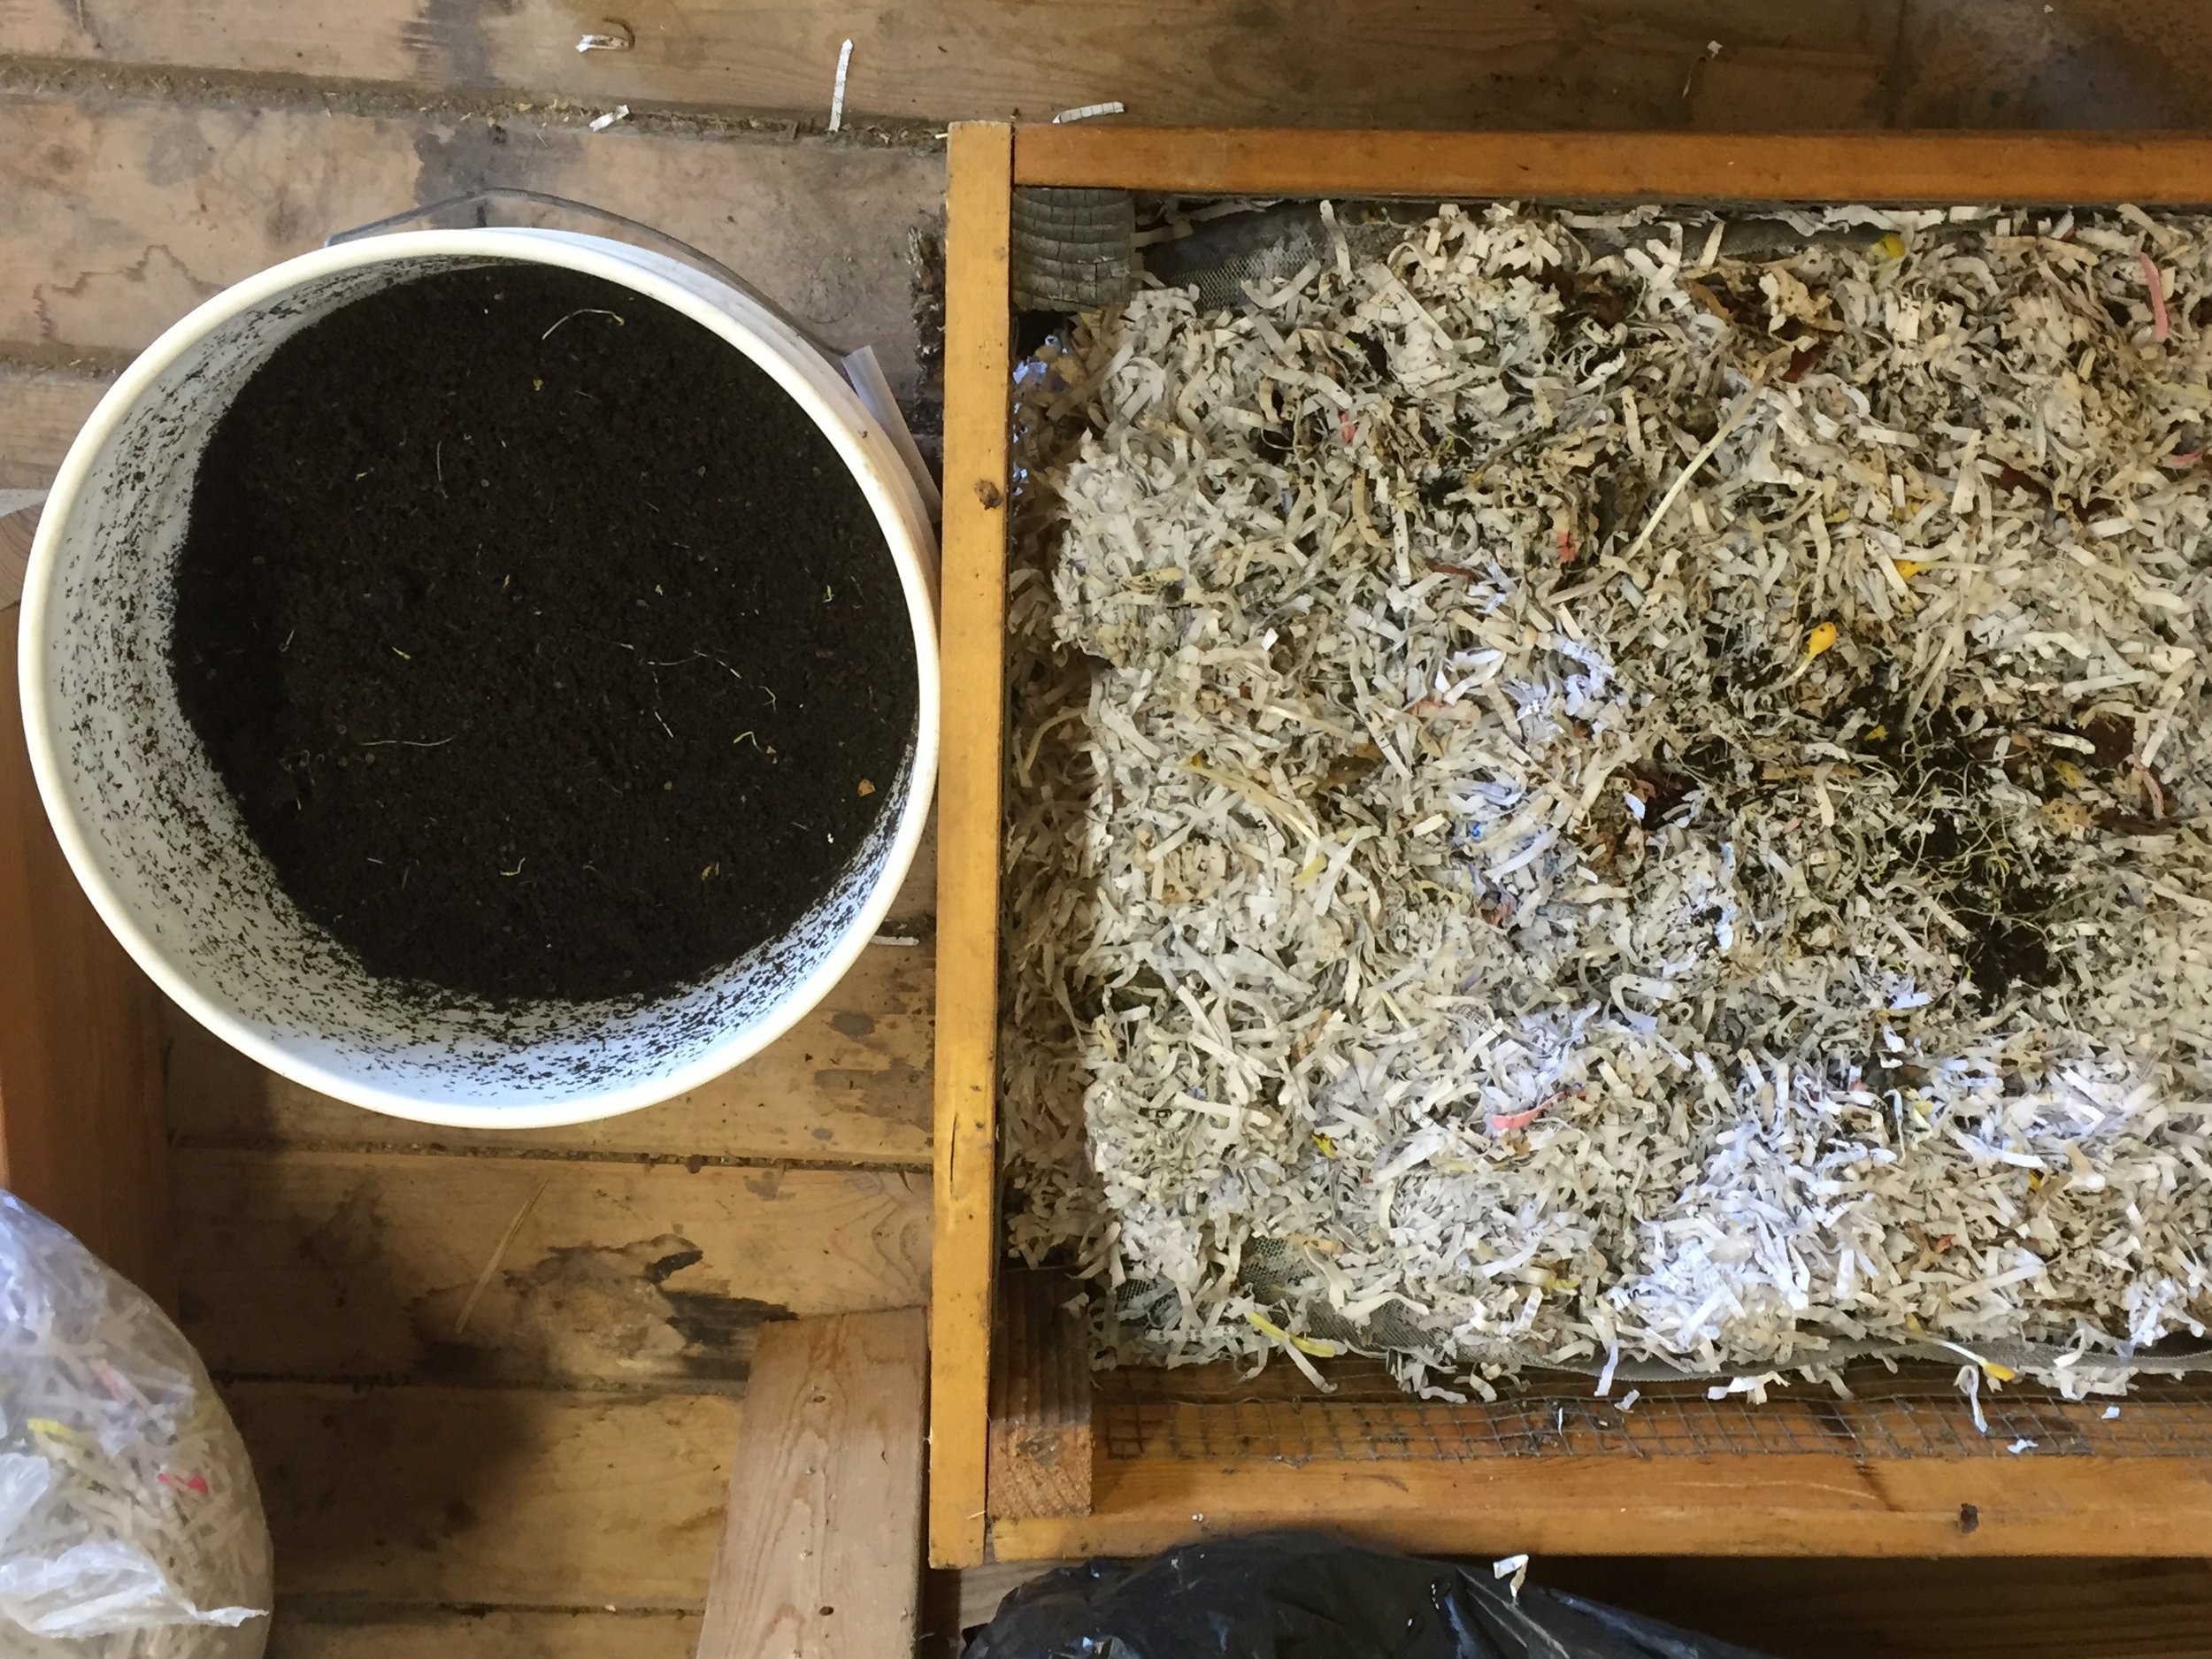
Shredded paper bedding next to a bucket of castings
The Worms: There are many species of worms, but not all are suited to living in a worm bin. Some worms live deep in the soil such as earthworms and are not good for composting food wastes. Others, such as red worms, live in the upper litter layer of soil and are excellent composters. Red worms, such as Eisenia foetida — also known as red wiggler, manure worm, and red composting worm — are what you want to add to your worm bin as they will consume large amounts of decomposing vegetation and paper bedding. They can eat up to half of their weight in feed per day and reproduce quickly under ideal conditions. So you can start with a small batch of worms and easily increase your population to handle all your food waste needs. Red worms can be sourced from fishing bait shops, friends and neighbors, or online.

Red worms, Eisenia foetida
Worm Bin Dynamics: Think of your worm bin as a functional ecosystem with its own food web dynamics. By adding bedding material and food scraps we eventually get worm compost, i.e. castings, in return. This doesn’t happen magically though. It follows nature’s pattern of material breakdown with the help of invertebrates (millipedes, pill bugs, enchytaeids) that chew and shred materials making it easy for your worms to eat. Protozoans, fungi, bacteria, rotifers, and nematodes also perform a role in material breakdown and serve as a supplemental food source for our worms.
Worm Castings: After several months you will begin to notice that your bedding has started to breakdown and there is a layer of black crumbly compost, called worm castings, on the bottom of your bin. This is the product of your worms’ digestive system with the help of microorganisms and invertebrates. Castings can be harvested and used to side-dress garden and house plants, used as a supplement in potting soils, or made into tea and sprayed on plants.
Considerations: Inside of your bin is a working environment. Proper conditions are needed for everything to work smoothly. If the bedding is too wet or too dry, worms will want to leave the bin. If your bin is too stinky, try adding less food and more paper. If you have fruit fly issues, you may have exposed food scraps that need covering or your bedding may be too moist. Locate your bin in a shady spot. The ideal temperature for your bin is between 70 and 80 degrees F; red worms will tolerate temperatures between 38 and 95 degrees F. During the winter, bring your bin into a garage, basement, or even in the house. For several years I kept worm bins under my bed during the winter…remember, a properly maintained worm bin is neither smelly nor dirty. Most important of all: have fun, observe, and learn from your mistakes and observations.
This information was written to be an introduction into worm composting. Much has been written on the subject both in the literature and on the Internet. For further reading I recommend Worms Eat My Garbage by Mary Appelhof.
————————————————————————————————————————————————————————————-
A huge thank you to Dave Victor for sharing his insight!