
Milwaukee Trail Community Garden Orientation
Hello and welcome to Milwaukee Trail Community Gardens! This garden has been lovingly tended and admired from the Milwaukee Trail Bike/Walking Path since 2014. (For more information on the other 11 community garden sites, click here.) Please read all of the important information here and watch the video tour below, so you are familiar with your garden’s amenities and resources. We hope that with an understanding of all the pieces that make up this garden site, you will help us care for it and keep it functioning and thriving for the benefit of everyone.
Important Housekeeping Items:
Always lock the shed when leaving the garden.
Do not add straw, soil, potted plants, plastic, leaves or any other yard waste to the garden’s designated weed pile (More info below). This weed pile is manually removed by Garden City Harvest staff throughout the season and taken to the City compost facility, and these items make it extremely difficult to move by hand. The compost facility may also reject the entire pile. We also need your help to keep an eye on things - if you see neighbors dumping, please ask them not to.
Communicate with your garden neighbors! Here is the link to Milwuakee Trail Gardens private gardener Facbook group. This is a great way to communicate with fellow gardeners and stay up to date with other happenings or updates in the garden.
For issues or inquiries, contact the Community Garden Staff or the Garden Leadership Committee (contact info in the shed).
If a water line breaks in the garden or there is no water, FIRST contact Corso Apartments. The front desk is located in the building directly east of the garden with the pool. THEN, contact Community Garden Staff to let them know. It is also extremely helpful to post about the water issue on the Facebook group, so other gardeners know not to come to the garden planning on watering until the issue is fixed.
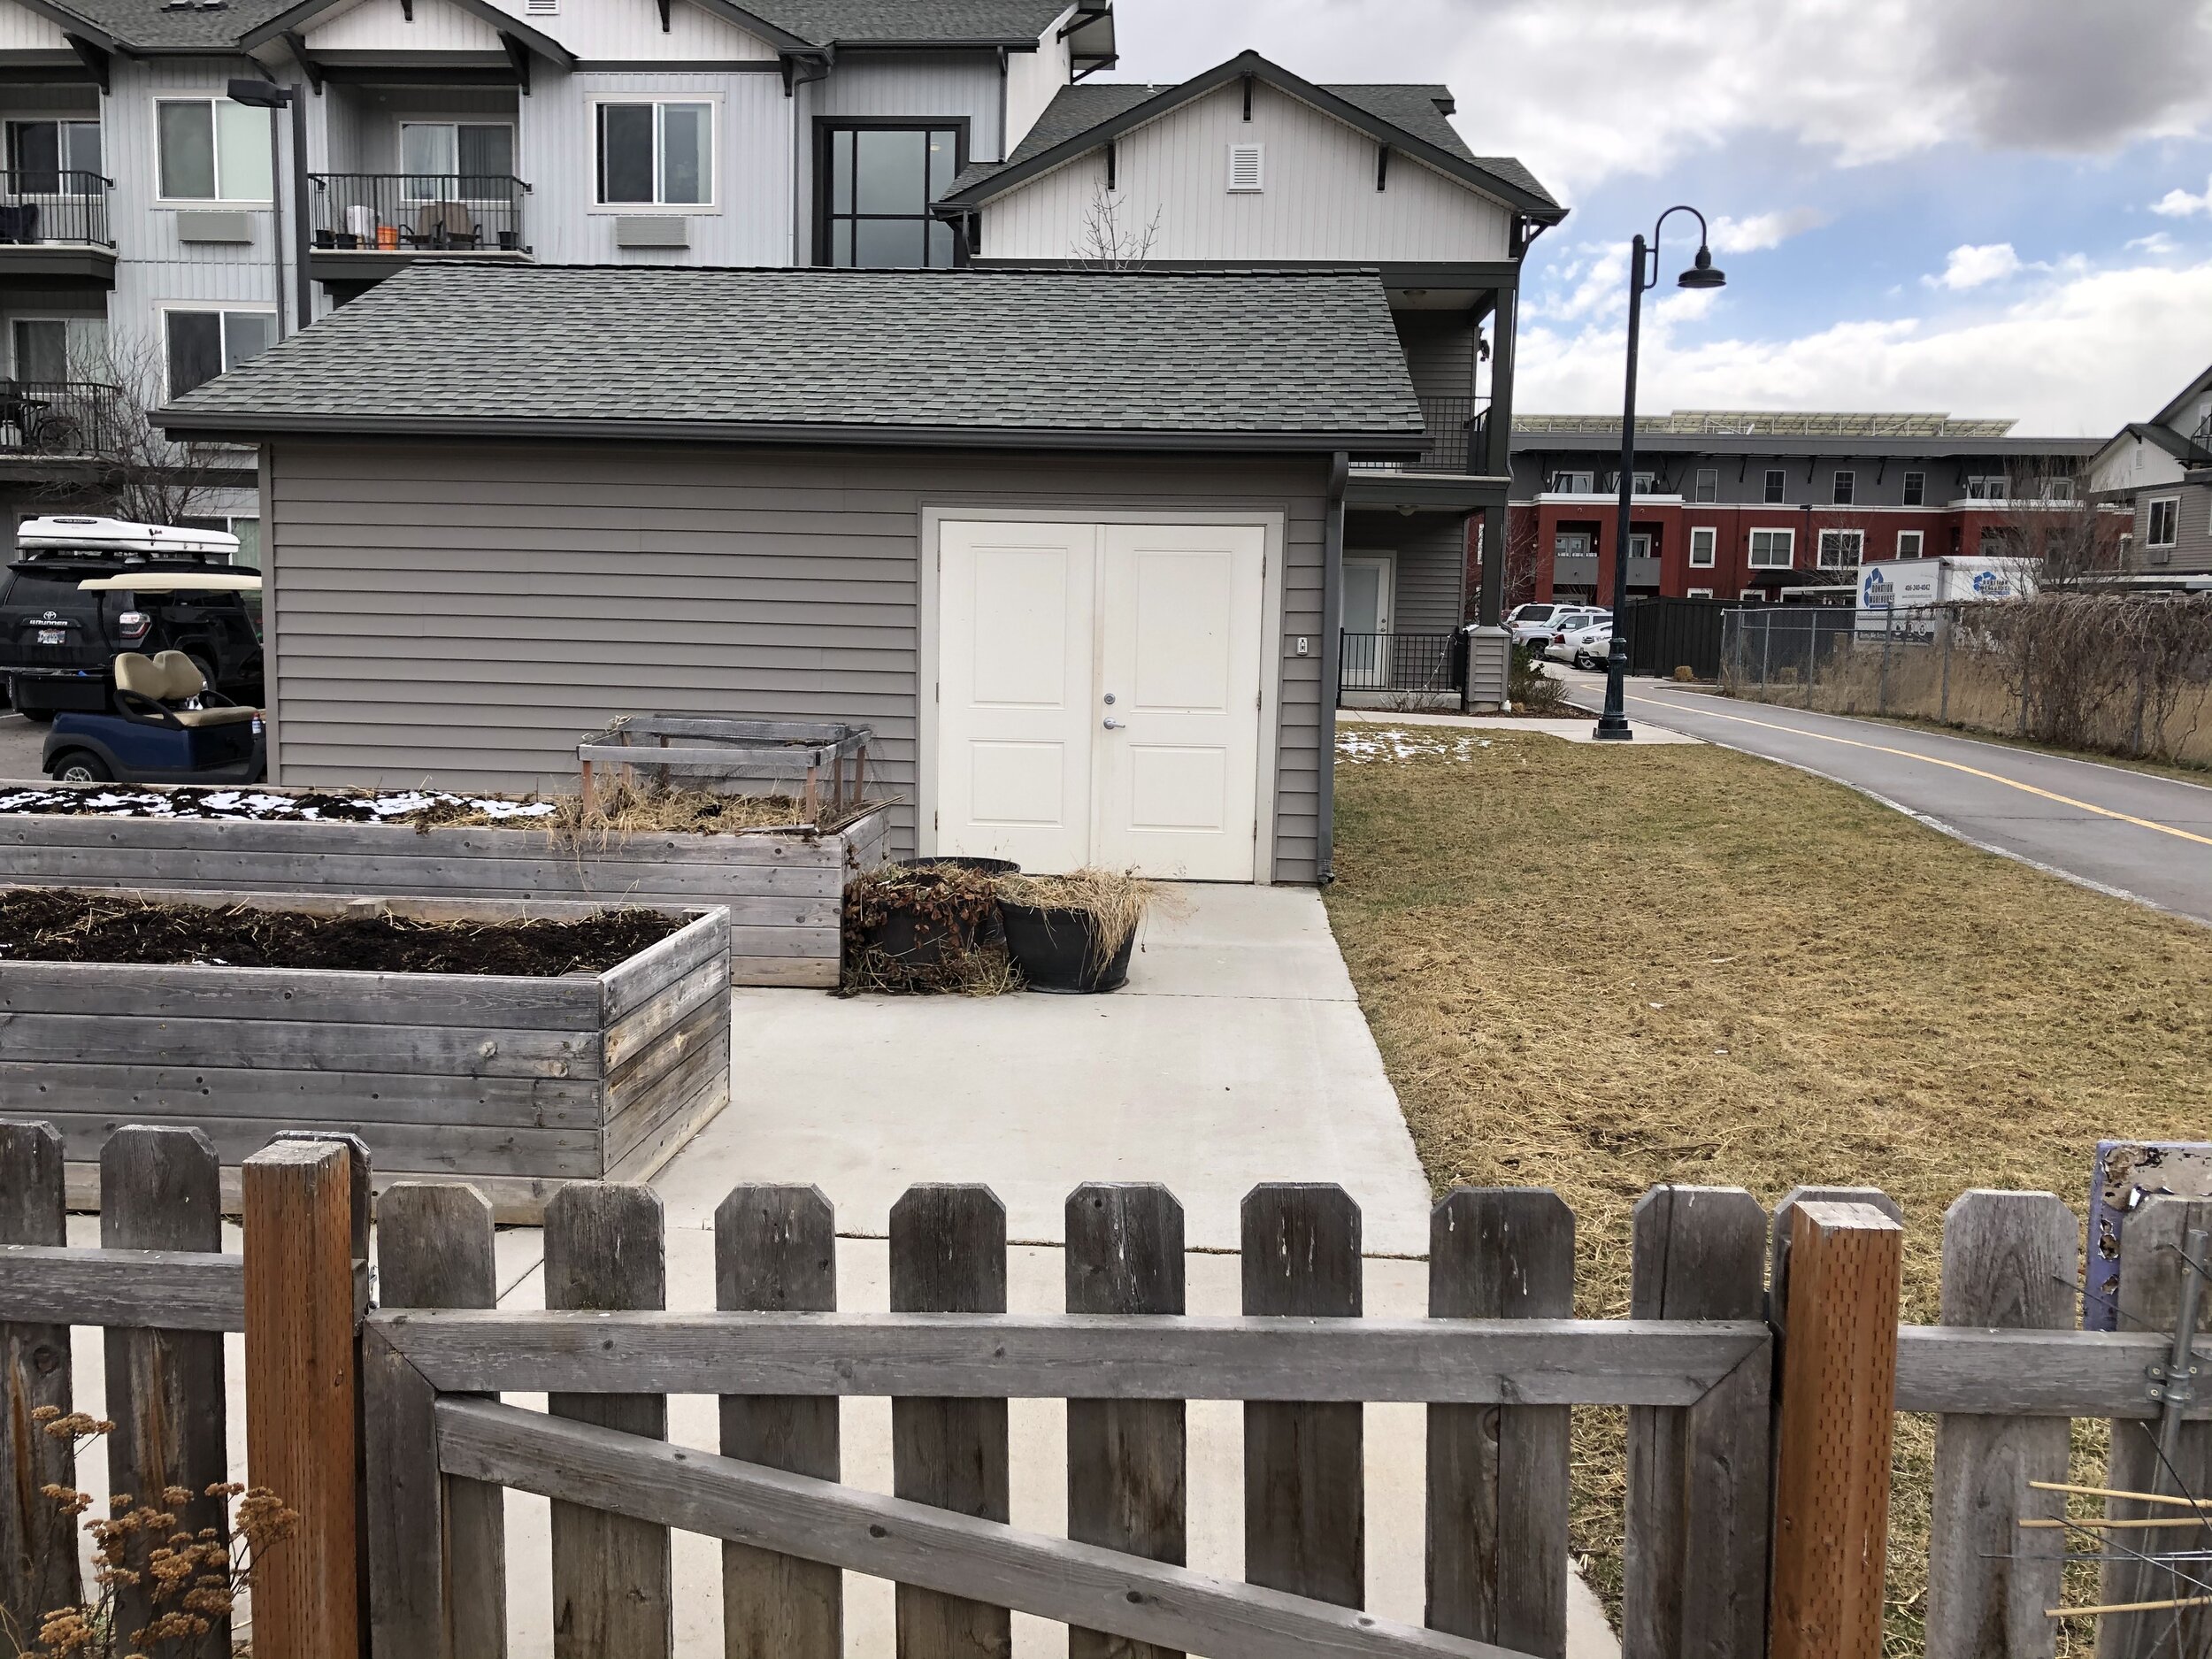
GARDEN SHED AND COMMUNAL TOOLS
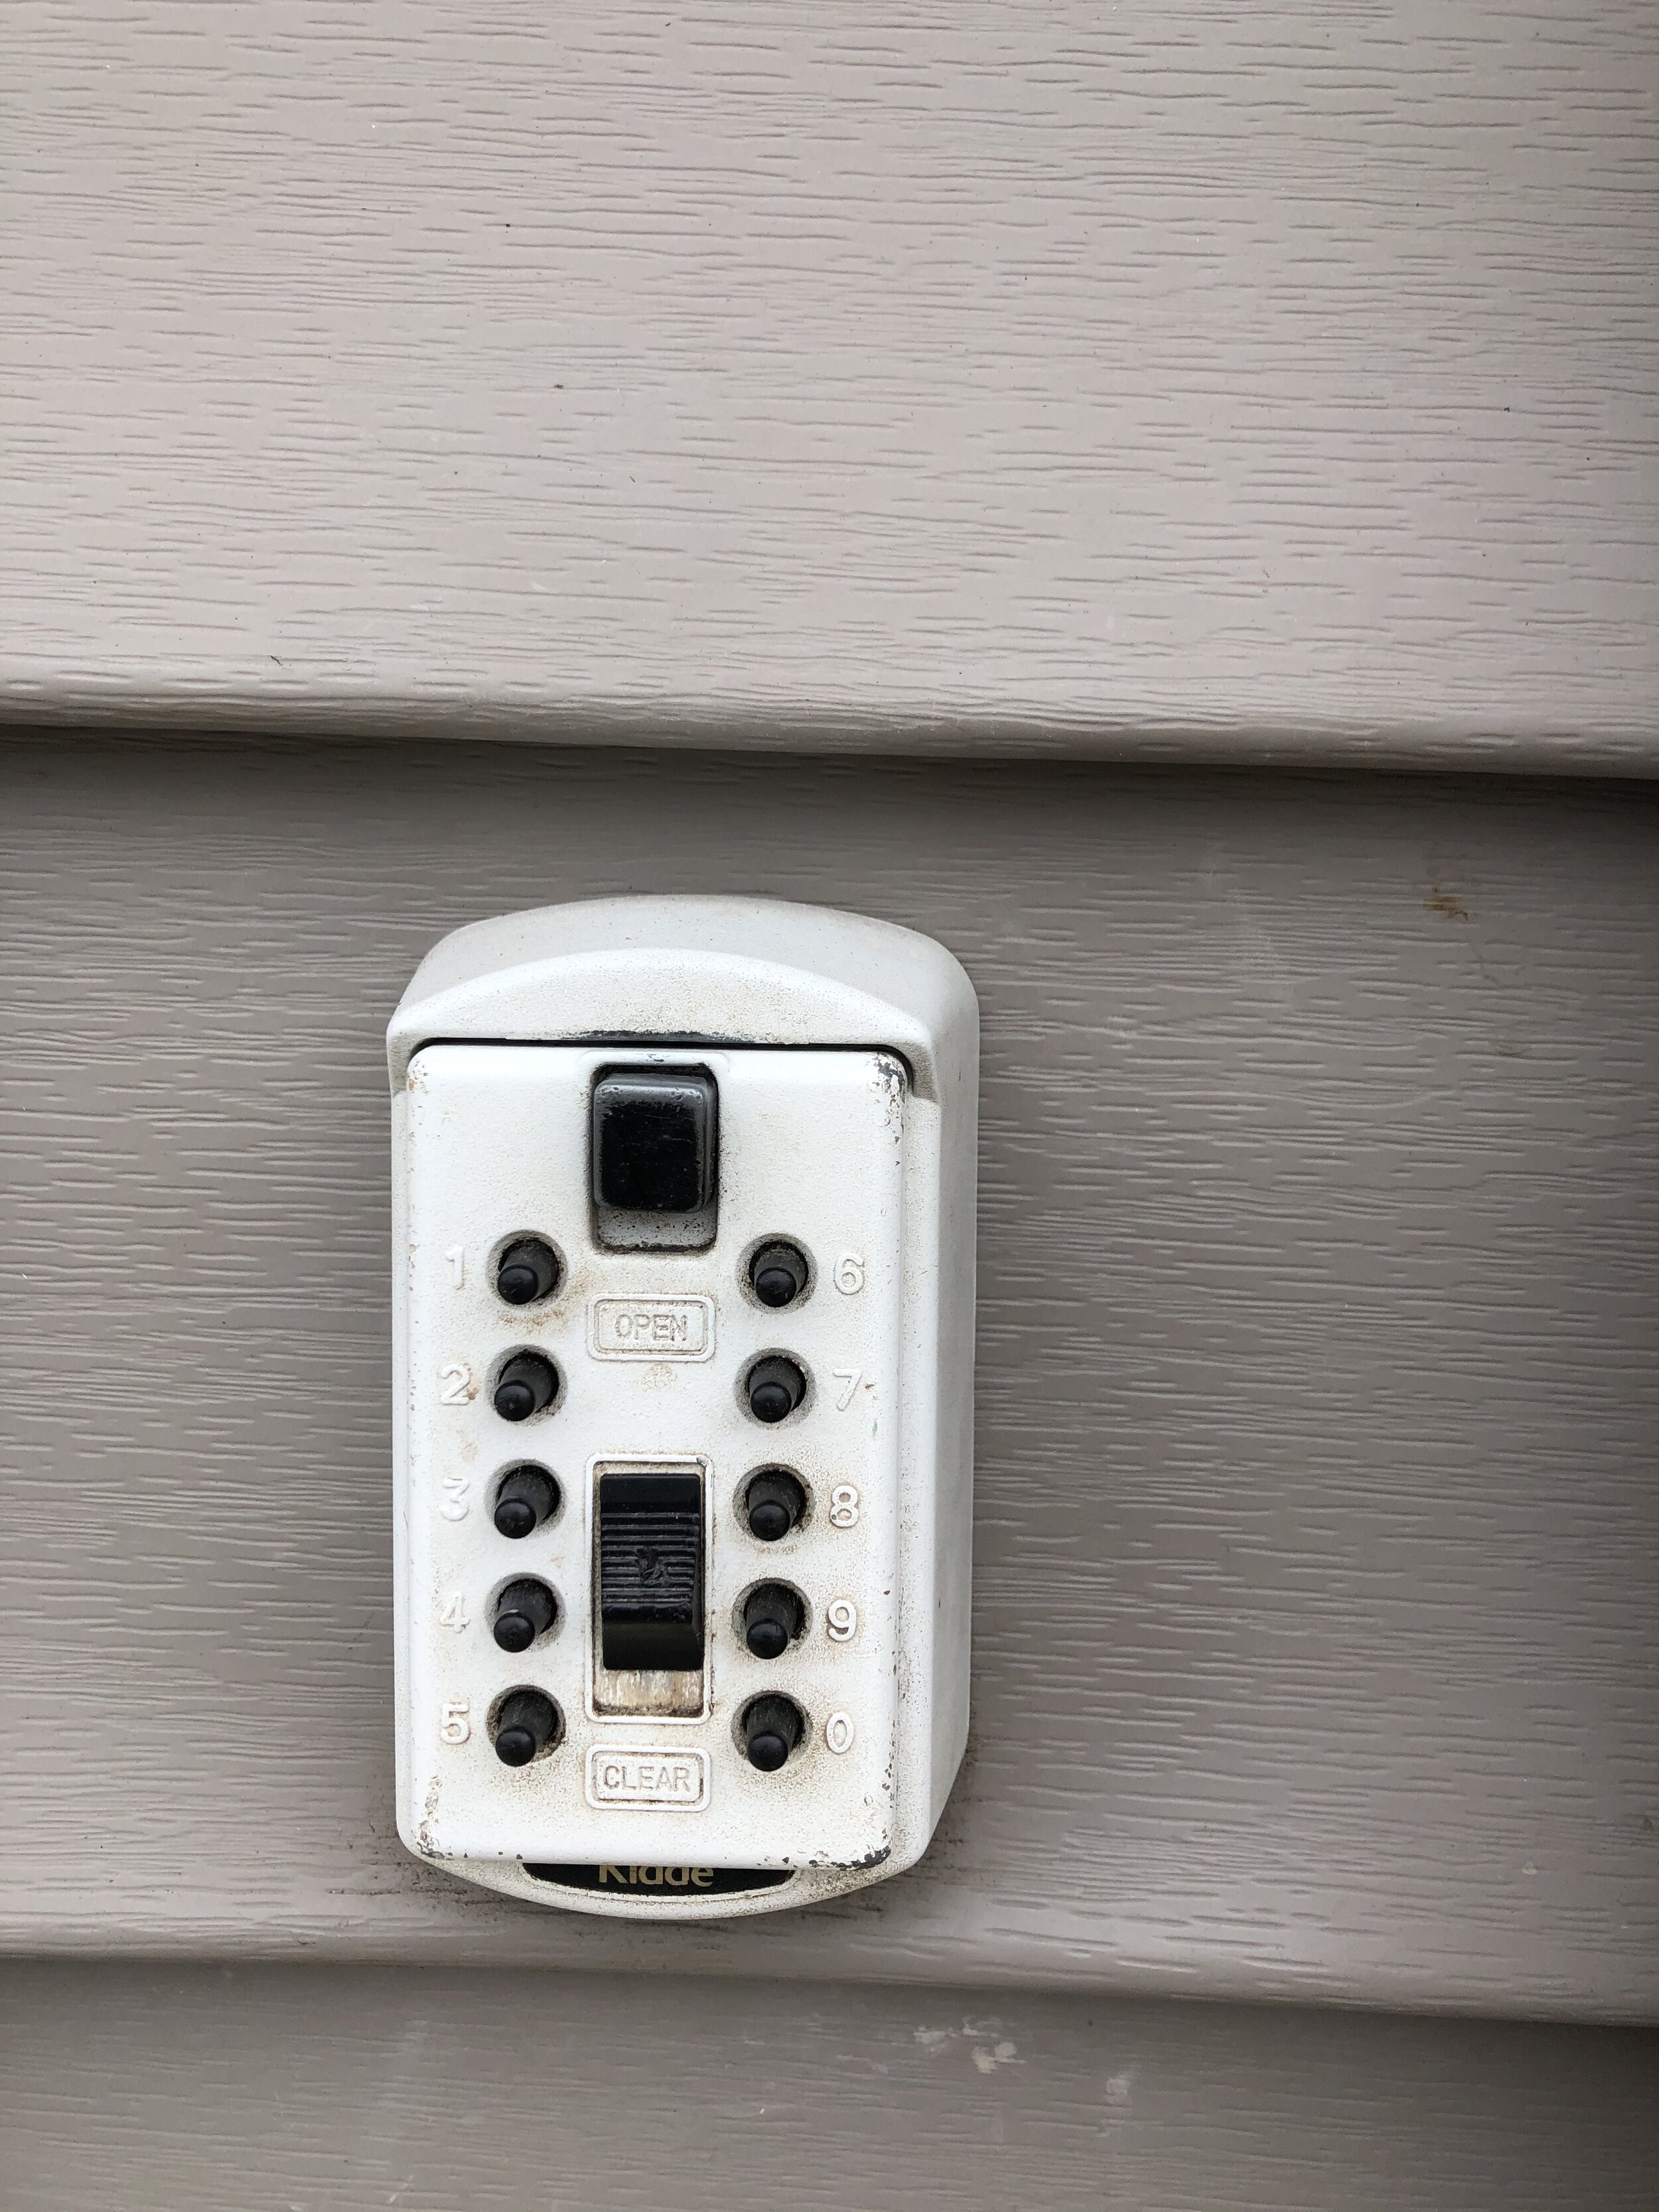
The garden shed is located in the maintenance shed directly south of the garden, near the two raised beds. The shed’s combination is in the orientation email you just received. Use the combination to open the lock box on the right side of the white double doors. Inside this lock box is a key to open the shed. Remember, after typing in the code, pull the “open” button down. If you make a mistake or it is not opening, pull the “clear” button down before retyping the combination. When done with the shed, lock it with the key and place the key back inside the lock box. To lock the lock box, type the combination in again, pull down on the “open” button while re-positioning the lid of the lock box back into place. Release the “open” button to lock the lock box.
Inside, the shed you’ll find communal garden tools, wheelbarrows, and hoses for your use at the garden. On the door of the shed is contact information for Garden City Harvest staff and your garden’s leadership committee (amazing fellow gardeners who volunteer their time to help you and Garden City Harvest staff). A first aid kit, important safety information, and other documents will be posted on the door or the right wall of the shed. On the shelves inside the shed, you’ll find resources on gardening, a recipe card box to log your three service hours, and free seeds.
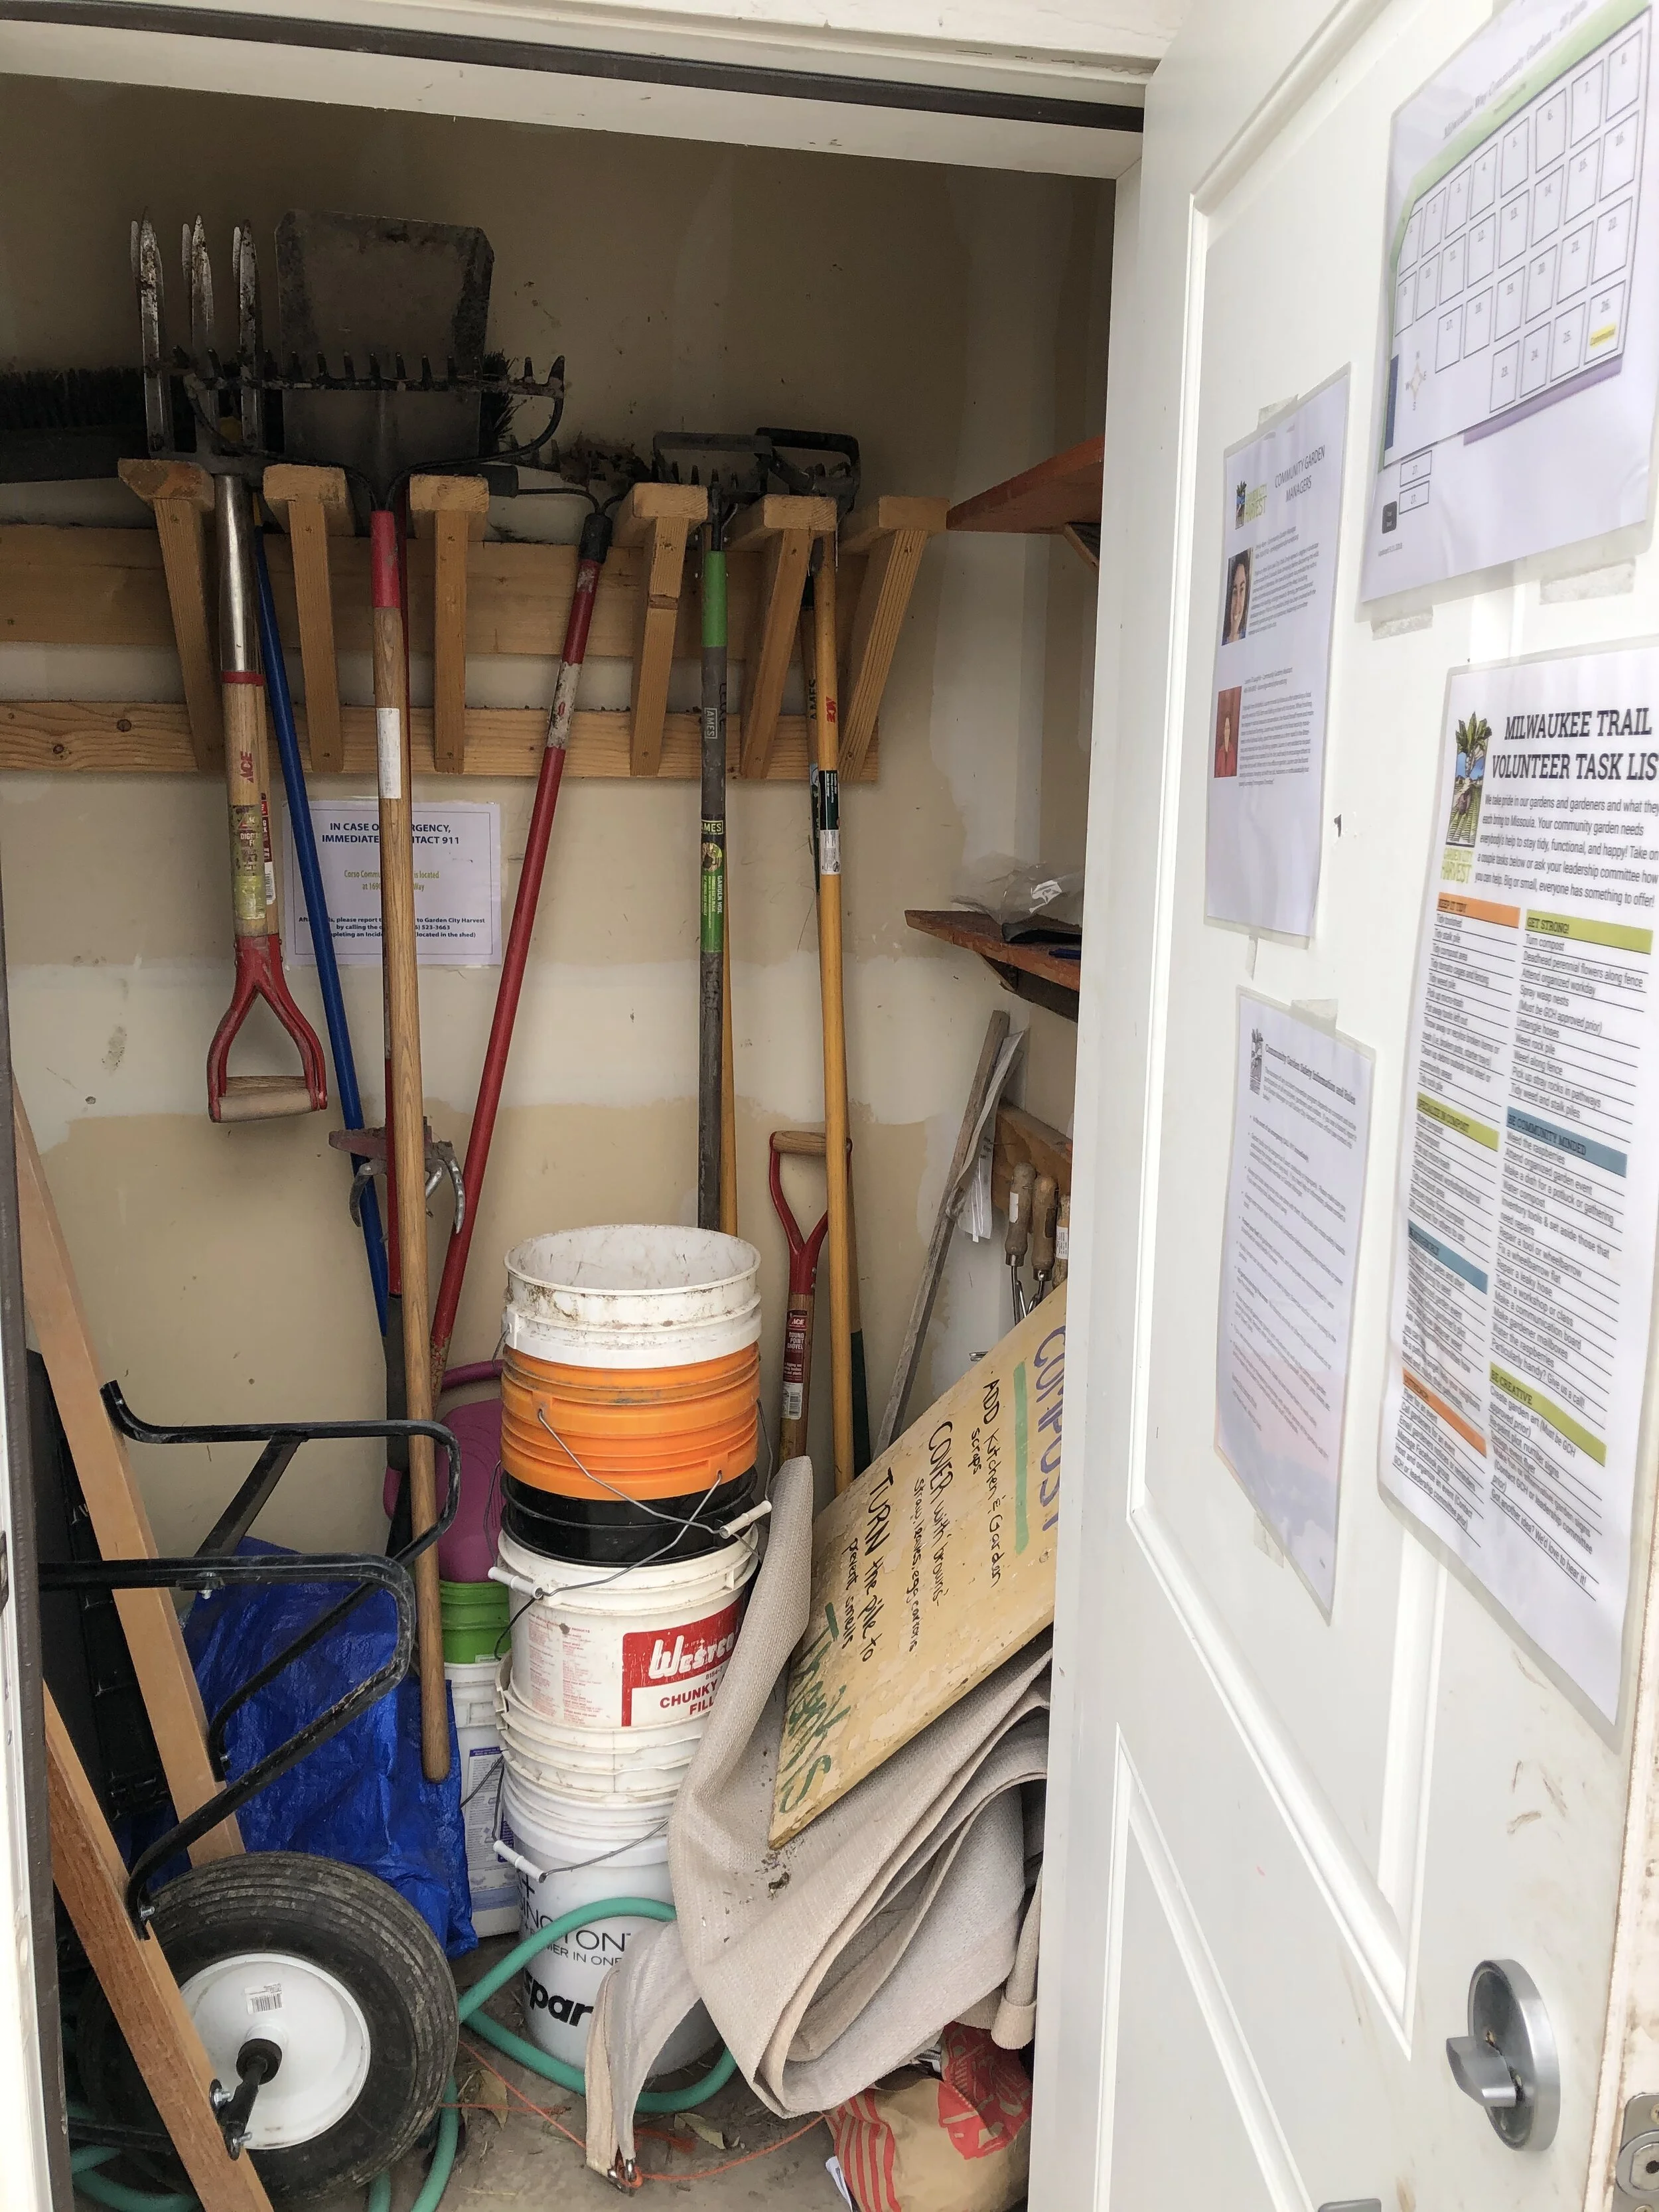
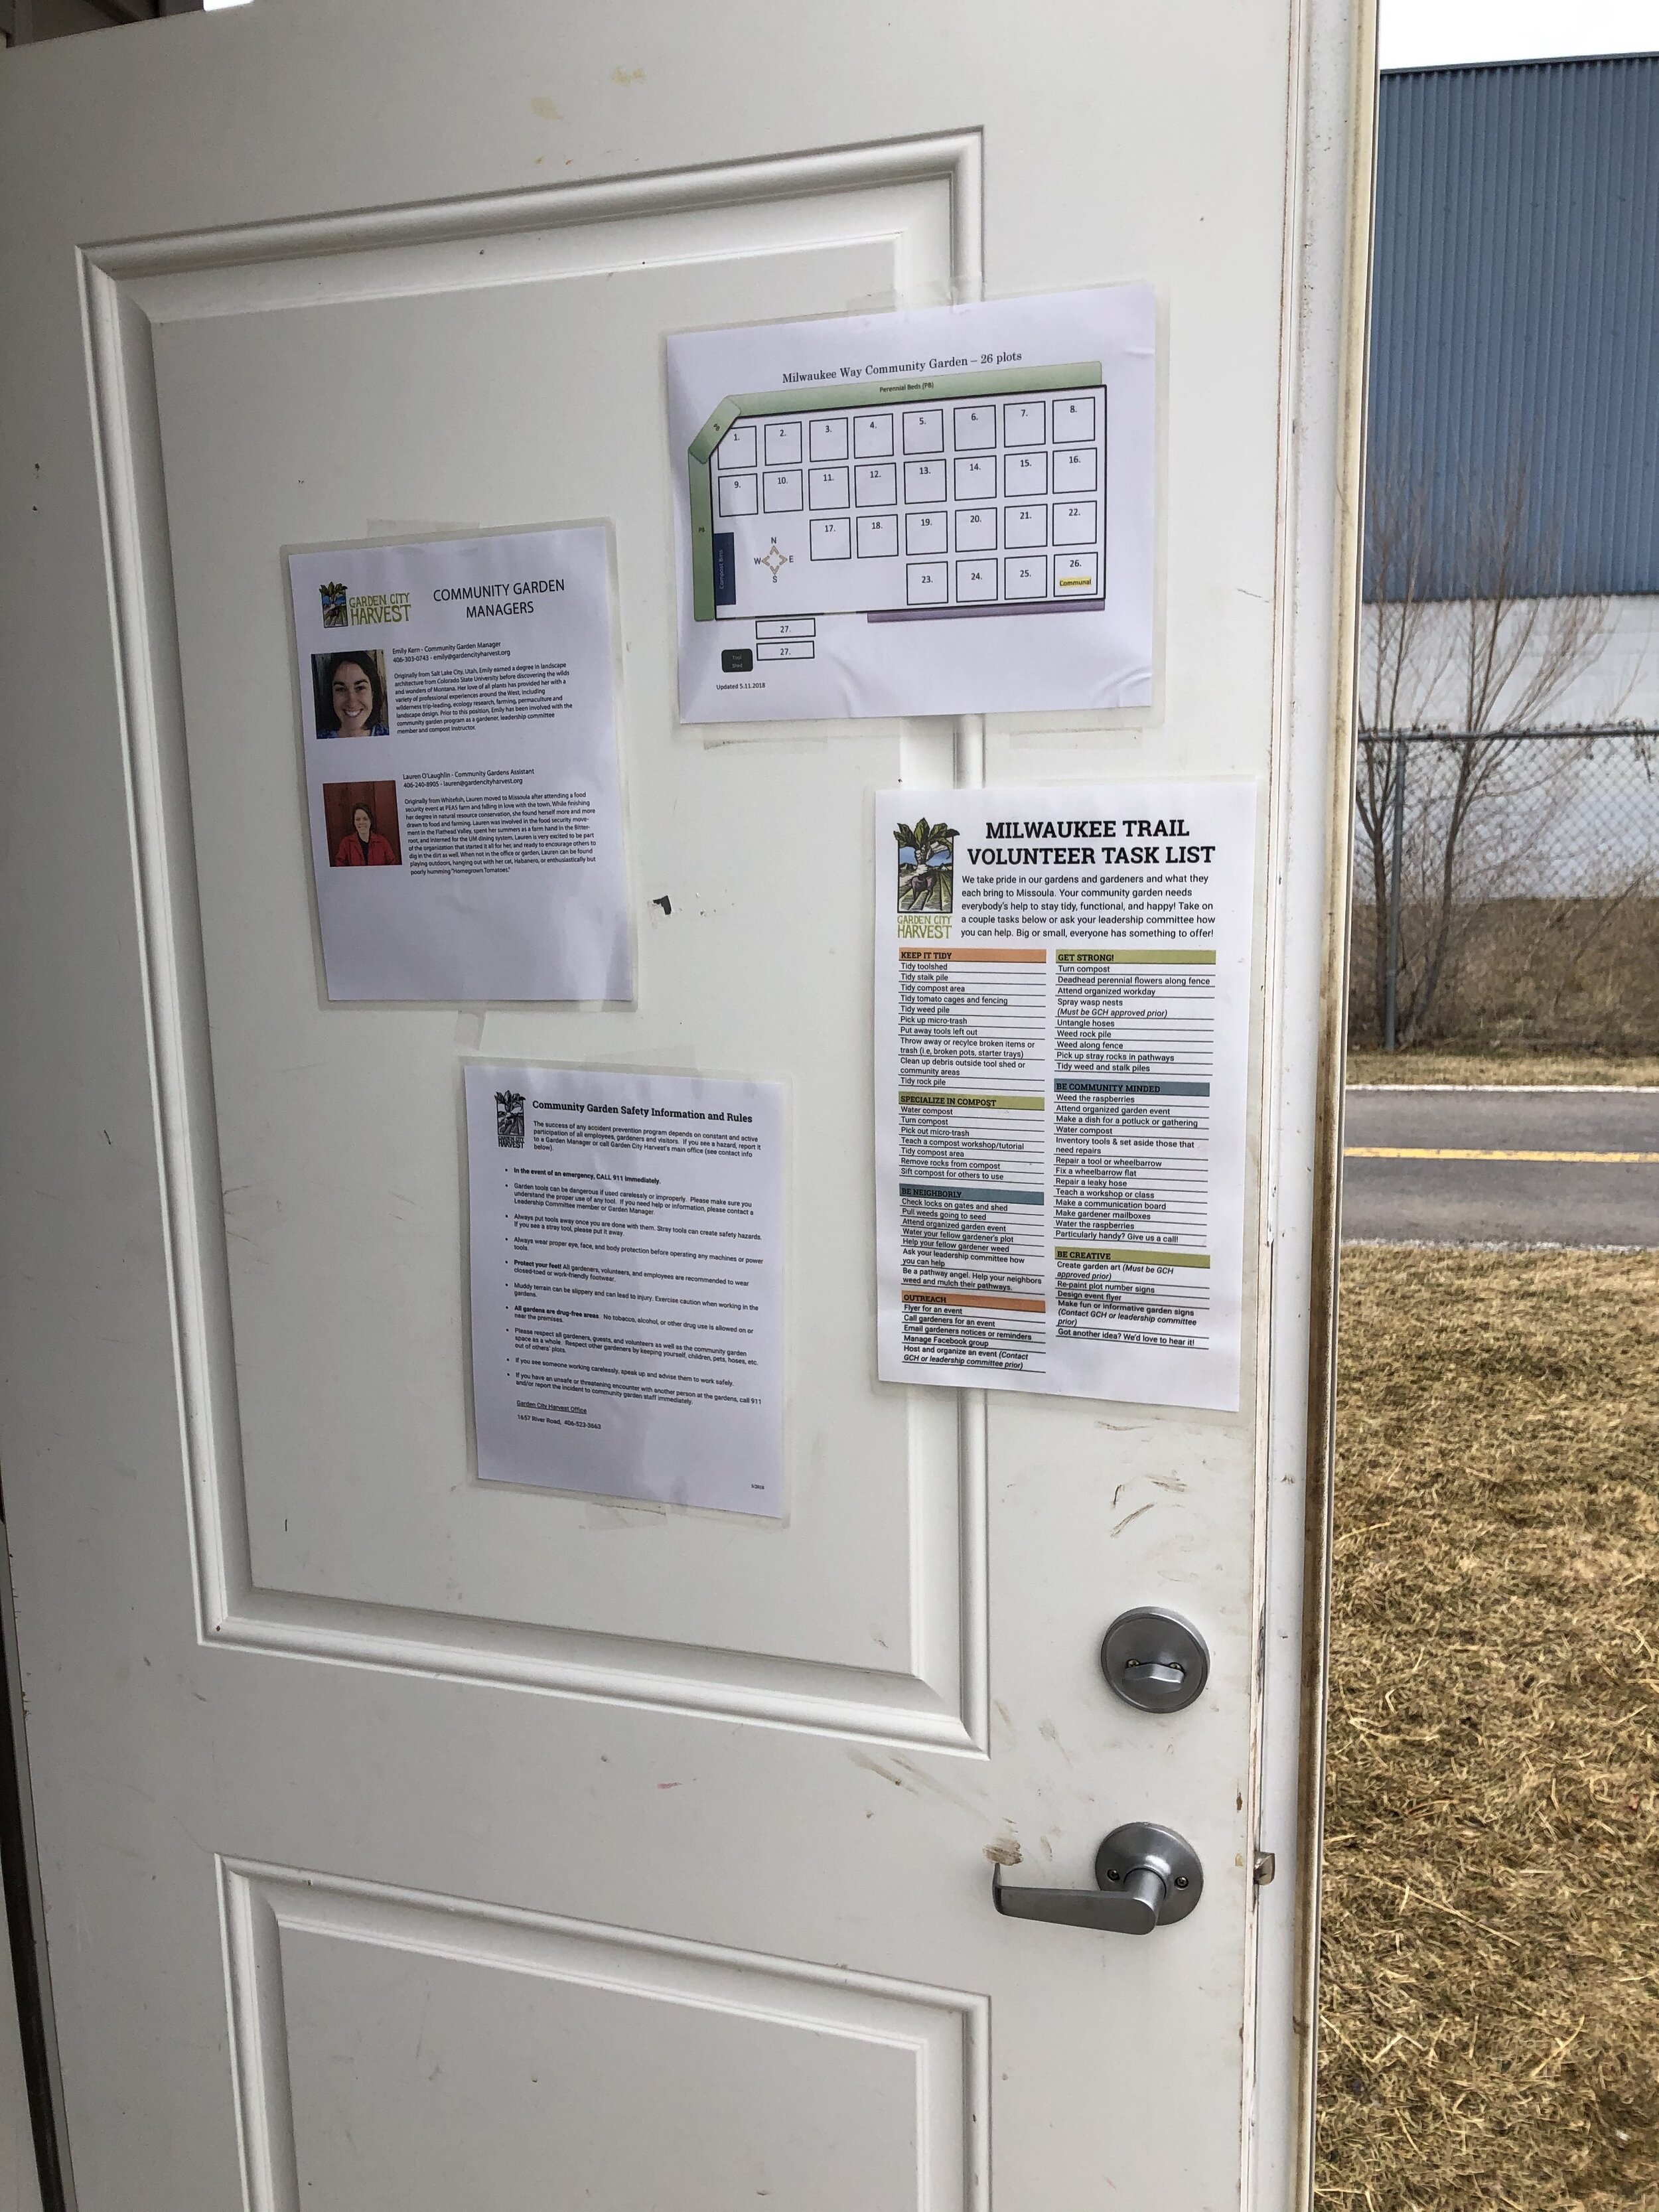

This photo on the right is the information kiosk where flyers about upcoming garden events or other important notices will be posted. Often, the leadership committee will write tasks that need done at the garden that can go towards your three service hours.
Remember, as mentioned in the contract, all gardeners are required to fill at least three hours helping to maintain the greater community garden and communal areas.
Make sure to read the “Communal Areas” section at the bottom of the blog for more ideas on how to fill these hours…
Next to the compost and kiosk, you’ll find tomato cages and trellising material for your use.
Soil amendments
Compost
Pictured below is the “house” compost system. This is for vegetable scraps from your garden and kitchen. DO NOT ADD WEEDS, FIBROUS PLANT STALKS, ANIMAL PRODUCTS, PAPER PRODUCTS, TRASH OR COMMERCIAL-GRADE COMPOSTABLE ITEMS. These items will not break down in our simple bin system.
All inputs start at the farthest left bin and are turned (moved with a digging fork or shovel) to the next bin as they break down to make room for fresh scraps! The decomposed compost in the farthest right bin is good to use in your garden - help yourself! Keep in mind, this compost system doesn’t break down on its own. It requires time, water, and attention. If the compost starts to smell, it either doesn't have enough carbon (straw) or it needs to be turned (which gives it oxygen and reduces the smell). During the hot summer months, the compost needs to be watered frequently (every day or every other day.)
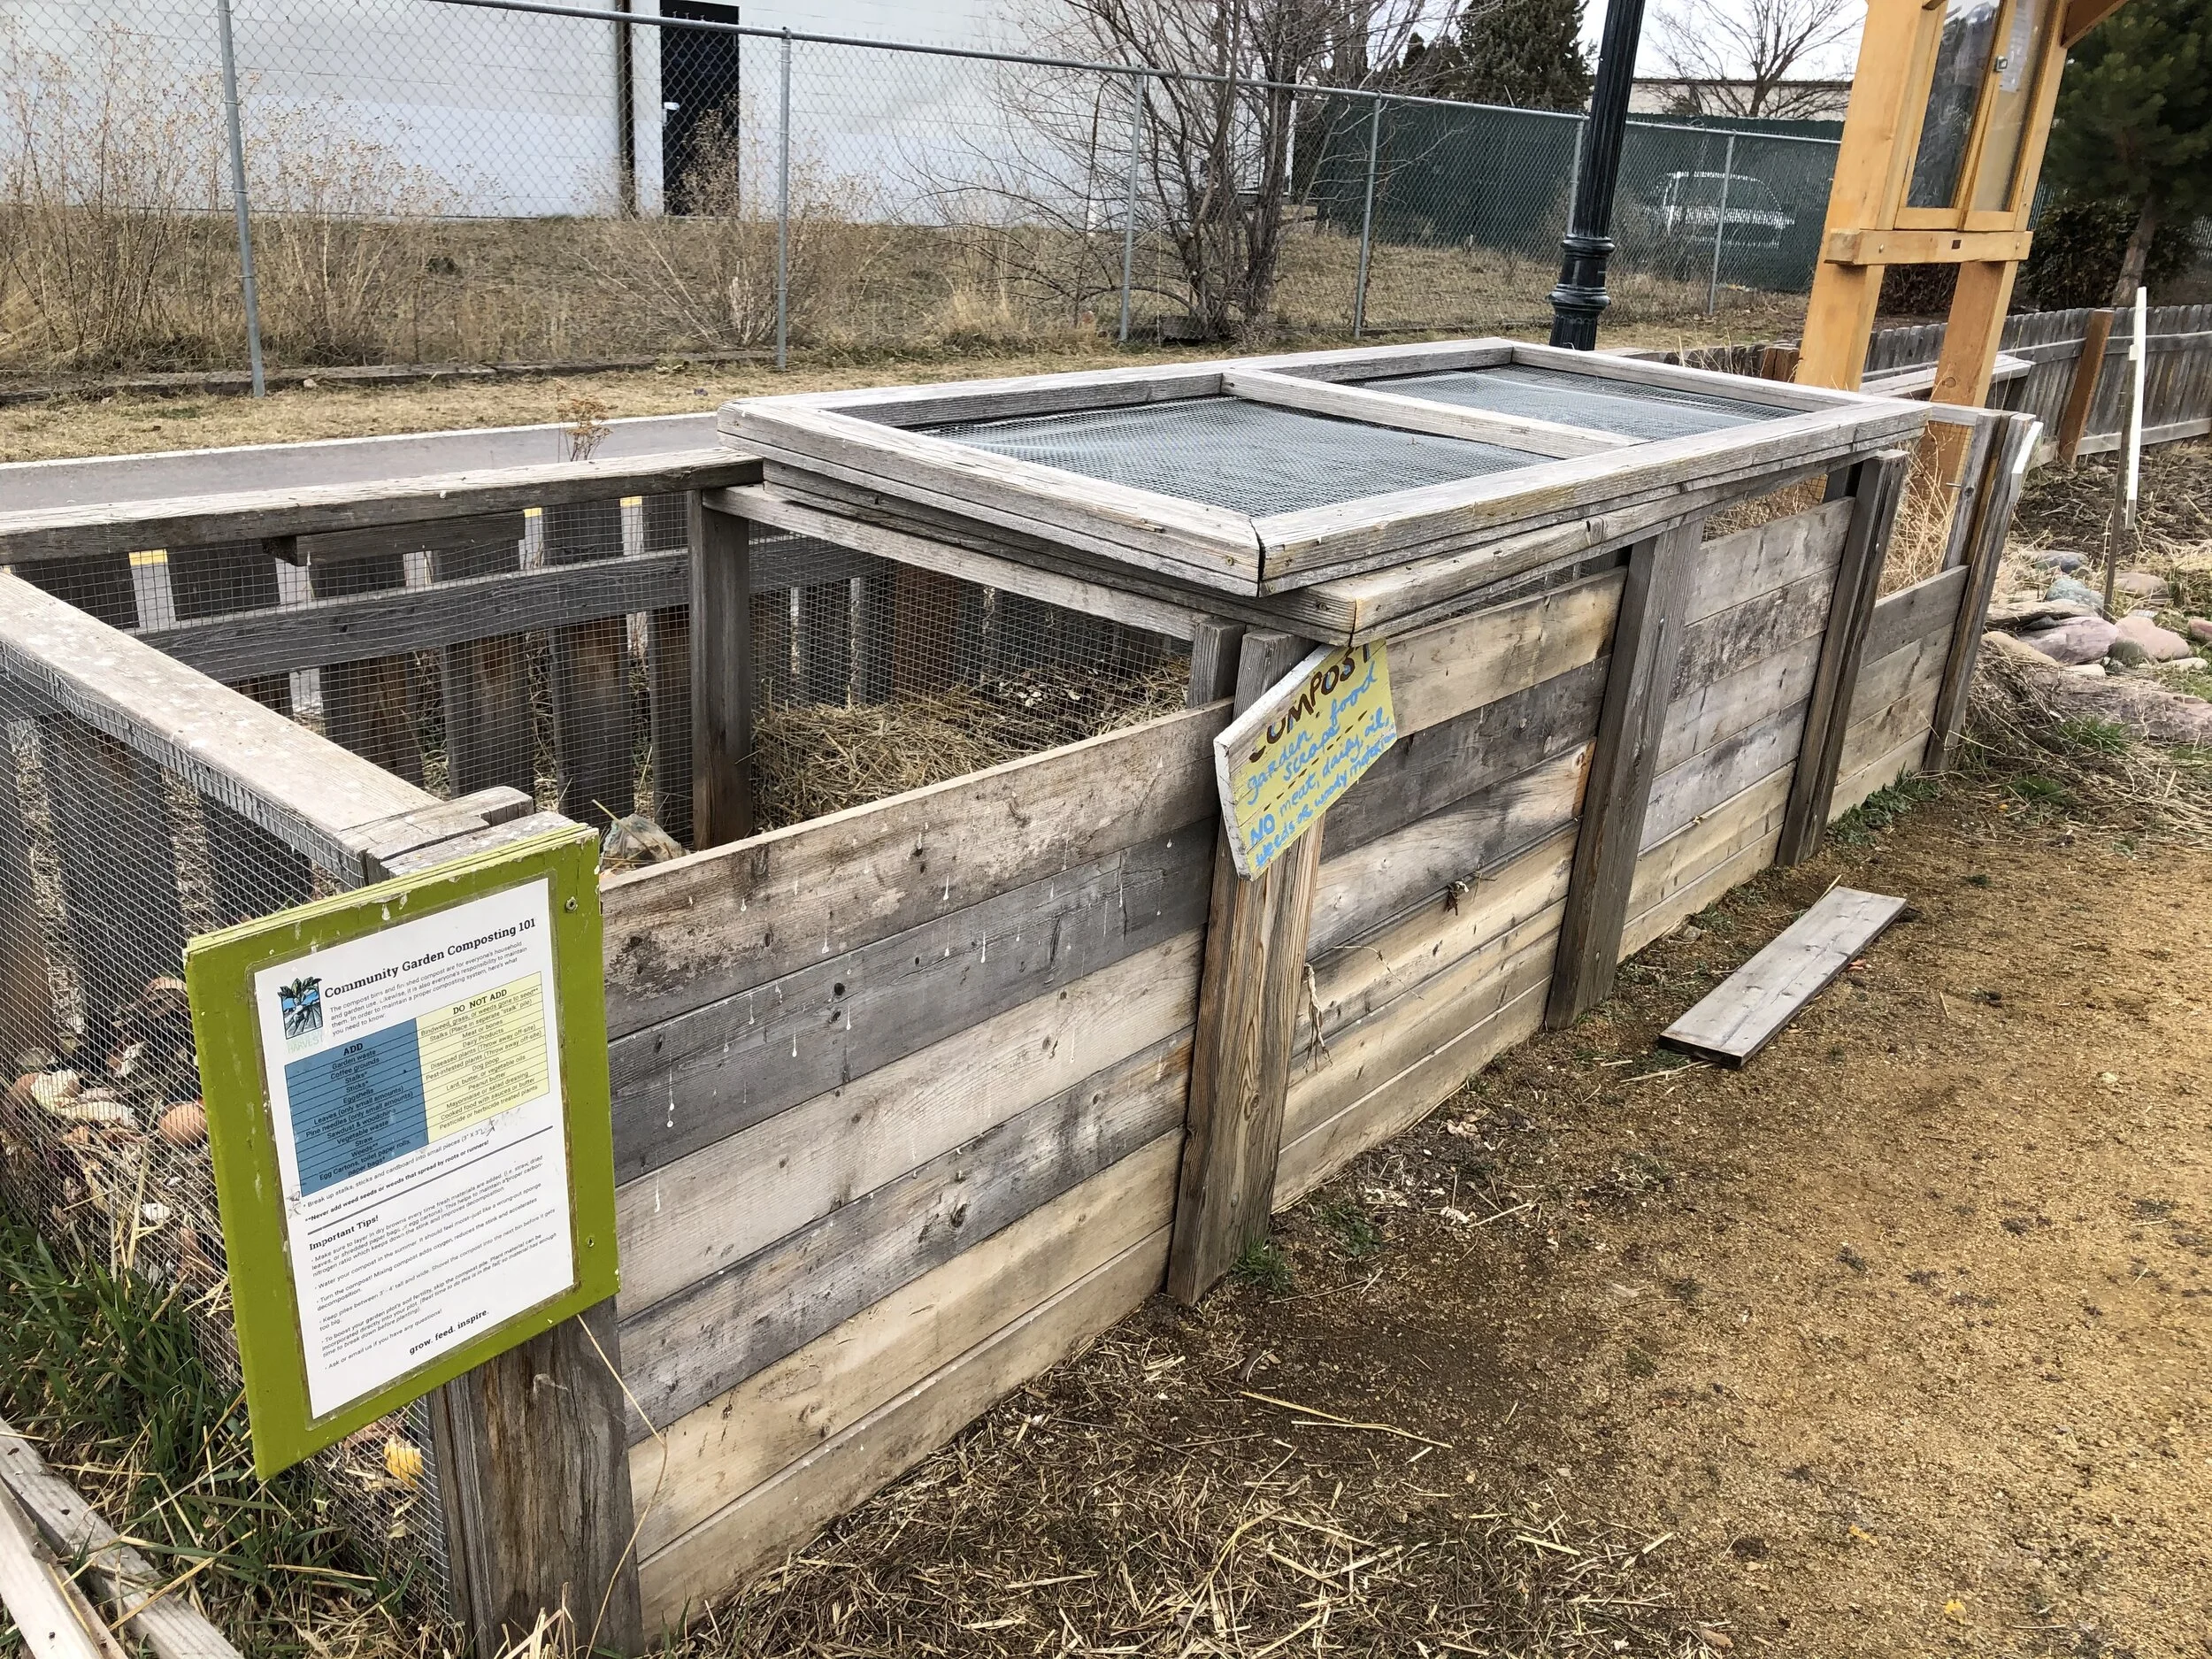
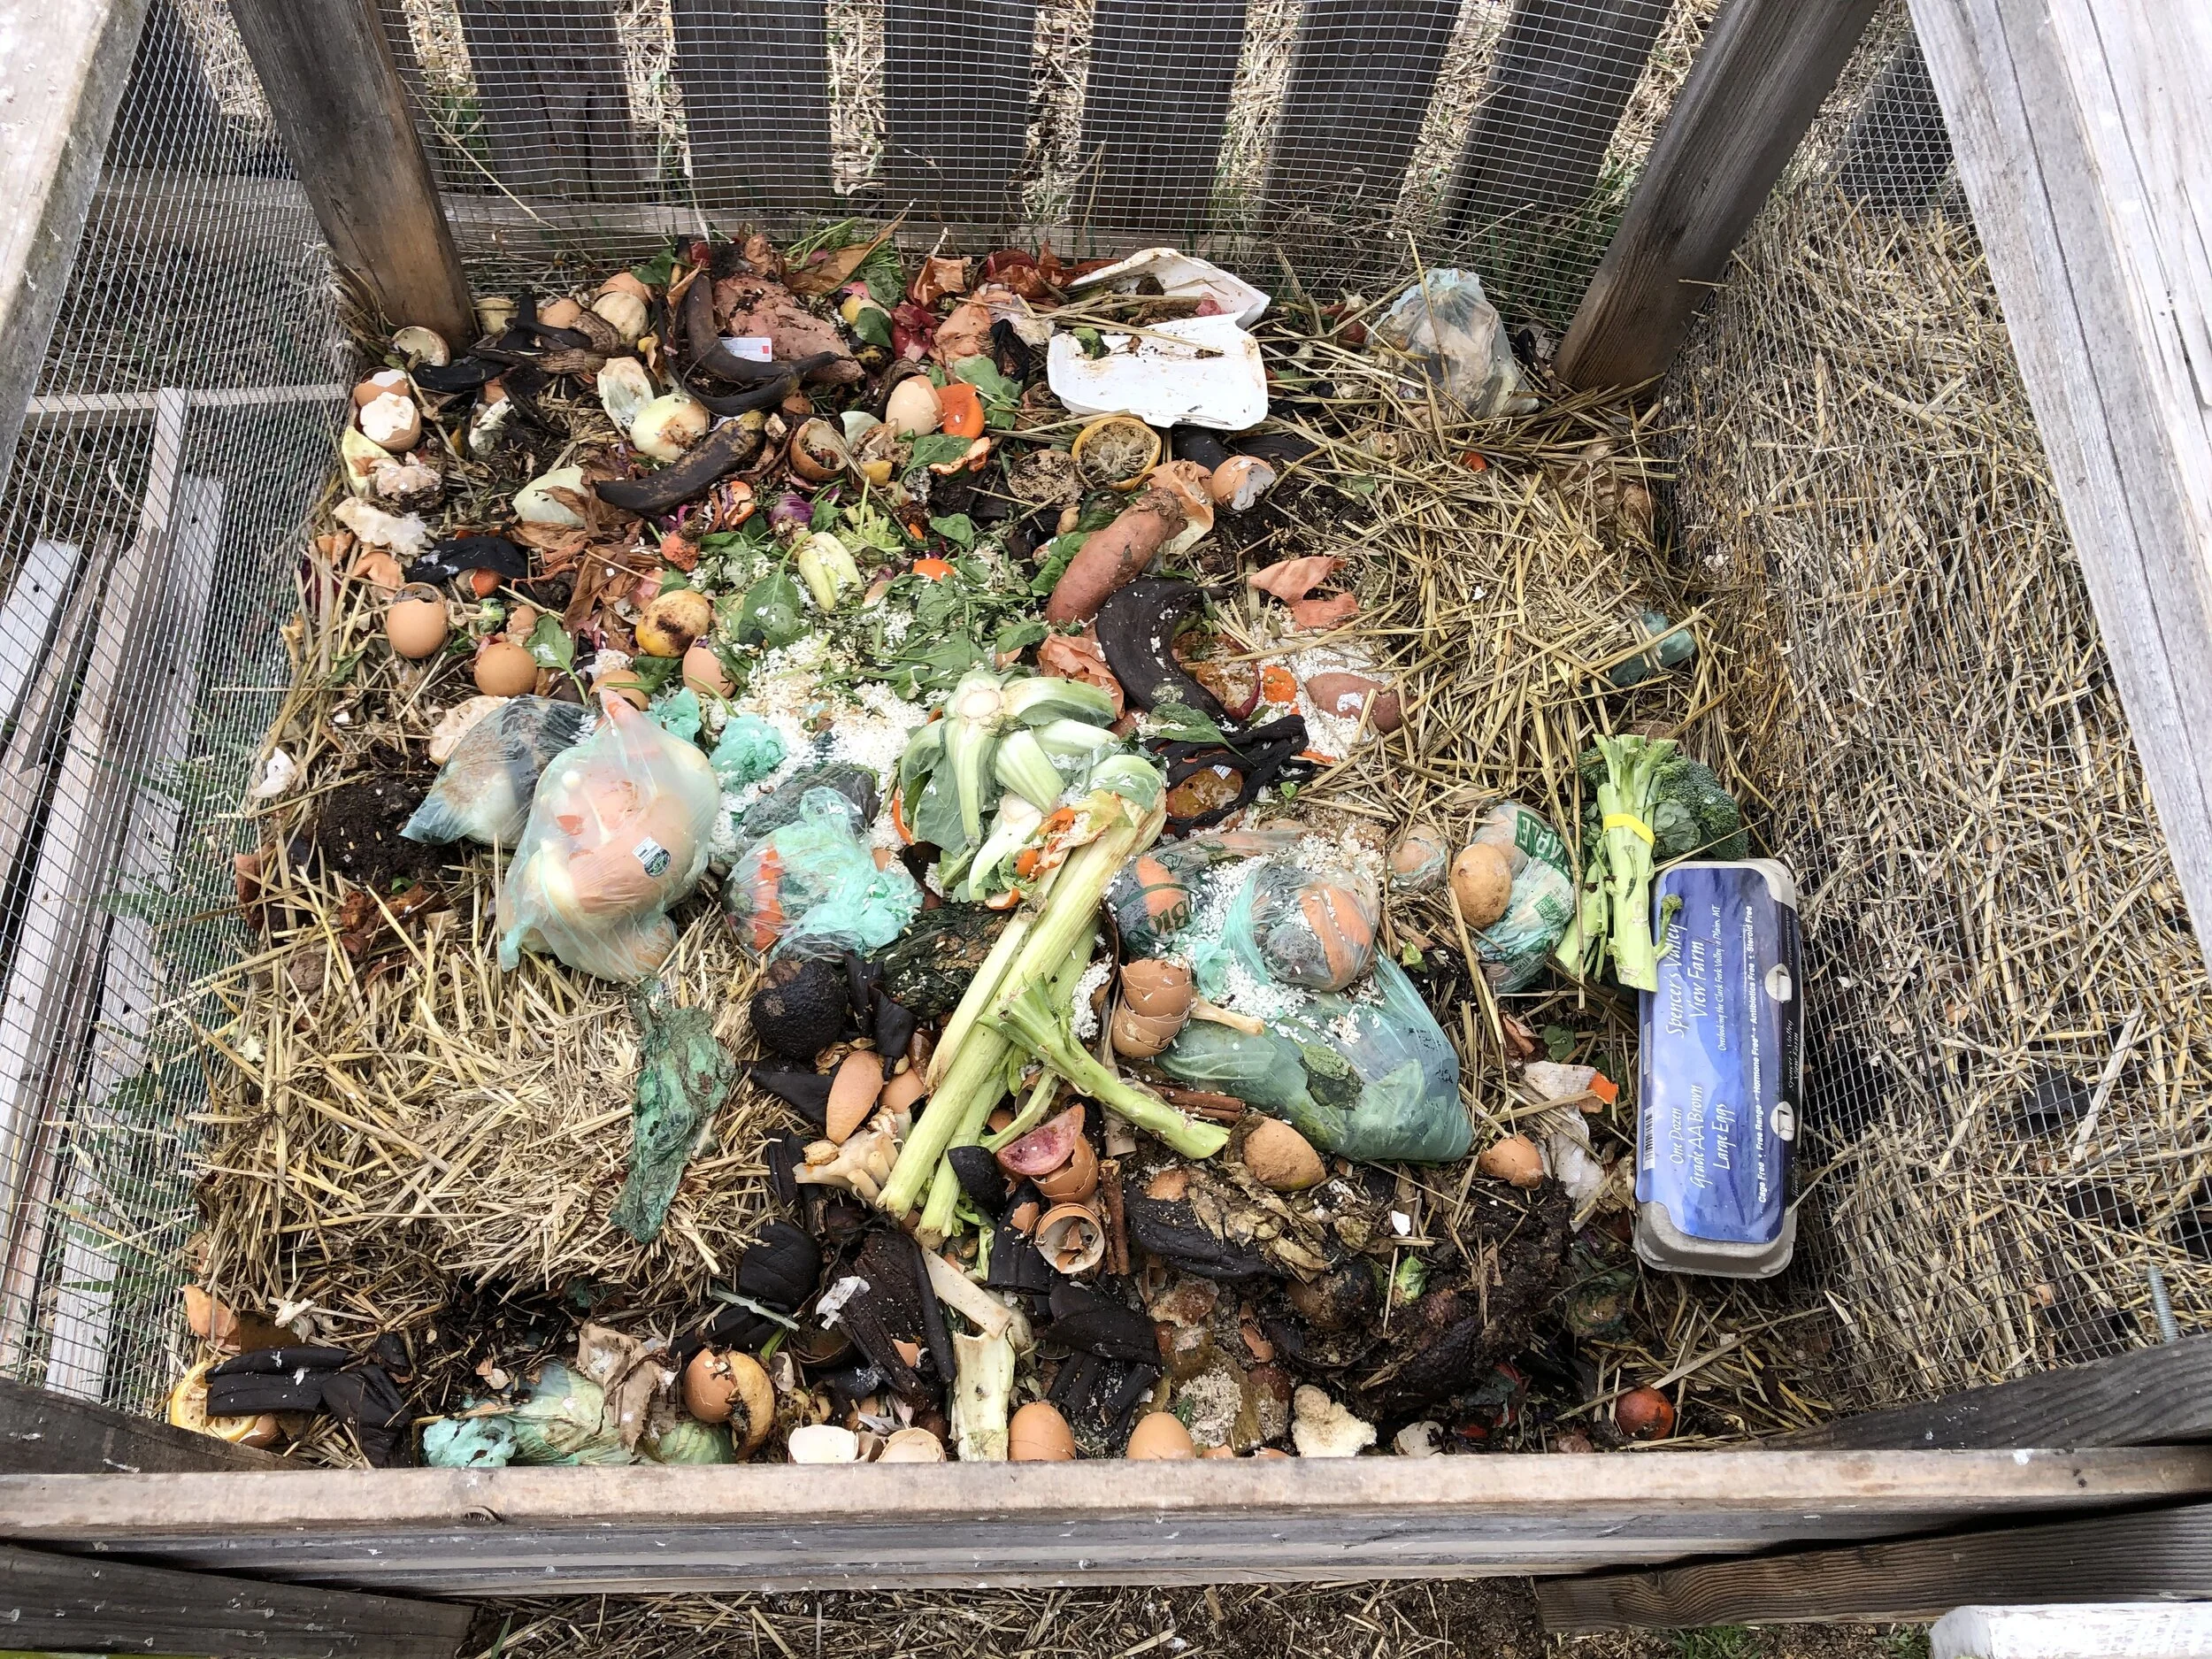
Do NOT add trash or “compostable” bags, silverware, or other commercial products. Egg cartons can only go in the compost if they are ripped into 1 inch pieces.
Manure
Garden City Harvest brings in composted manure every spring for community gardeners to help supplement their garden soil. Each garden plot is allotted two 5-gallon buckets of manure each spring. Gardeners are also encouraged to build their own soil by bringing in other amendments as long as it is not laden in chemicals. Check out our Sustainable Growing Guidelines for more information.
Straw
We recommend you use straw only for mulching garlic and overwintering crops. Leaves are also a great mulch for your overwintering soil. Straw can be found at Ace Hardware, Murdochs, CHS Mountain West Co-op, and local nurseries. Please place used straw that you rake off your plot next to the compost bins to be mixed in with the vegetable scraps.
WEED PILE
Weeds must be separated from other garden waste and placed in designated weed pile. DO NOT put weeds in the house compost system! Stalky plants (i.e. sunflower, corn stalks, kale or brussels sprout stalks that take a long time to decompose) also go in the designated weed pile.
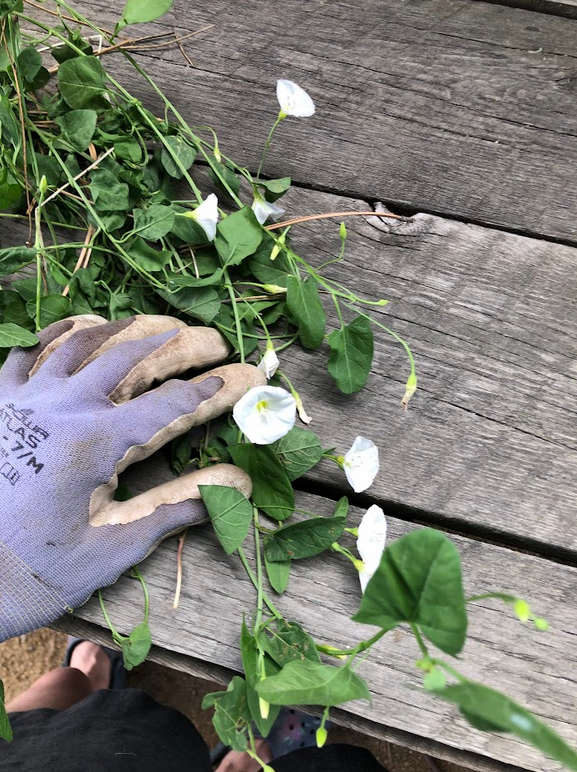
Bindweed and thistle (both shown at the bottom of this page) should be thrown in the trash rather than in the weed pile. You can put them in the dumpster on the corner of the parking lot just outside the garden, visible in the photo below. These weeds are pernicious and removing them from the site will help you and other gardeners for years to come.
Please take the time to separate your house-compostable garden materials from the weeds and stalks, and absolutely no dumping of personal home yard or garden waste is allowed. Do not add straw, soil, potted plants, plastic, leaves or any other yard waste to the weed pile. The weed pile is manually removed by Garden City Harvest staff throughout the season and taken to the City compost facility, and these items make it extremely difficult to move. Garden City Compost may also reject the entire pile.
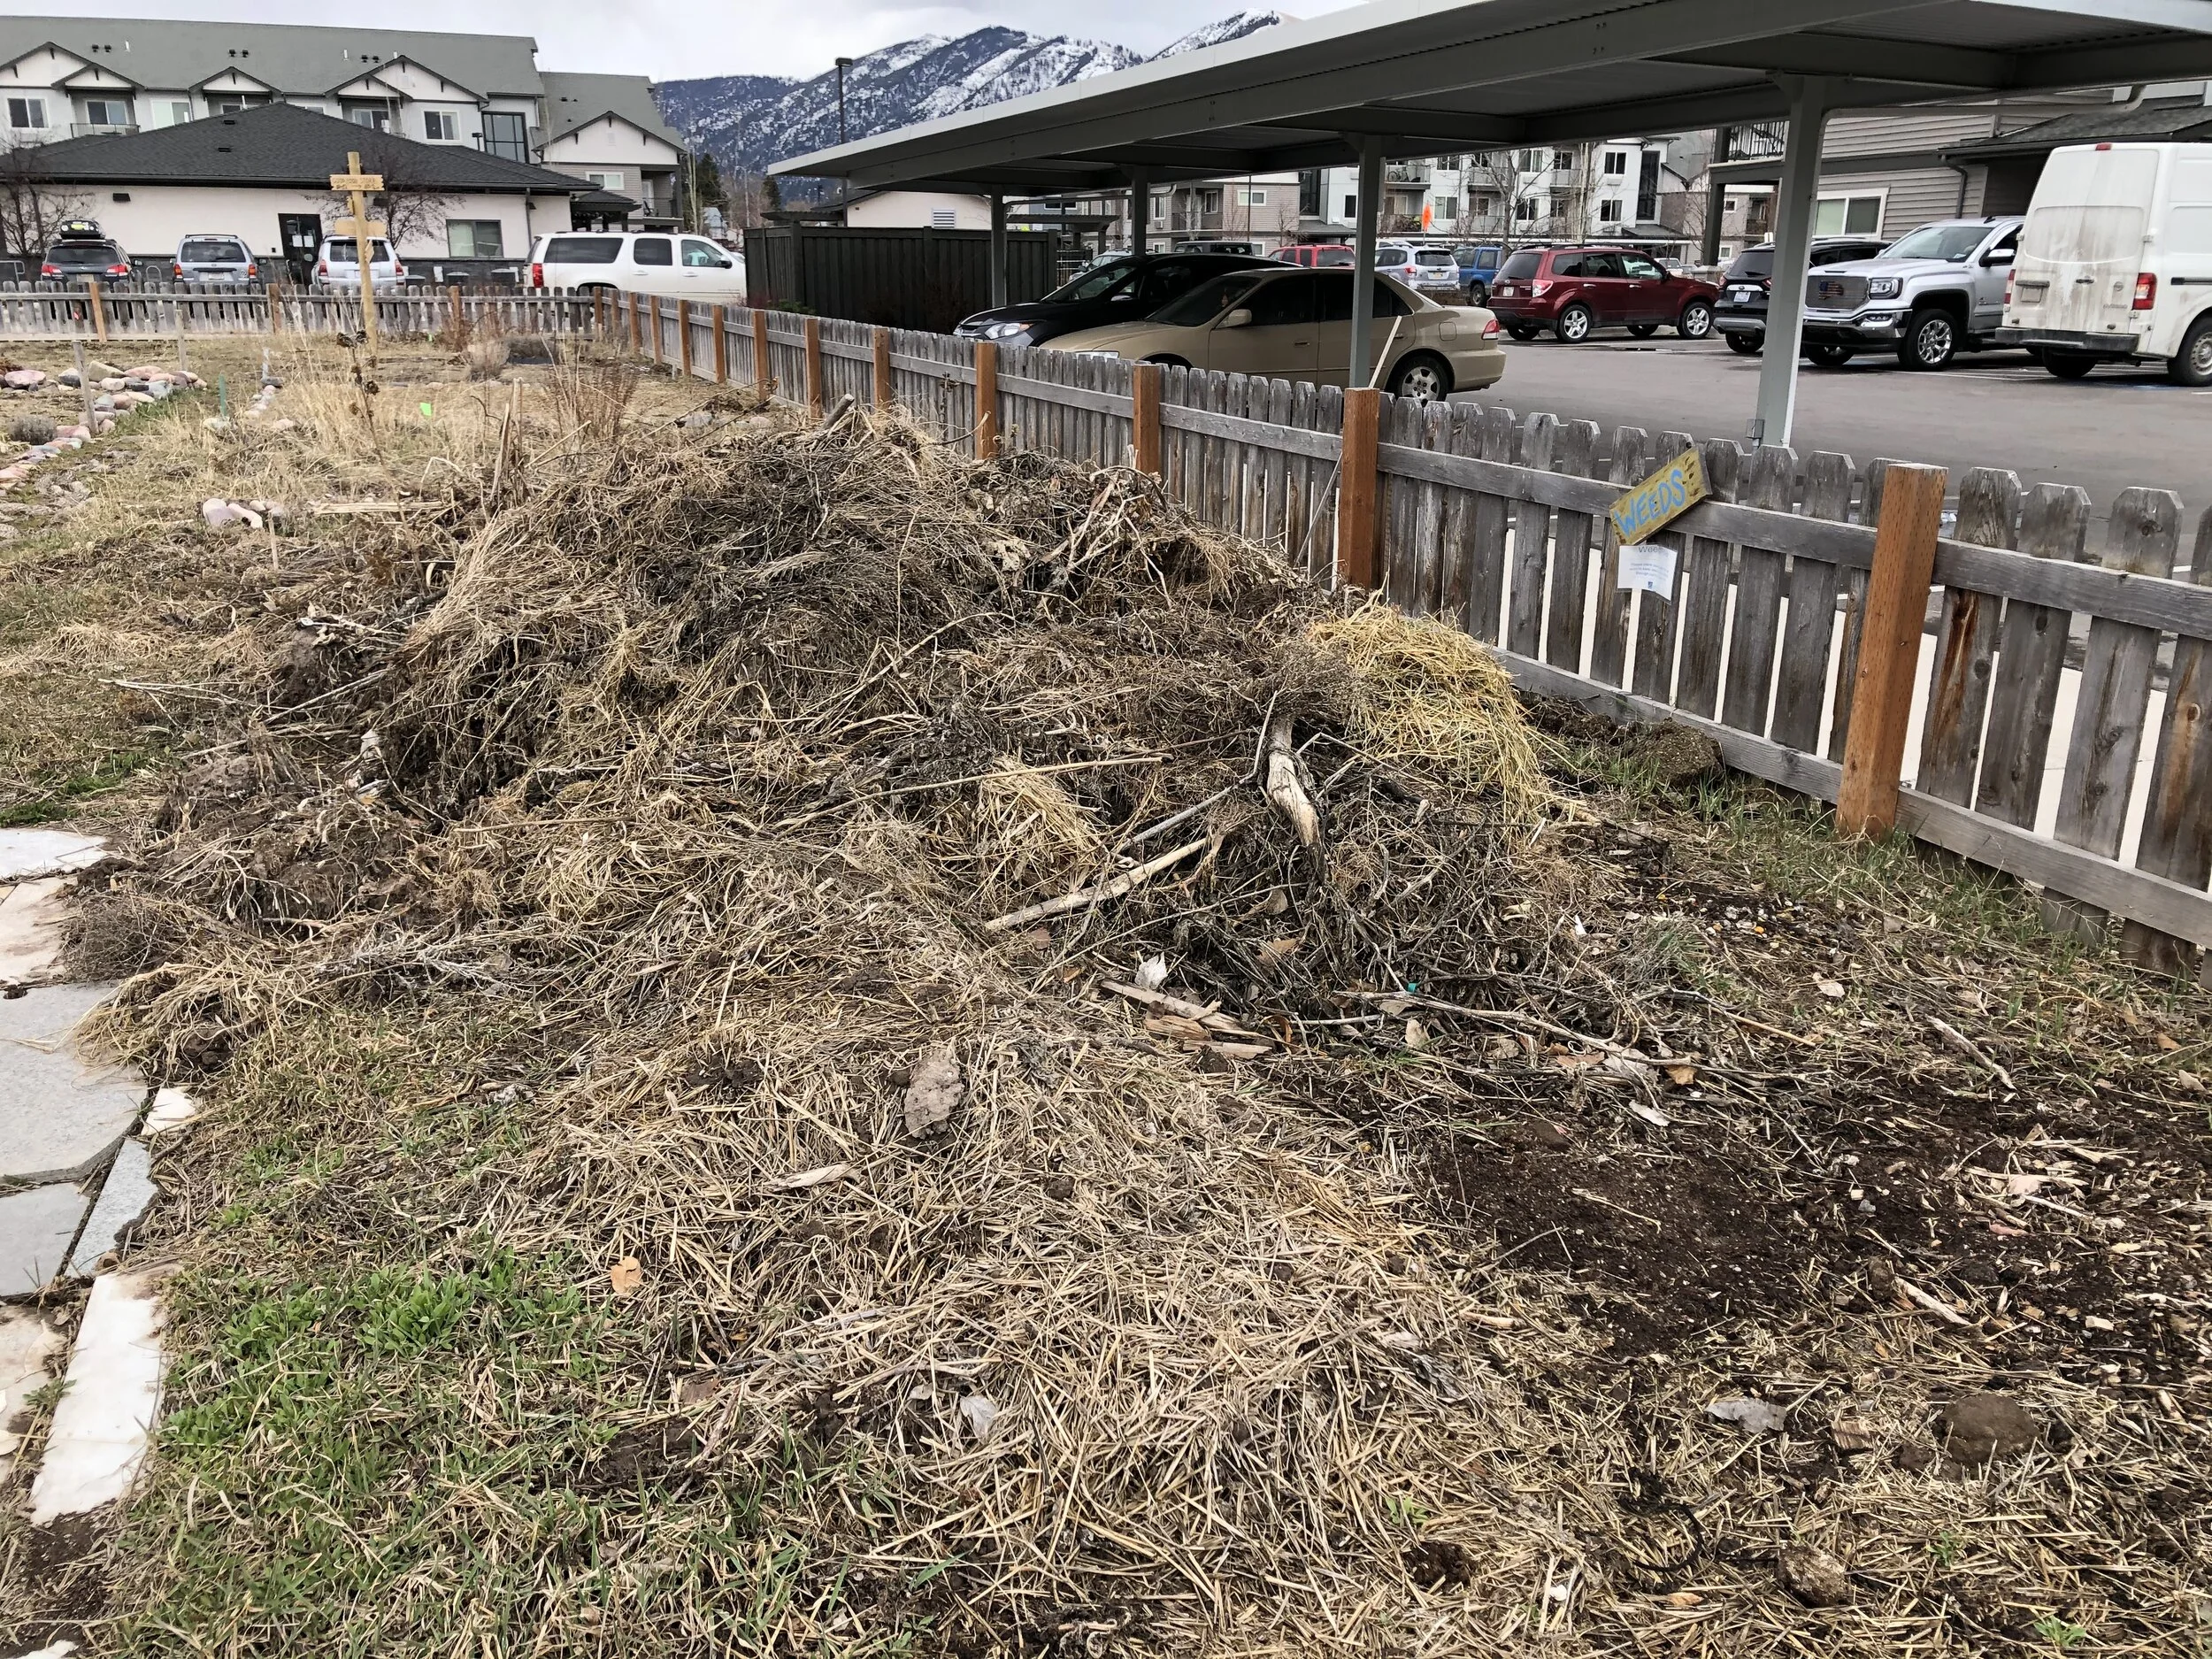
Milwaukee Trail’s weed pile. Along this fence line, will be the composted manure and straw bales.
COMMUNAL AREAS
Here is Milwaukee Trail Garden’s Community Plot. Help water and weed it and share in the harvest!
There are several other communal areas and resources in the garden that need your help. Many of these will benefit you and your garden. Additionally, Milwaukee Trail Garden is located on land owned by Corso Apartments and abuts the City owned bike trail, so it is important to be respectful tenants and neighbors. Here’s a list of things that all community gardeners are collectively responsible for, so please do your part and chip in those three hours (or more)!
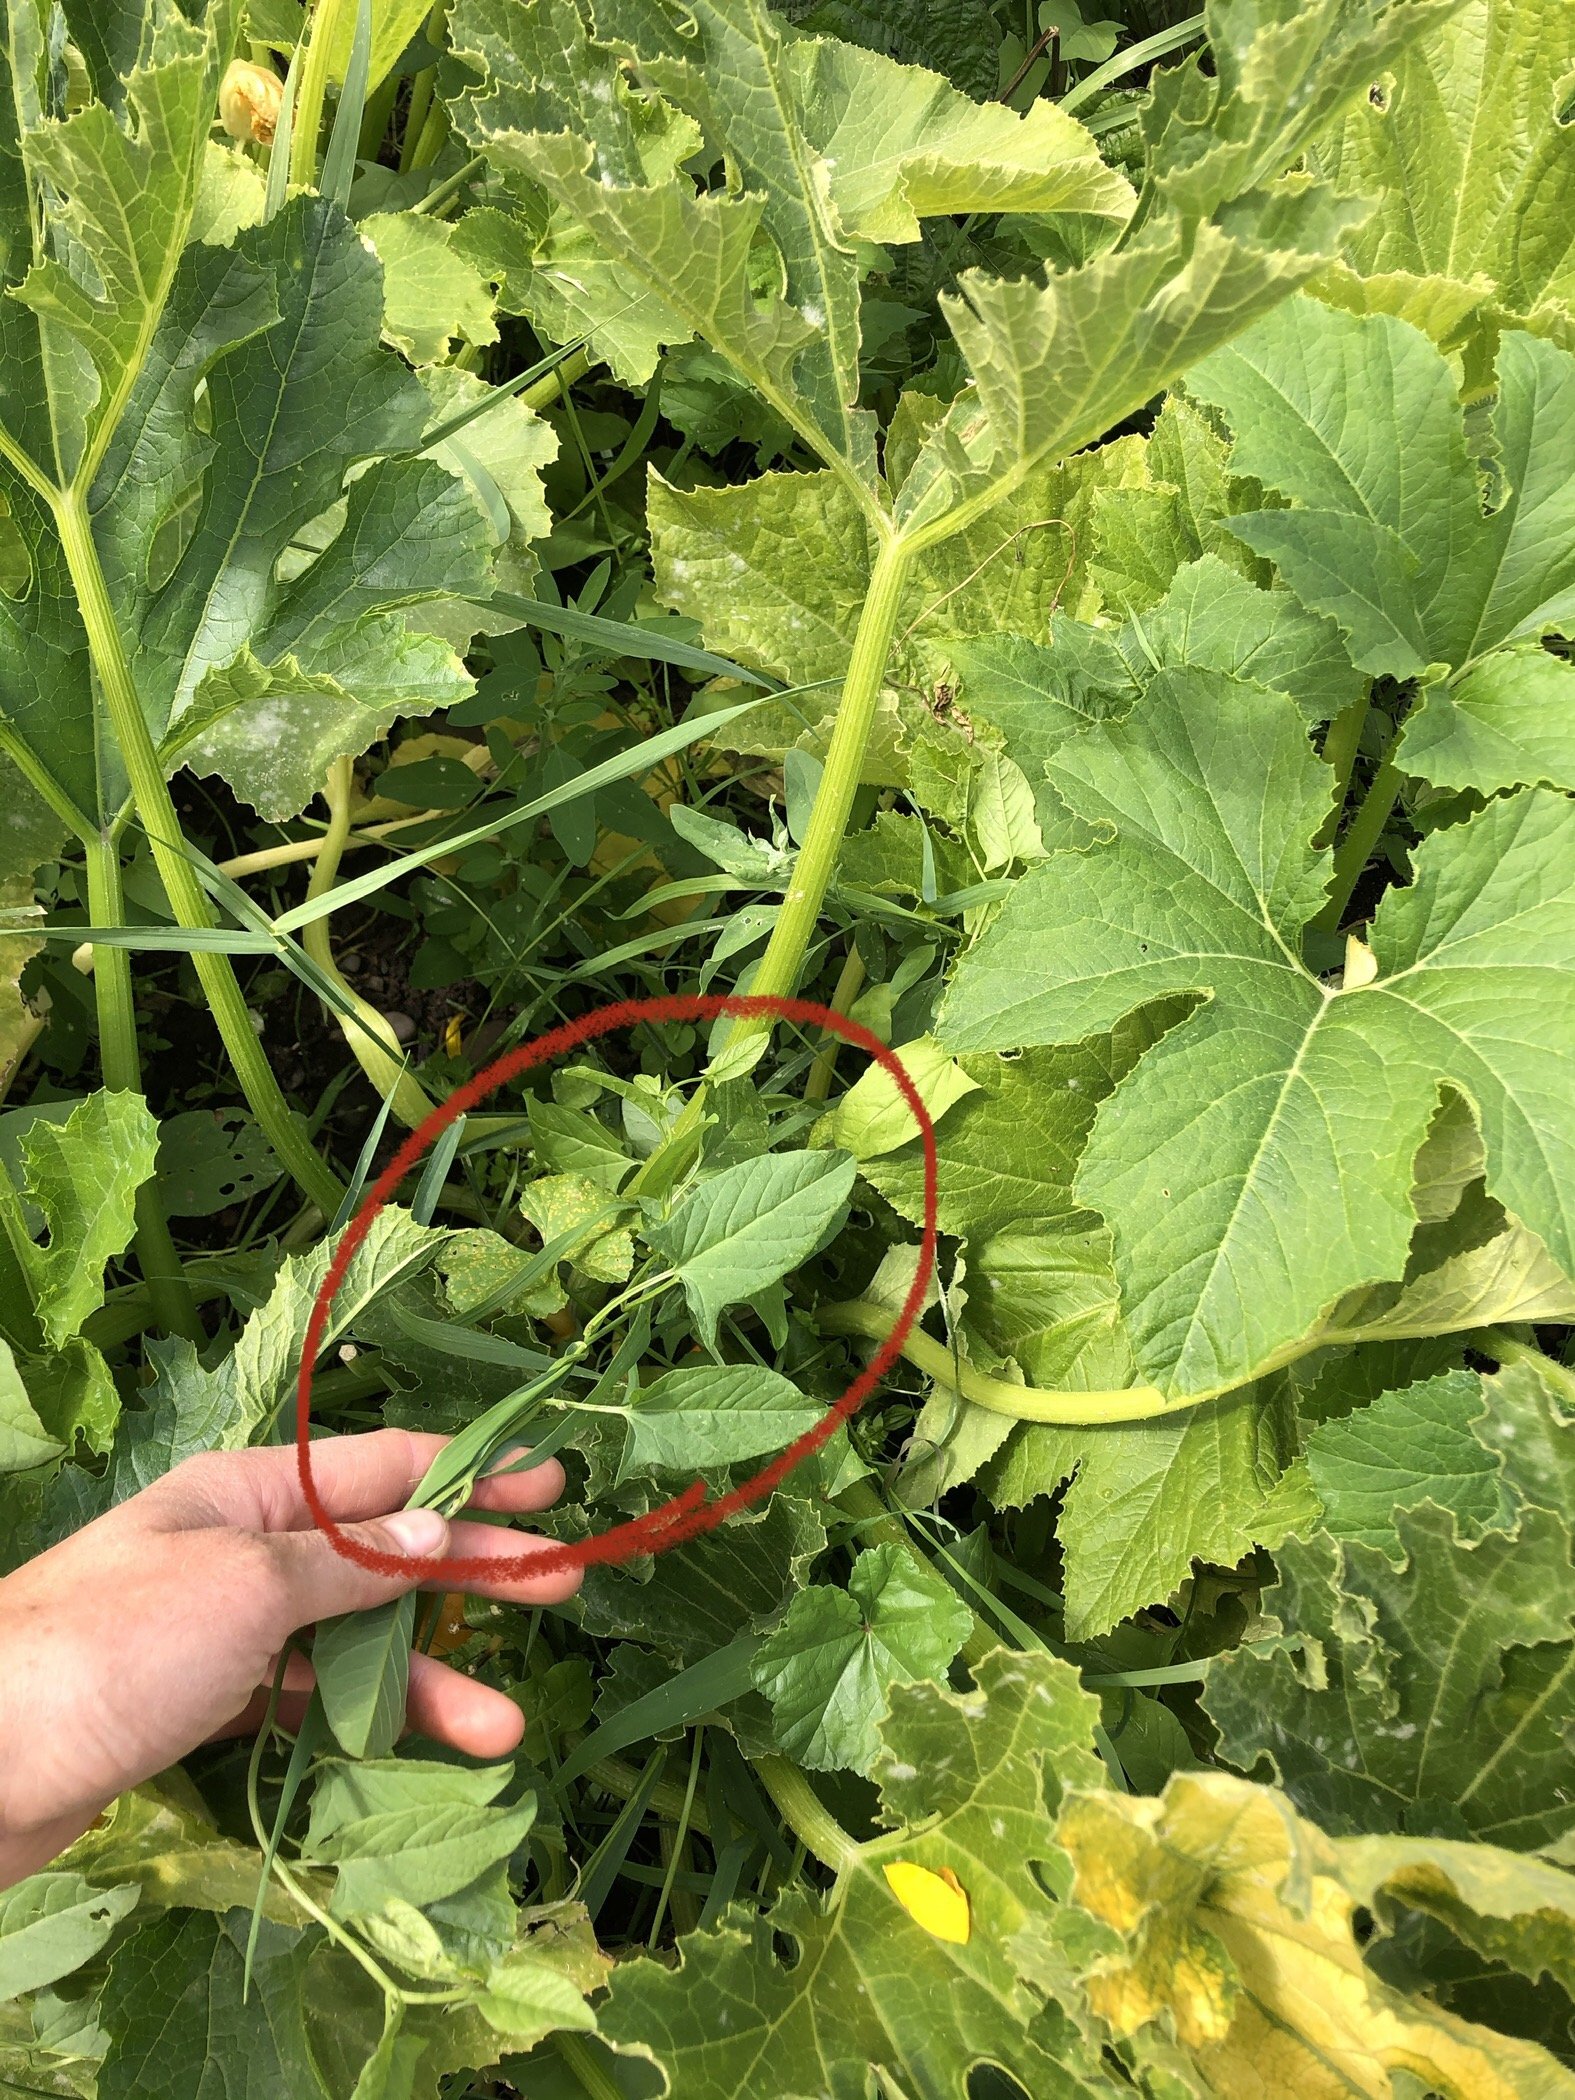
Perennial flower beds between the garden and the bike trail: Here you’ll find yarrow, yarrrow, and more yarrow (the ferny leaf & pink flower)! There are some other perennial flowers tucked in along this edge, but yarrow really loves it here, and as you’ll see, it has taken over some areas. Yarrow is a native plant that is great for beneficial insects. Please help us by weeding this flower bed (see most wanted weeds in the section below), and cutting down the brown/dead flower heads from last season. If any flowers grow over into the bike trail, please cut those back too - we can’t have plants falling into the pedestrian lanes of traffic!
Tool shed: Help us keep it clean and tidy. Occasionally, it will need to be reorganized.
Weeding: The area around the picnic table and compost needs weeding.
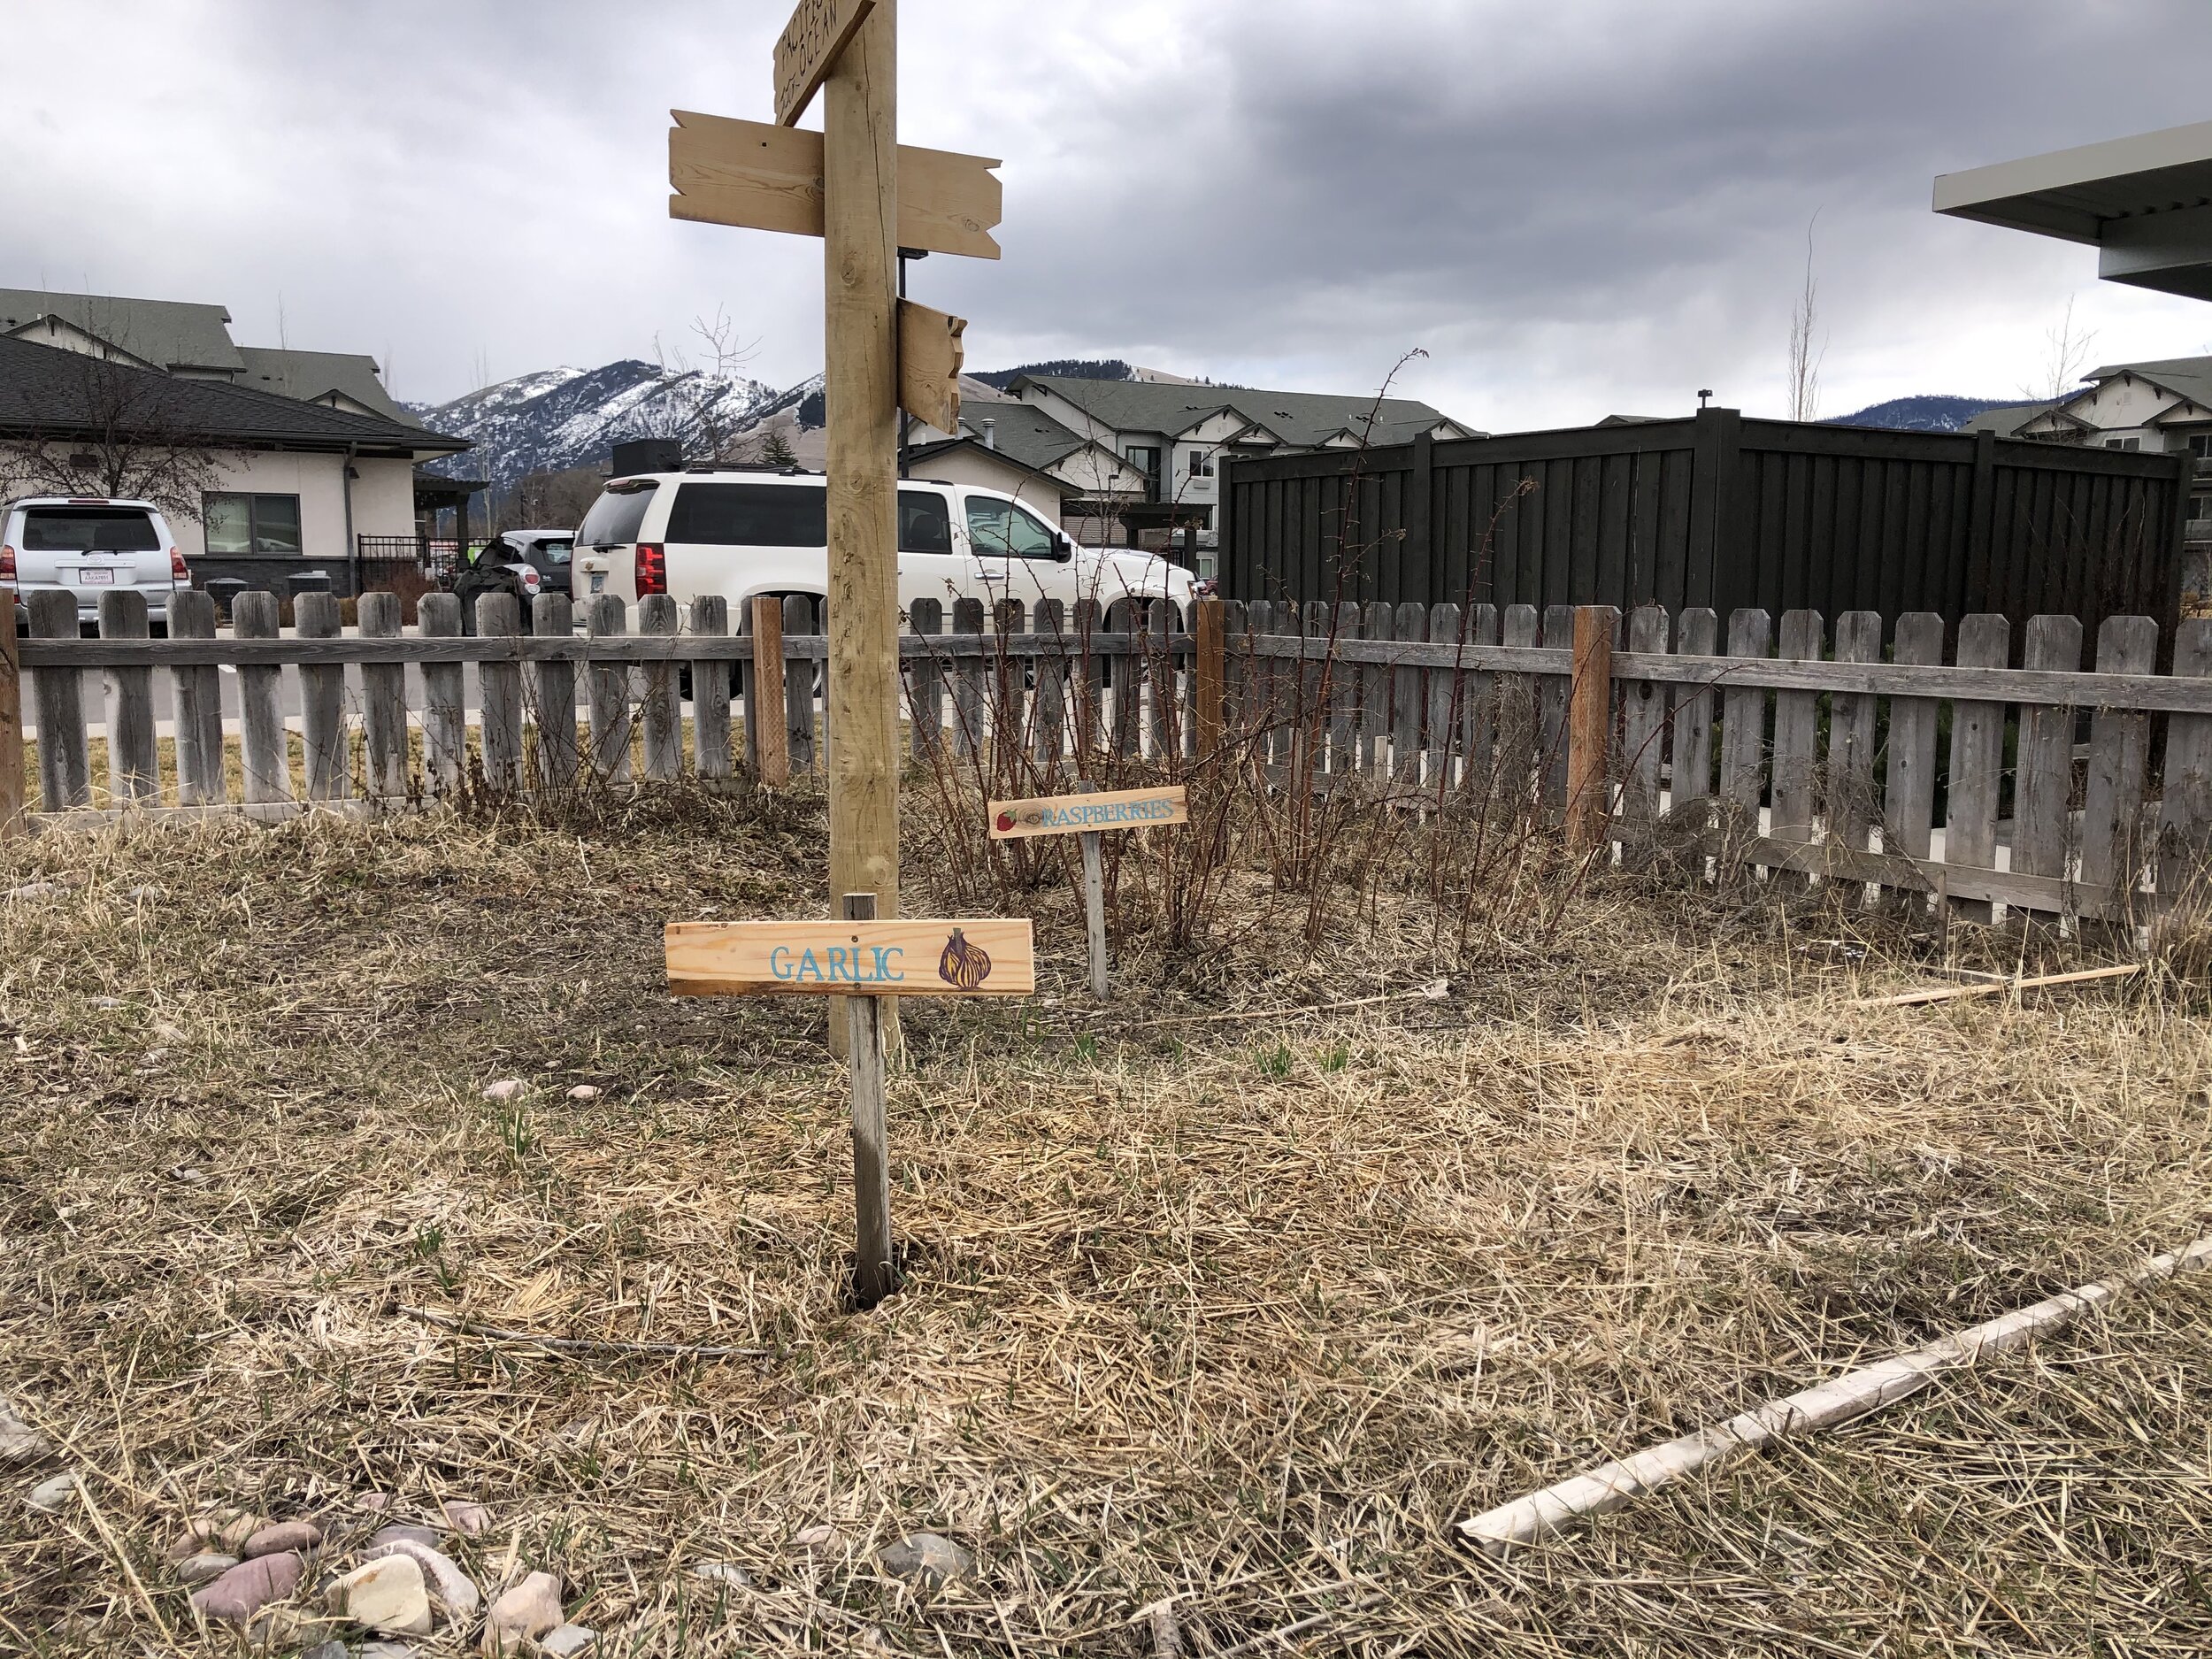
Community berry and herb patch: Located in the farthest southeast corner of the garden, you’ll find some raspberries. Help us water and weed this plot, and in turn share in the harvest!
Compost: When the compost gets stinky or full, move each pile to the right (See the Compost section above for more info).
Trash: The rule is pack it in and pack it out, but inevitably trash ends up blowing around the garden. Spend a couple minutes helping us pick up trash around the garden site.
Need more ideas? Contact your leadership committee - contact info in the shed!
MOST WANTED WEEDS
Weeding is a fundamental part of gardening and should be done weekly. If you keep up with it using a hoop (hula) hoe, it should take no more than an hour a week to keep your plot clear of most weeds. If you choose to weed less often, the task will get exponentially more difficult, and you will be on your hands and knees digging out weeds. Keep your eyes out for notices about weeds throughout the growing season. Watch the video tutorials and look at the photos below for weeding tips, and if you have any questions about weeds, please ask!
While there are many garden weeds, we have three problem plants on the site - quackgrass, bindweed, and thistles.
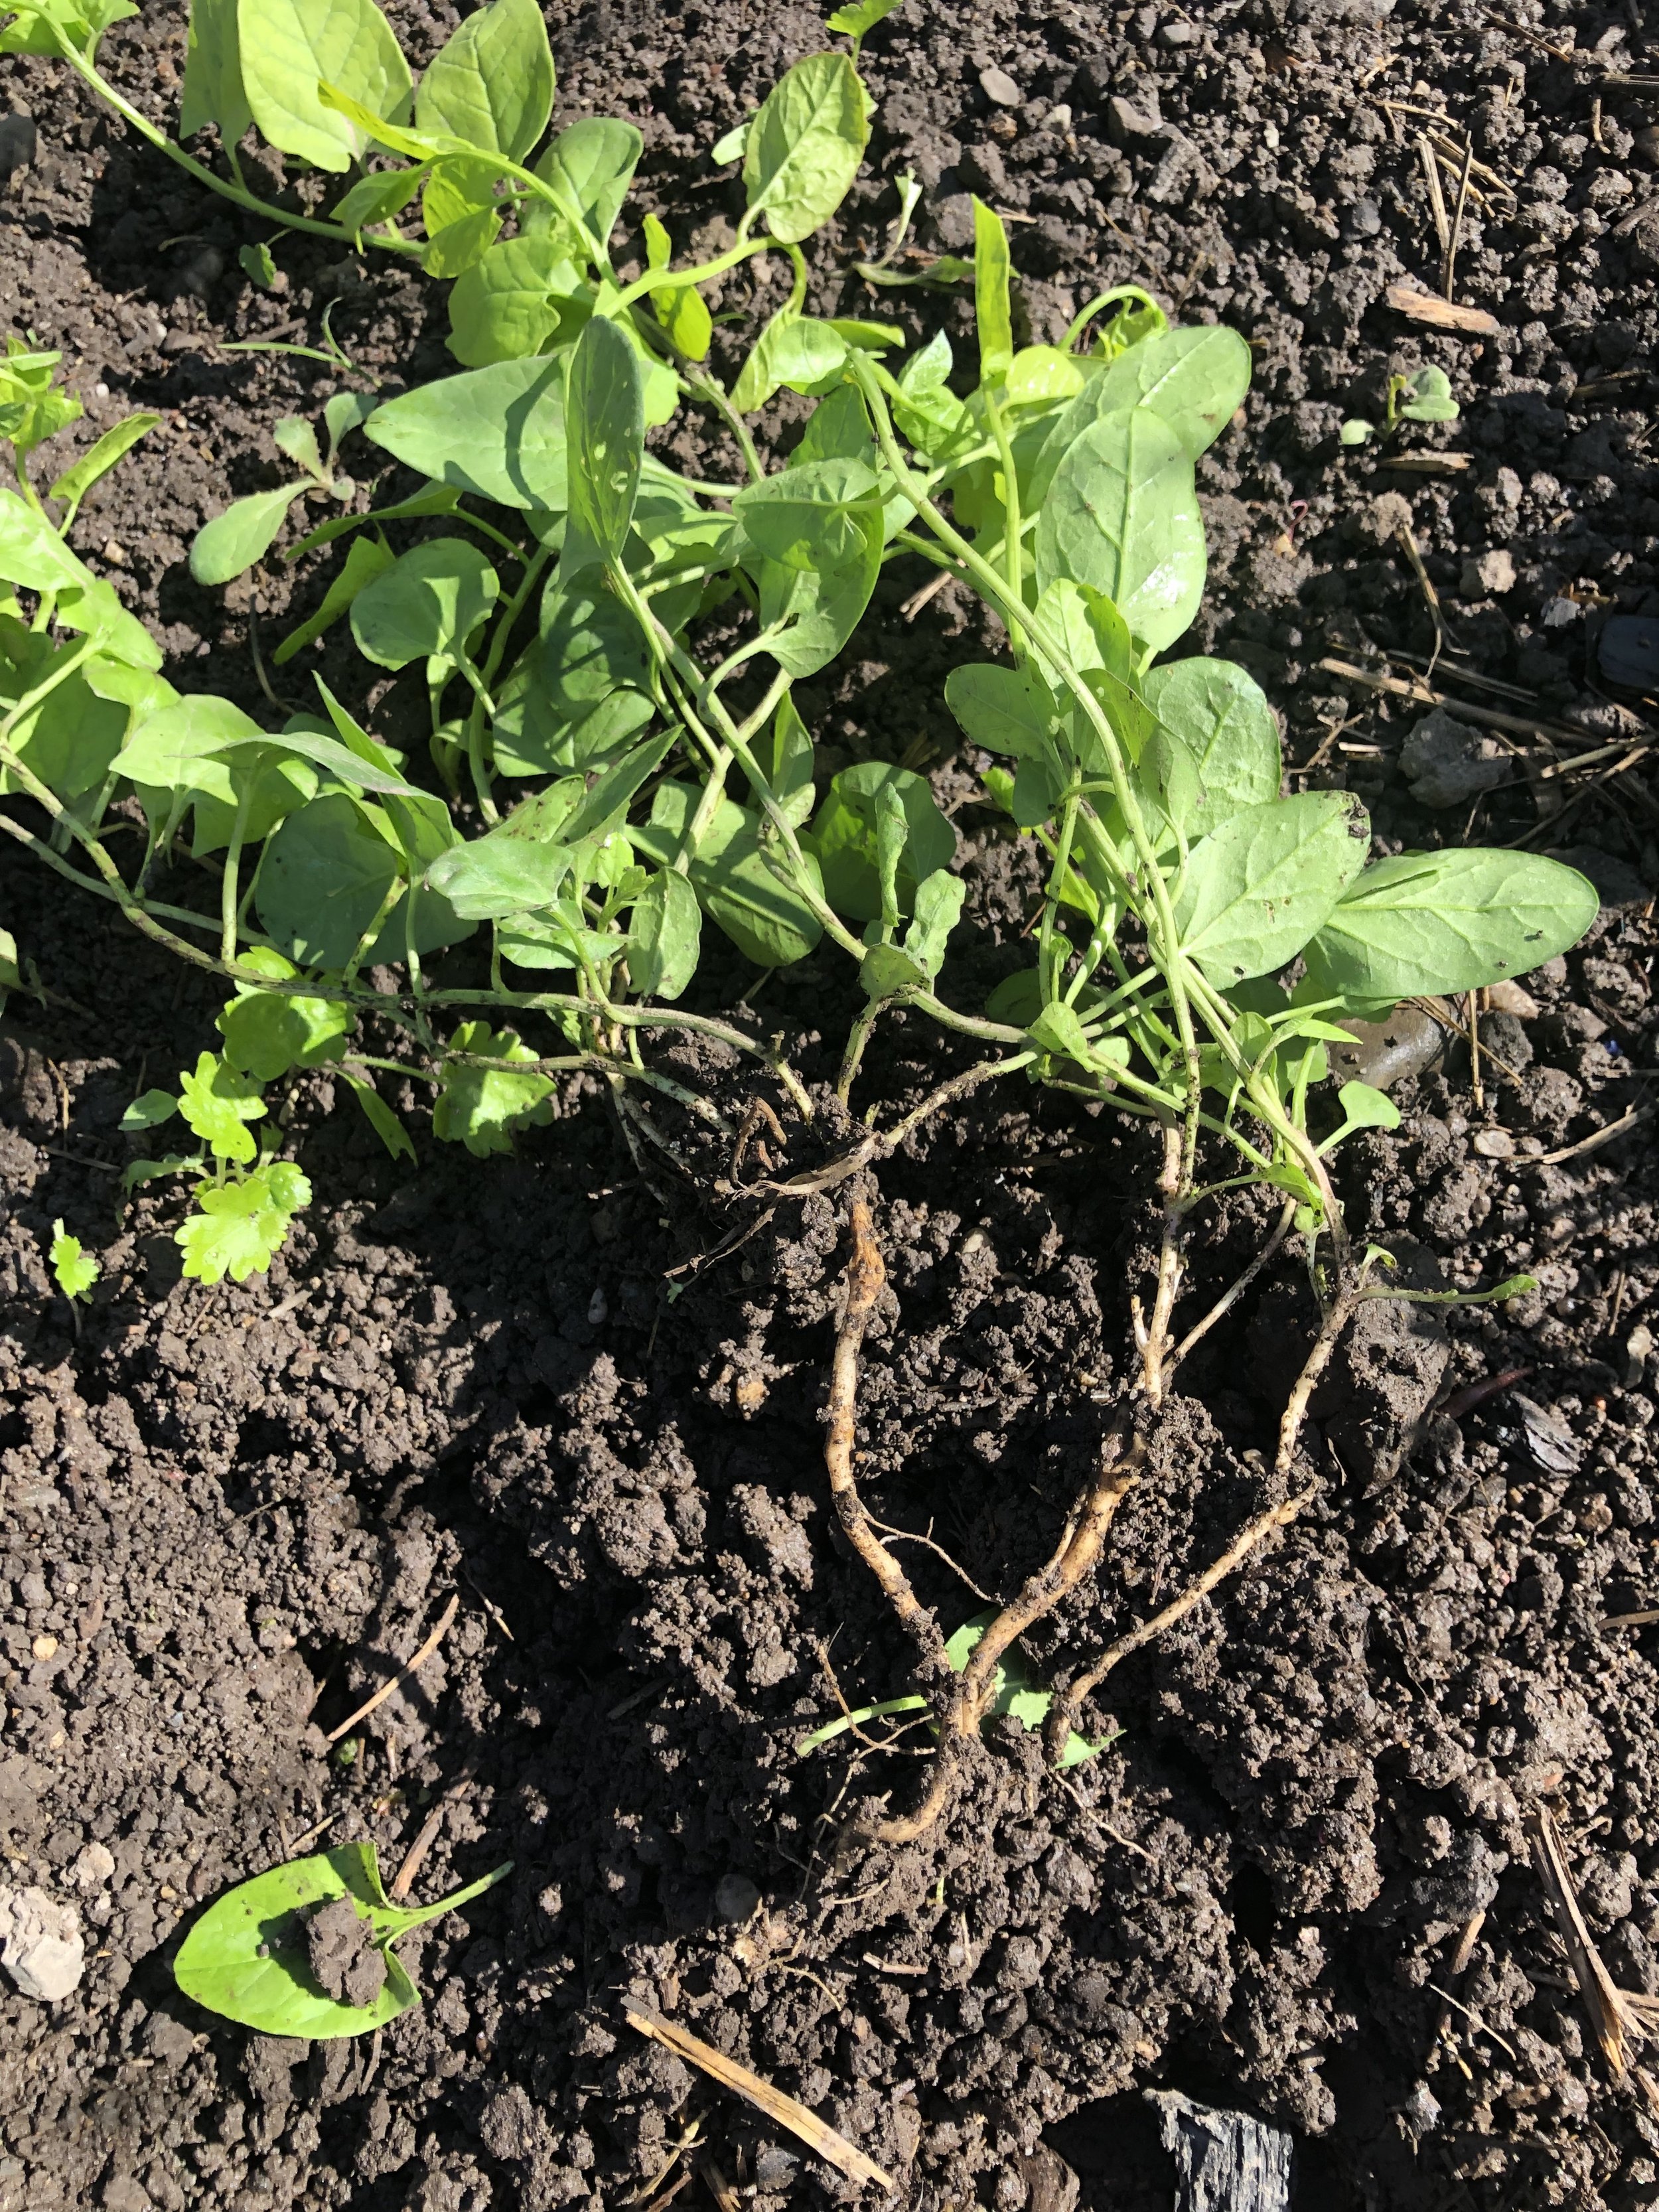
Quackgrass
Quackgrass is grass with white, wire like roots and should be added to the weed pile. Use a digging fork to loosen the soil and make it easier to pull out the roots. Make sure you shake out any clumps of dirt.

The white, wiry roots of quackgrass.
Bindweed
Bindweed is a perennial that is very sneaky. We want you to be able to ID it before it flowers and weed it out. It has arrow-shaped leaves, white flowers, and vines around anything nearby. Put bindweed in the trash (the dumpster located just outside the garden), NOT in the weed pile. This will minimize its spread.
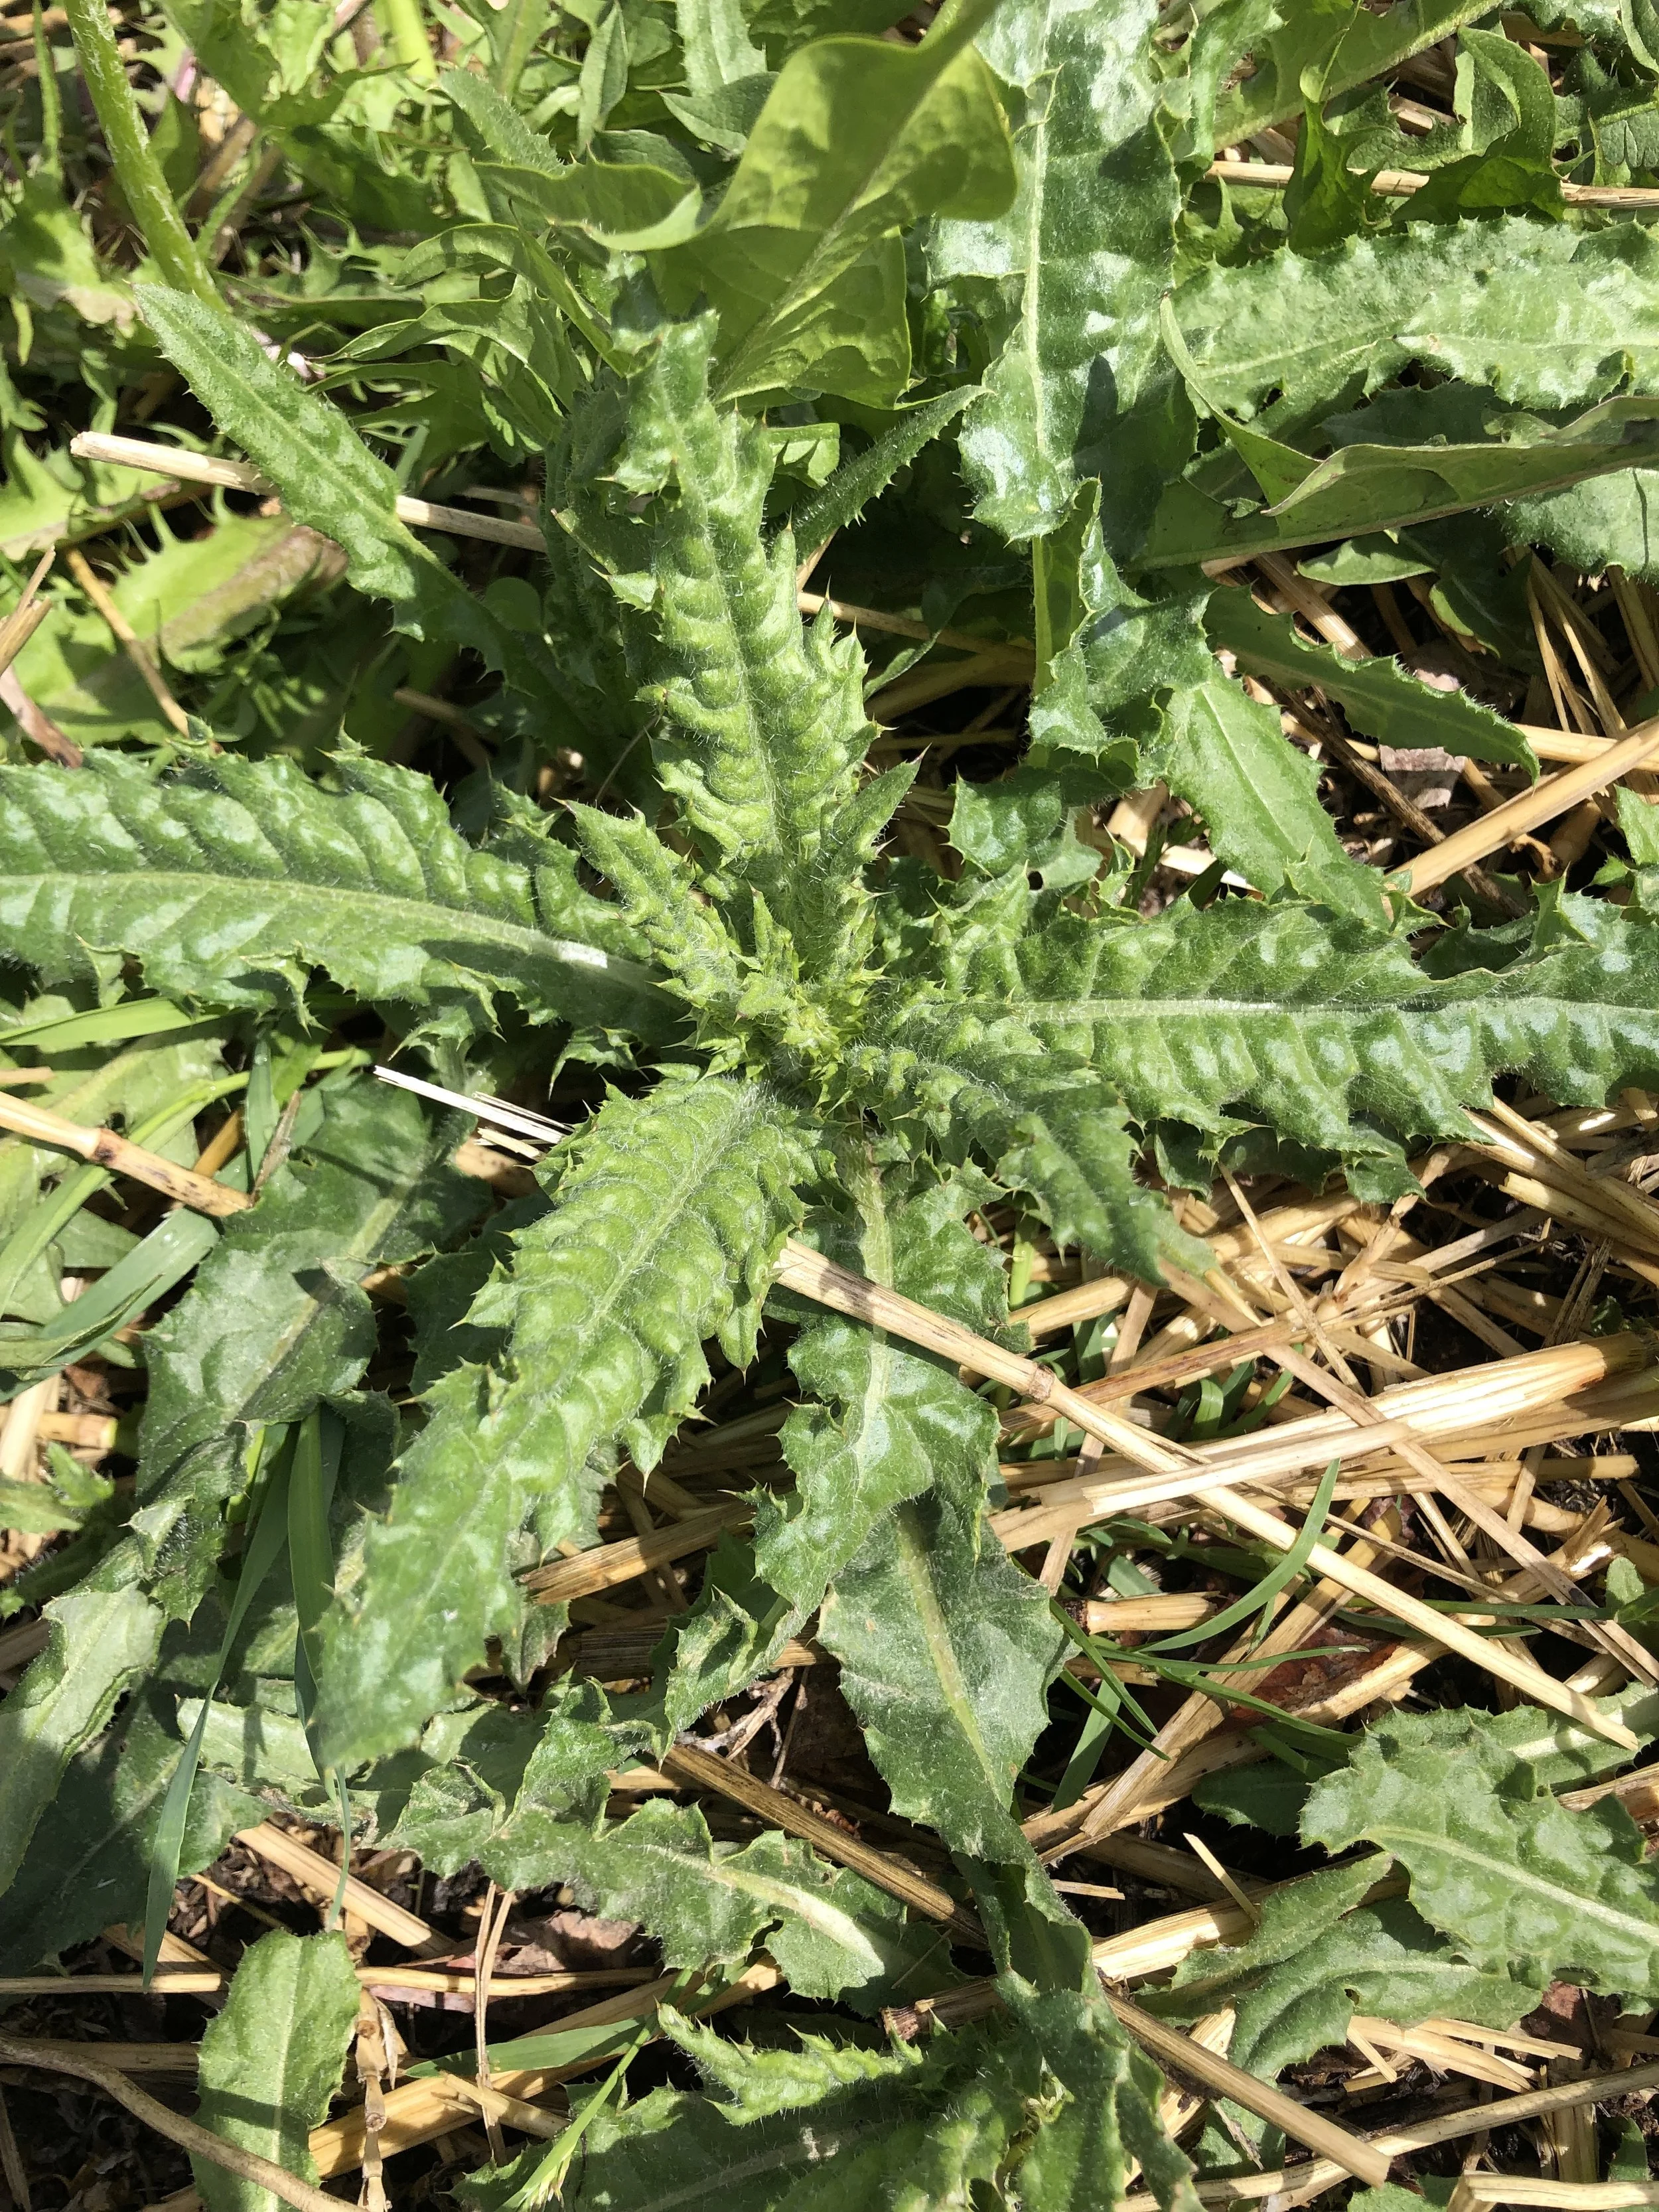
A thistle plant.
Thistle
Thistles are prickly and have long taproots. Their flowers are pinkish-purple. Use a digging fork or trowel to remove the whole taproot, and be sure to wear gloves! Please also throw thistle in the trash, rather than in the weed pile.