
Growing Big Bountiful Garlic
This blog was written by Emily Kern Swaffar and Marnie Craig, a Northside Community Gardener. They outline how you can grow delicious garlic for yourself in a step-by-step process, from planting in the fall to harvesting in the summer.

Photo by Emily Kern Swaffar
Fall can mean a sudden change of pace for those of us who spend time working in the dirt. Our lives and our gardens undergo significant changes as we transition from the warmth of summer into the cold and dark winter. For many of us, this is a bittersweet time. We will miss our time in the garden, fresh-picked meals, and chatting with fellow gardeners. But winter also offers a chance to reflect on the past season, plan for the next, and hunker down with warm winter dishes.
An oddball in our fall routine of closing our gardens down and putting our storage foods up is garlic. This time of year, when our crops are reaching the end of their lives or have already passed, another round of garlic is just starting. We plant our garlic in the fall to overwinter so that it can begin to grow as soon as weather permits in the following spring. We can also plant garlic in the early spring as soon as the ground is workable. However, bulb production is more successful when planted in the fall. Also, fall planting is a much-welcomed change of pace from our usual fall routines.
Choosing Garlic
When planting garlic, we use individual cloves. Since garlic is produced asexually through cloning, we want to plant the largest and healthiest cloves available. Don't plant small or rotten cloves. Choose cloves that exhibit traits you wish to continue in your crop. Plant the cream of the crop, the largest, best-formed cloves of your favorite variety.
It's best to plant garlic cloves that you, a friend, or a local farmer grew or to buy seed garlic. Although technically you can plant cloves from grocery store garlic, it may not be a variety that is well-suited to grow in Montana, or it may be treated, making it less likely to succeed. If you don't have trusted garlic to plant this season, purchasing some seed garlic online or at a local nursery could be well worth the investment. If you plan well and buy enough this year, you can grow enough garlic to plant each following year (no additional expense necessary).
We recommend Antelope Creek Garlic in Pony, Montana, a family-run garlic farm providing a wide variety of high-quality Montana-proven seed garlic. Seed garlic is a considerable investment upfront, but with good planning, it is a one-time investment and will pay for itself many times over.
Garlic comes in hardneck and softneck varieties. Hardneck varieties produce large, easy-to-peel cloves with a variety of flavors. Softneck produces smaller, more challenging-to-peel cloves that are better for storage and suitable for decorative braiding.
Pull the cloves of your best seed garlic apart, leaving on the protective papery husk. The husk helps protect the cloves from disease and pests once in the soil. Choose the largest and best-shaped cloves! From each clove, you will grow an entire bulb.
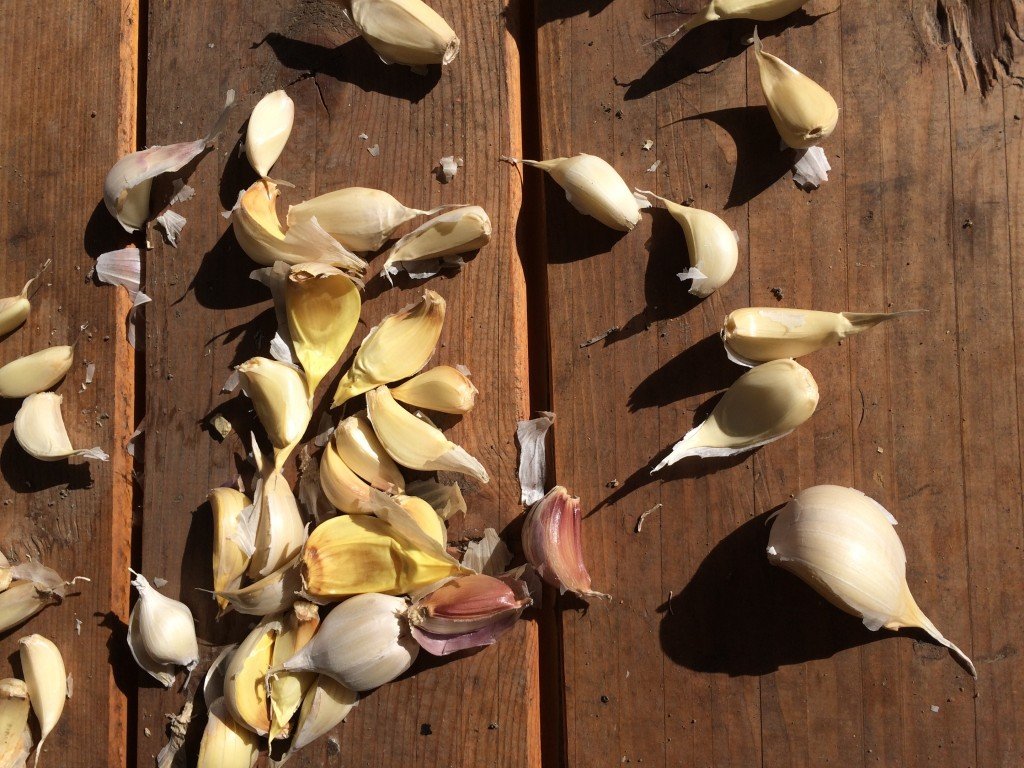
The largest and best-looking cloves will yield the best heads of garlic next year.
Photo by Emily Kern Swaffar
Prepping the Garlic Bed
Plan and consider how you will rotate your garlic beds each year. Garlic grows best when rotated to a different area in your plot each year to help it fend off disease and avoid white rot disease. Read this blog to learn more about white rot disease.
Plant in well-drained nitrogen-rich soil. Feeding the soil feeds our plants and provides nutrient-dense veggies for our meals. Garlic is a heavy feeder, so it's best to amend the soil before planting. To start the microbial magic, prepare the garlic bed at the end of September or the beginning of October. Add garden compost, composted manure, and any straw left in your plot from mulching in the summer into the top six inches of the garlic bed soil and mix it in.
Planting
Plant before the ground freezes but after the warm season has ended, usually at the end of October. A mixture of slow-release organic fish bone meal will balance out the manure's nitrogen, adding phosphorus and calcium. If you didn't add manure, you can add an organic blood meal for nitrogen. Ground eggshells will also add calcium, and Epsom salt will add magnesium. Add a mixture of these to your planting rows.
Plant each clove about 2 inches into the soil, with the pointy end facing up. Plant the cloves 4-6 inches apart in rows at least 6 inches apart. Mulch heavily with straw, about 4 - 6 inches deep. You can also use a mix of dried leaves and straw. The mulch reduces temperature fluctuations over winter and protects it from freeze-thaw cycles where it can either rot, be pushed to the surface, or not germinate.
Voila! Your work is complete until early spring.
Springtime
As the weather warms and snow and ice have melted in the garden, pull back the straw to see your garlic sprouting. You should see small shoots of green emerging from the bed of straw, sometimes as early as late February or as late as mid-April. Once the weather warms, remove ALL the mulch to help avoid white rot.
Keep the garlic bed well-weeded and moist (but not waterlogged). Watering deeply once a week throughout the growing season works well. Fertilize with organic Alaska Fish Fertilizer a couple of times in early spring to promote good leaf growth. The better the leaves, the better the bulbs!
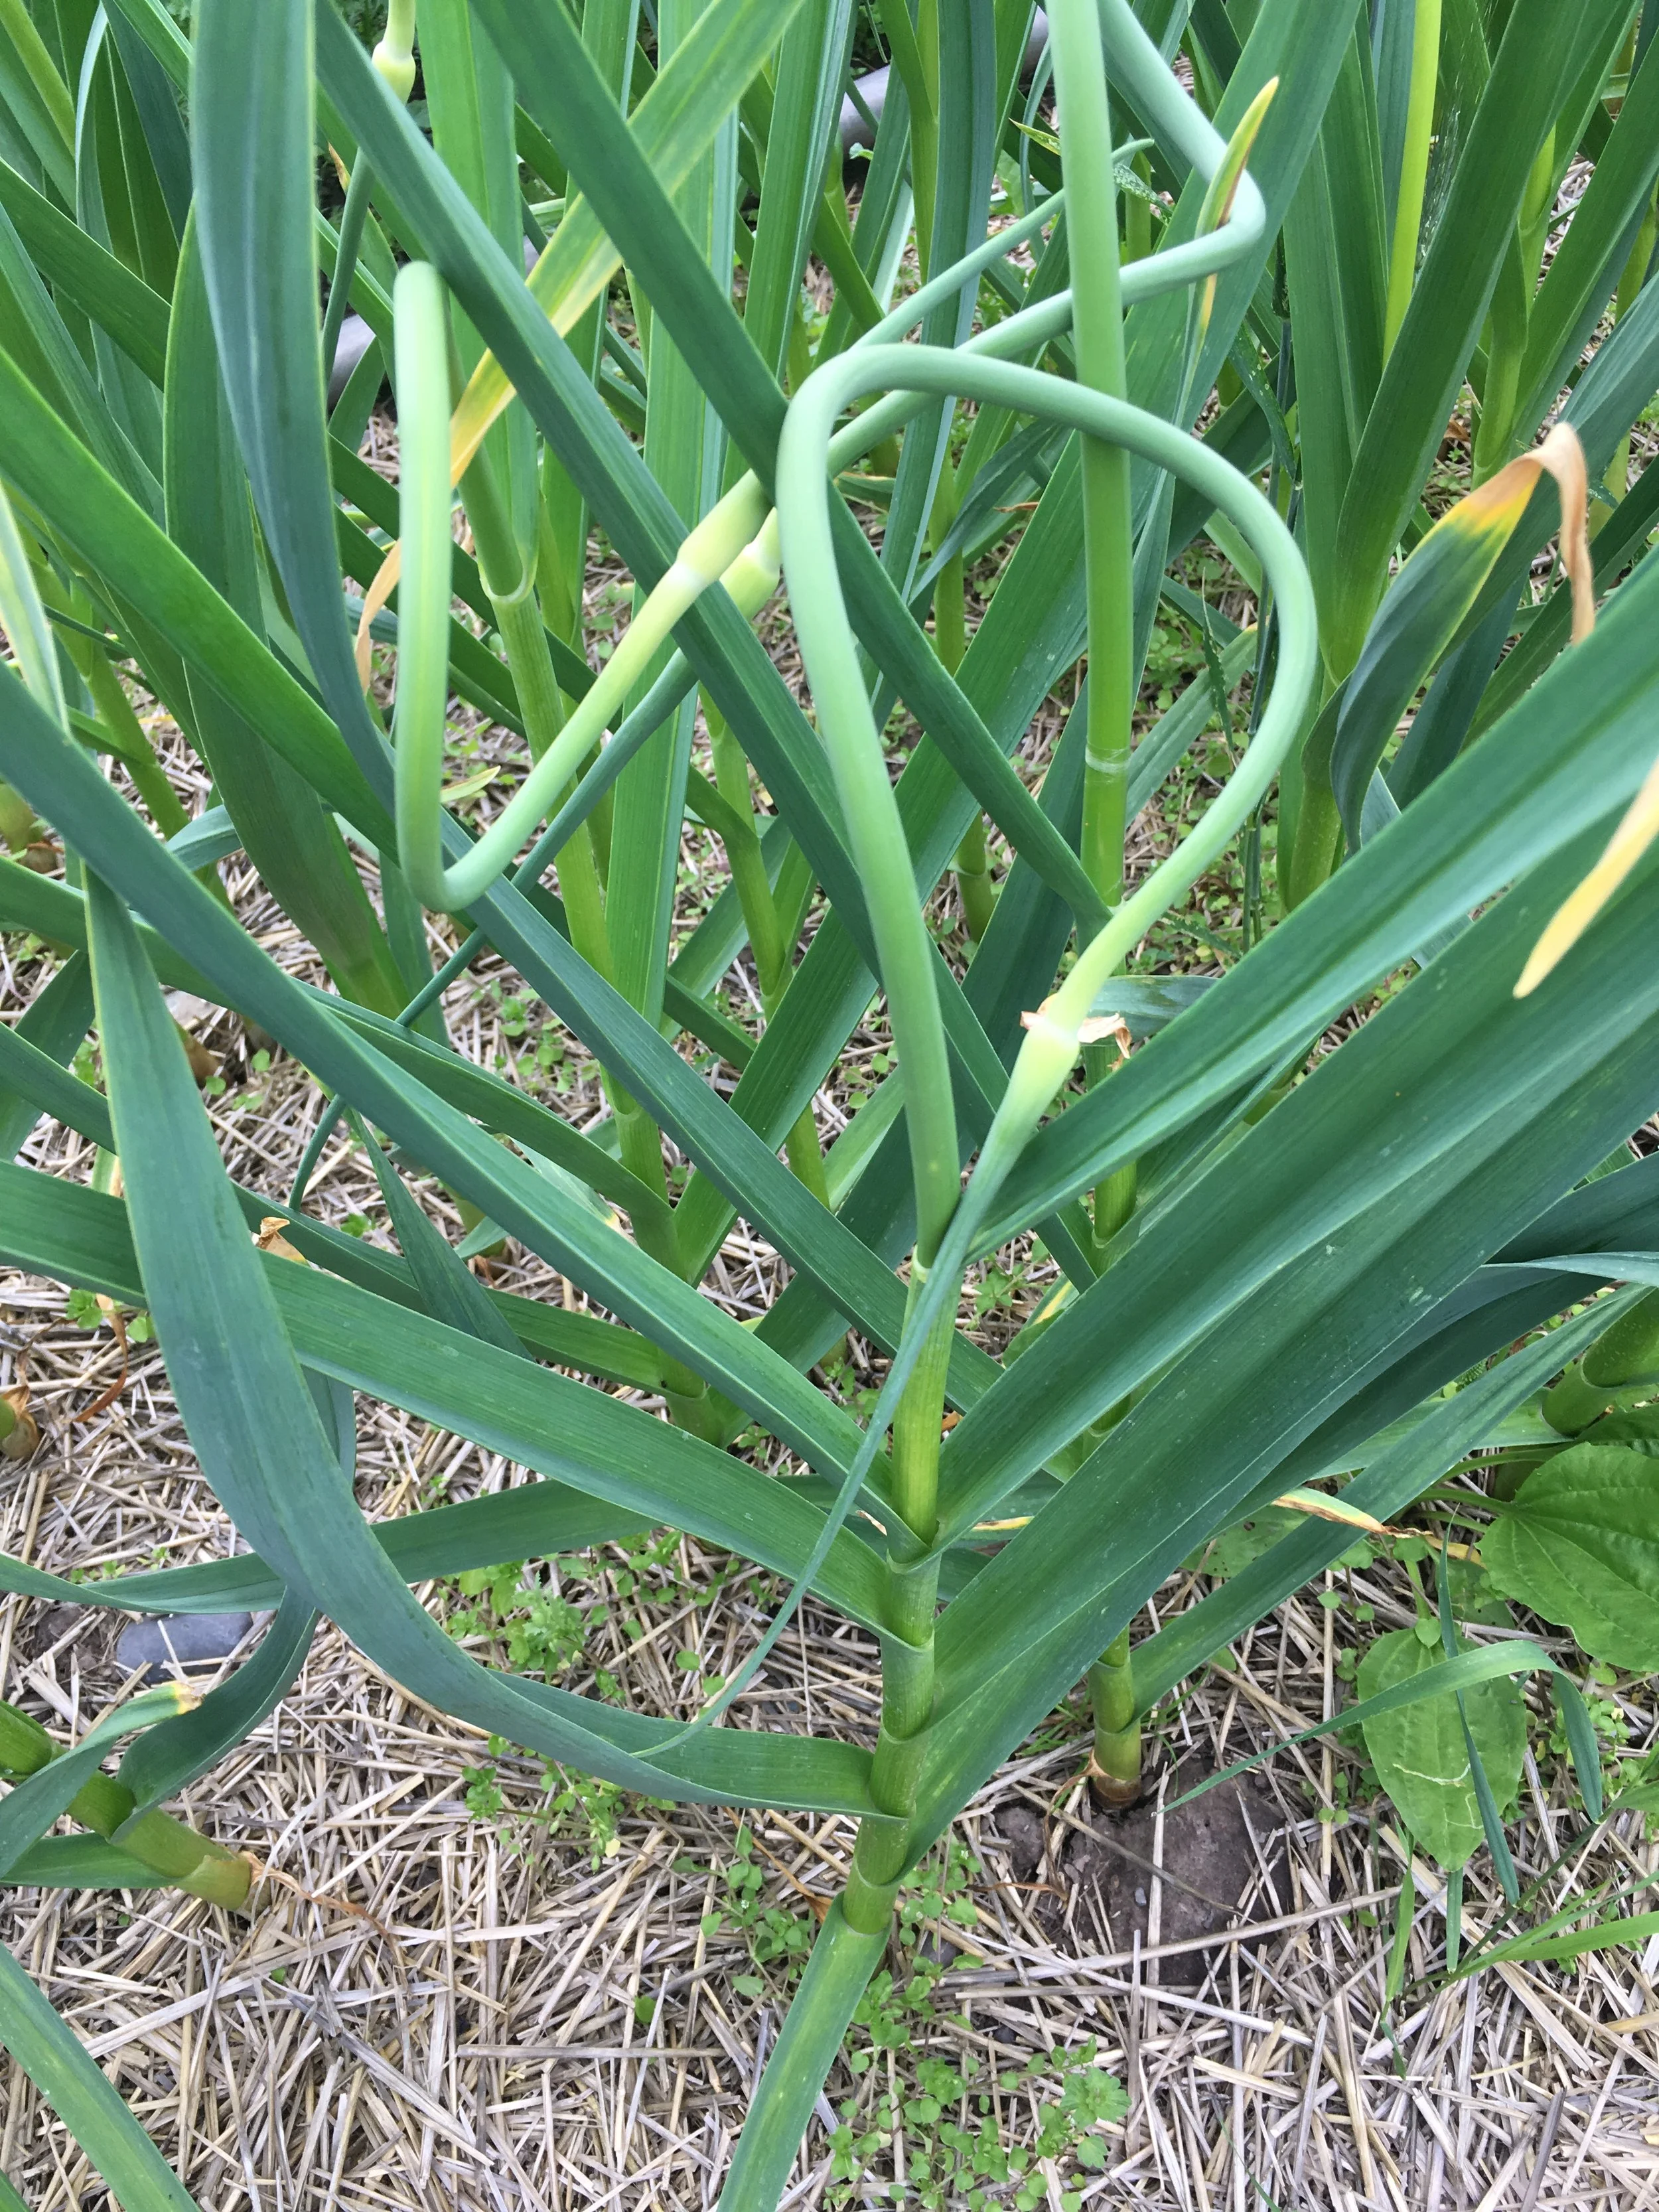
Scapes are ready to harvest when they curl over.
Photo by Garden City Harvest
Scapes
With a hardneck variety, you get the bonus of delicious garlic scapes. Scapes are great for summer grilling and pesto and stir-fries. Scapes grow in coils and should be snapped off at the curly stage to avoid taking energy away from the plant and reducing bulb size. Their appearance signals the end of the leaf-growing stage. In a month or so, it will be time to get the garlic out of the ground!
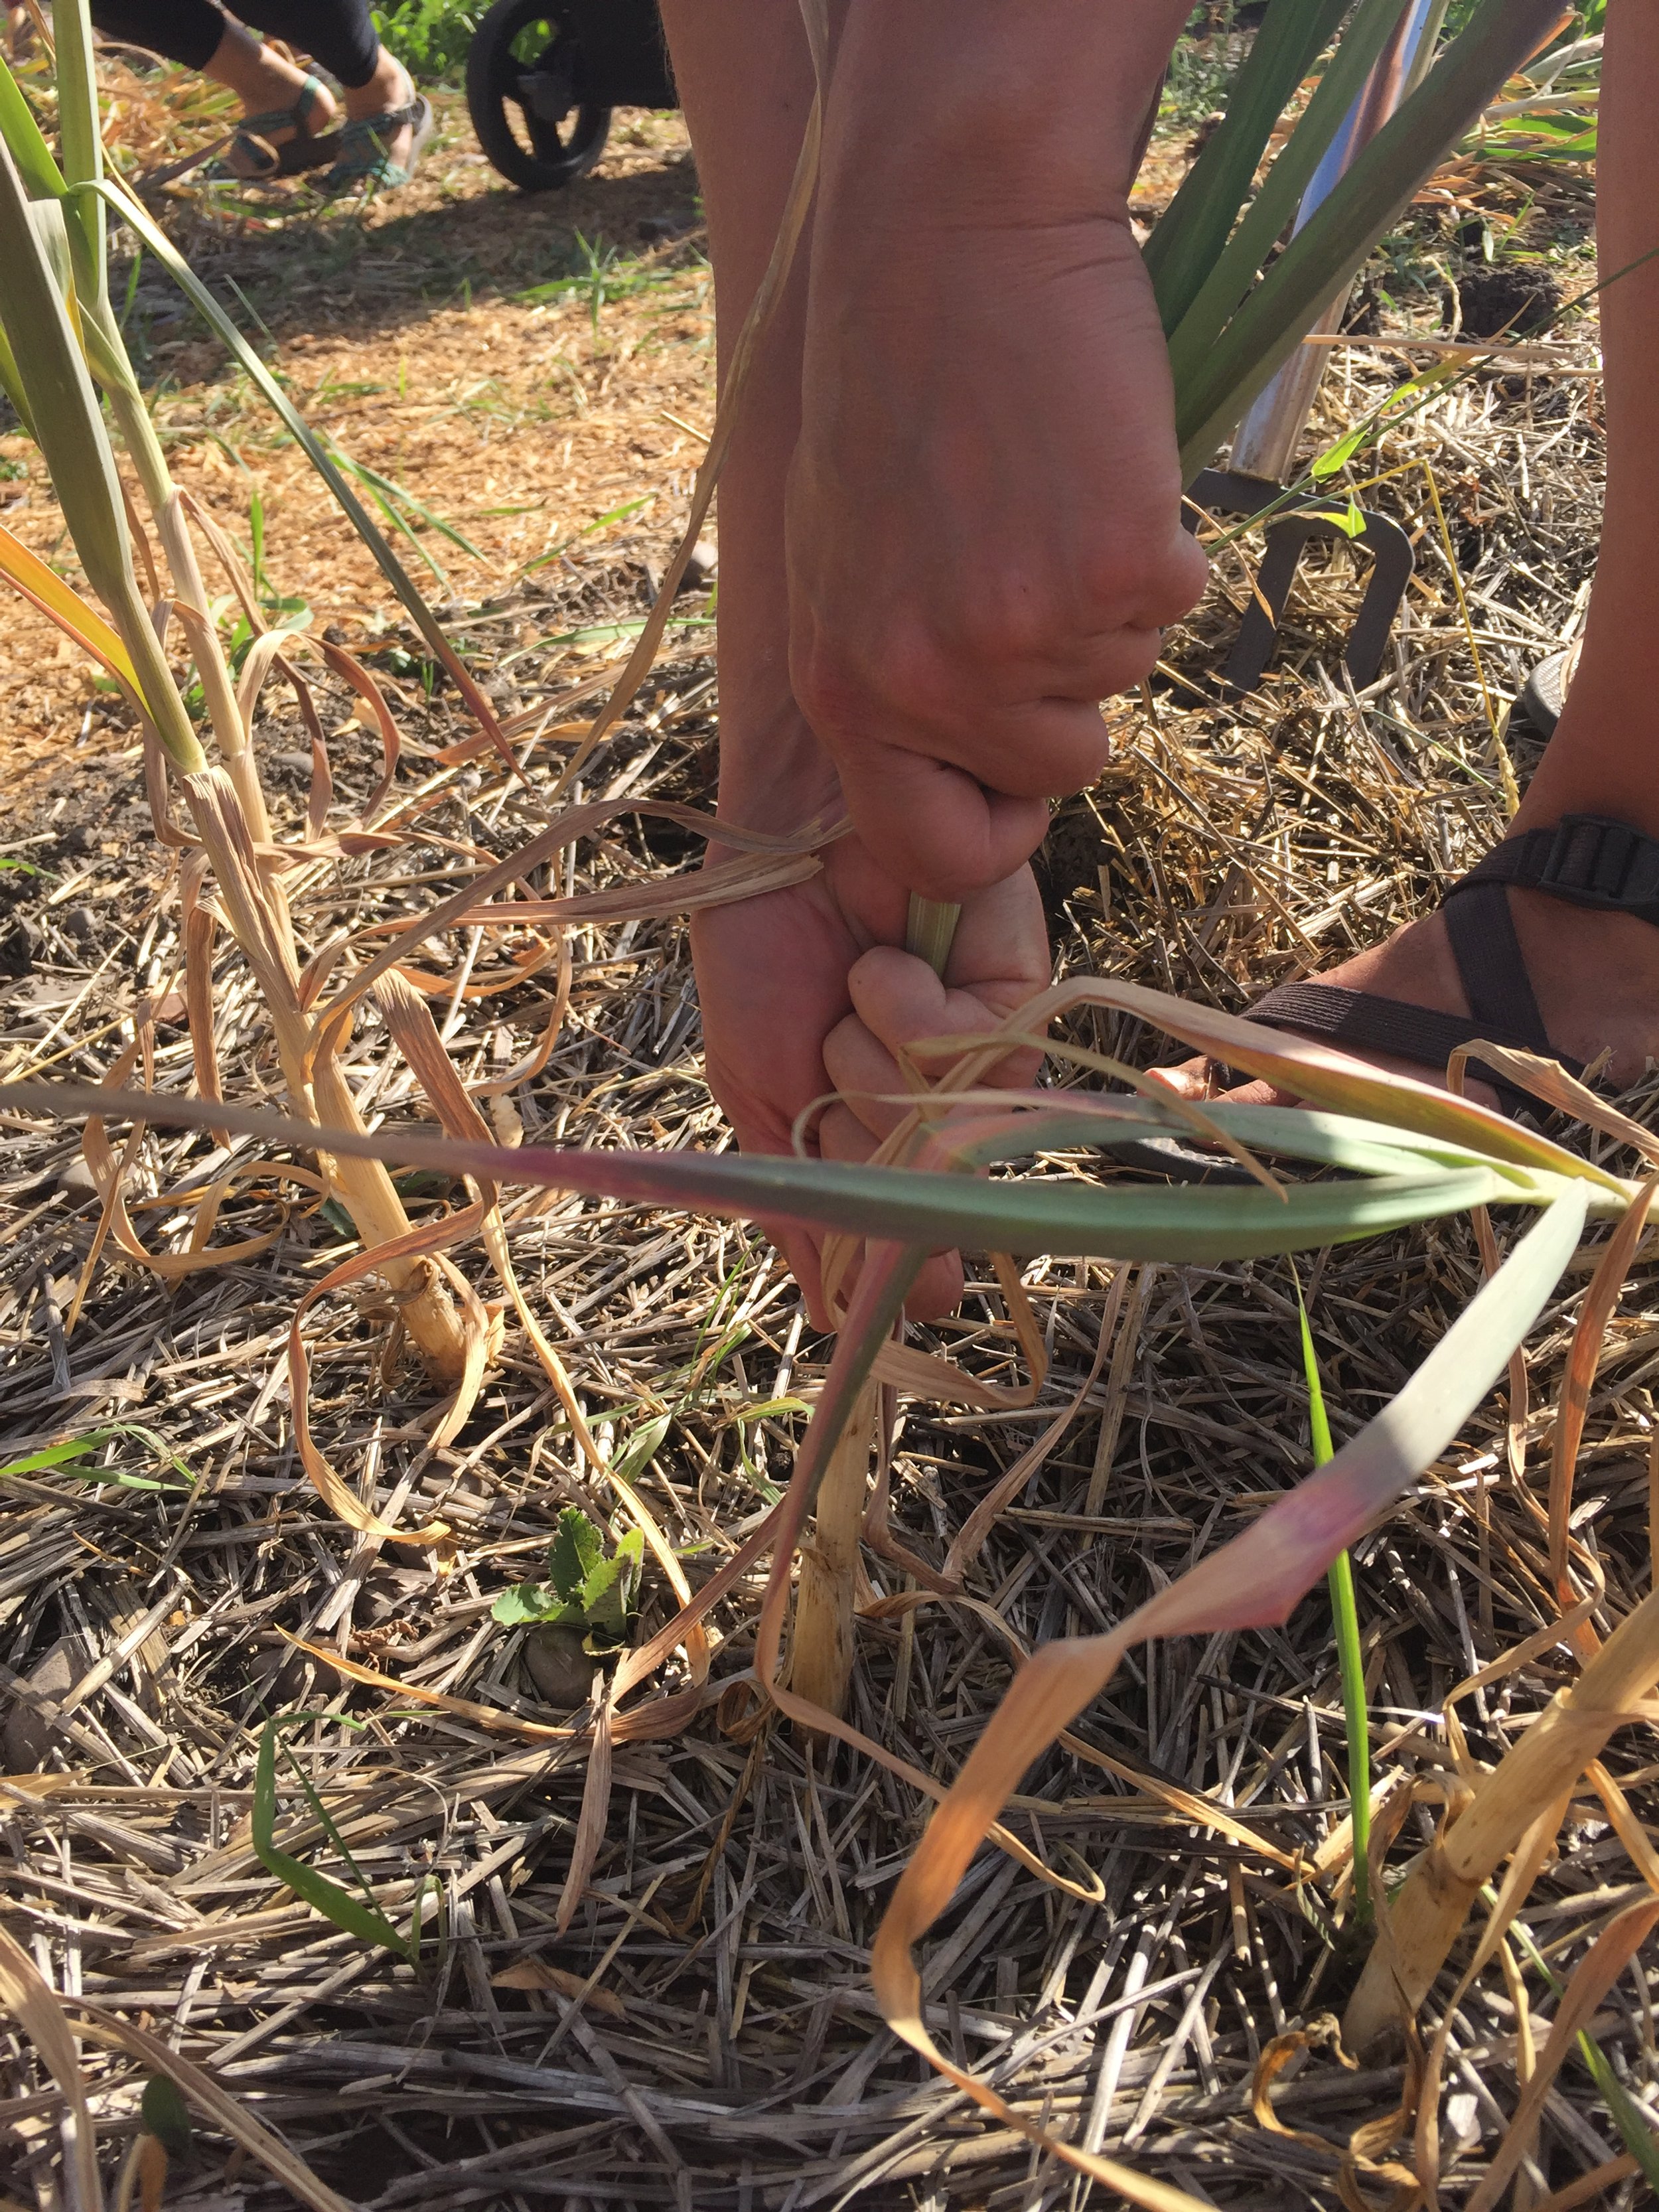
Harvesting and Curing
Stop watering at least a week before harvesting, in mid to late July, after the bottom three leaves have turned yellow. After a week without water, carefully dig out your bulbs.
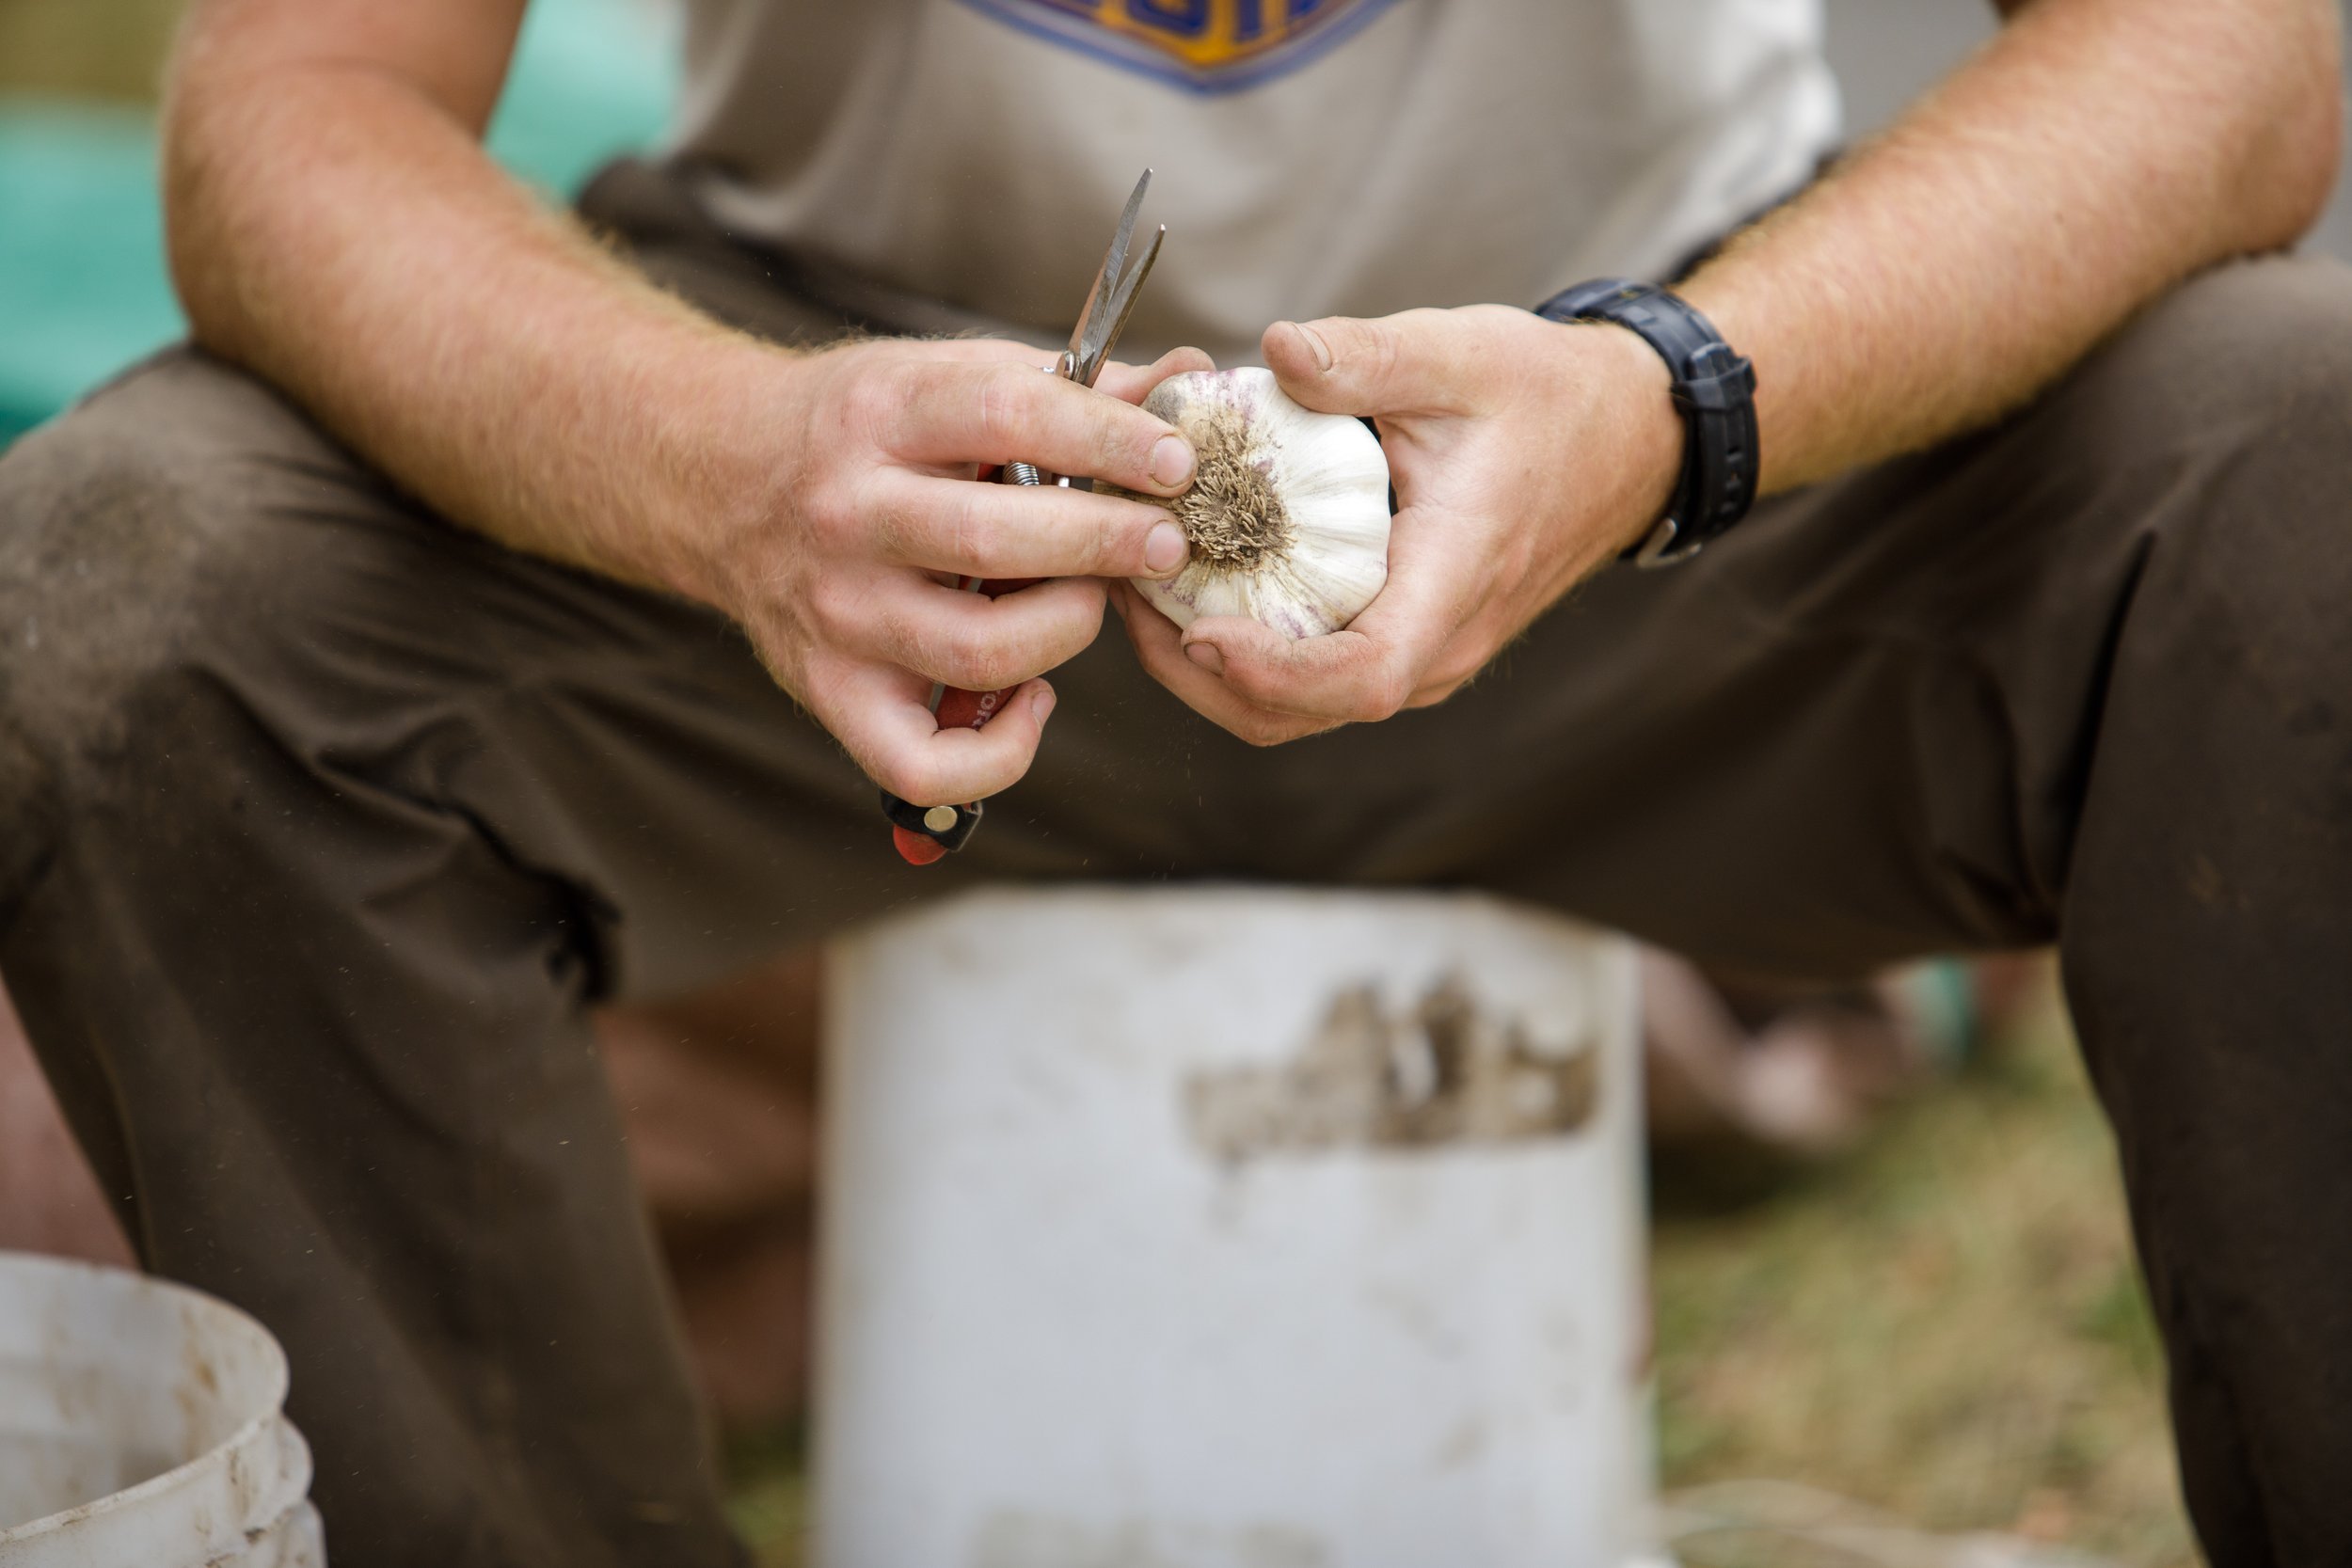
Do not wash the garlic or peel off the skin. Brush off as much dirt as possible and cure for three weeks in a shaded, dry, and well-ventilated area. You can hang it by the stems or place it on a screened table on the north side of a house. If you dry them inside, like in a garage, ensure good cross ventilation with open windows or a continually blowing fan.
After curing:
Cut off the roots and stems of your hardneck variety, leaving an inch of stem.
Peel off the outermost layer of skin to reveal your beautiful white bulbs.
Cut off the roots from your softneck variety, and if you plan to make braids, leave the long stems and leaves.
Peel off the outer layer of skin, and it's time for braiding. Here’s an easy how-to tutorial.
Select the largest and best-formed cloves for your next planting, and store your garlic in a cool, dry place.


Clockwise from left: Garlic ready to be harvested; garlic curing on a rack; peeling the outer layer off garlic and sorting out the best heads for planting; garlic with the roots trimmed.
Photos by Athena Photography and Garden City Harvest staff