Four Ways to Preserve Peppers
Our window for eating fresh, ripe, local peppers is narrow in this climate and I can’t help but feel a little frenzied once they make their appearance. Our farmers have honed in on varieties that are both delicious and quick to ripen- Jimmy Nardellos, Hungarian Hot Wax, Czech Black and Bulgarian Carrot Chilis to name just a few. These peppers offer an incredible diversity of flavor and color often absent from the varieties we’re likely to find at the grocery store.
Part of my love for peppers comes from the intense color they add to the plate. This color persists through various methods of preservation and, come winter, there’s nothing like a flavorful splash of fiery red-orange to liven up a dish. Peppers lend themselves to an incredible diversity of preservation methods that can be as simple or involved as you like. This post includes methods for freezing, fermenting, canning and marinating peppers, plus a bonus recipe at the very end, so read on!
the methods:
frozen
Peppers are one of those foods that can be frozen raw without serious detriment to the texture, flavor and color. Freezing them can be as easy as removing the seeds and stems and placing them in a freezer bag. Small hot peppers can be frozen whole. Peppers from the freezer can be added to a dish as you would raw peppers.
Below is my method for freezing roasted Poblano and Anaheim peppers and can be applied to any large pepper on hand. The result is a delicious, homegrown substitute for canned green chiles. Pulled from the freezer, we chop them up and add them to eggs, casseroles, soups and chilis.
Roasted Chiles for freezing
INGREDIENTS
Poblano and/or Anaheim peppers
TOOLS
Oven
Baking sheet(s)
Large pot with lid
Plastic freezer bags
INSTRUCTIONS
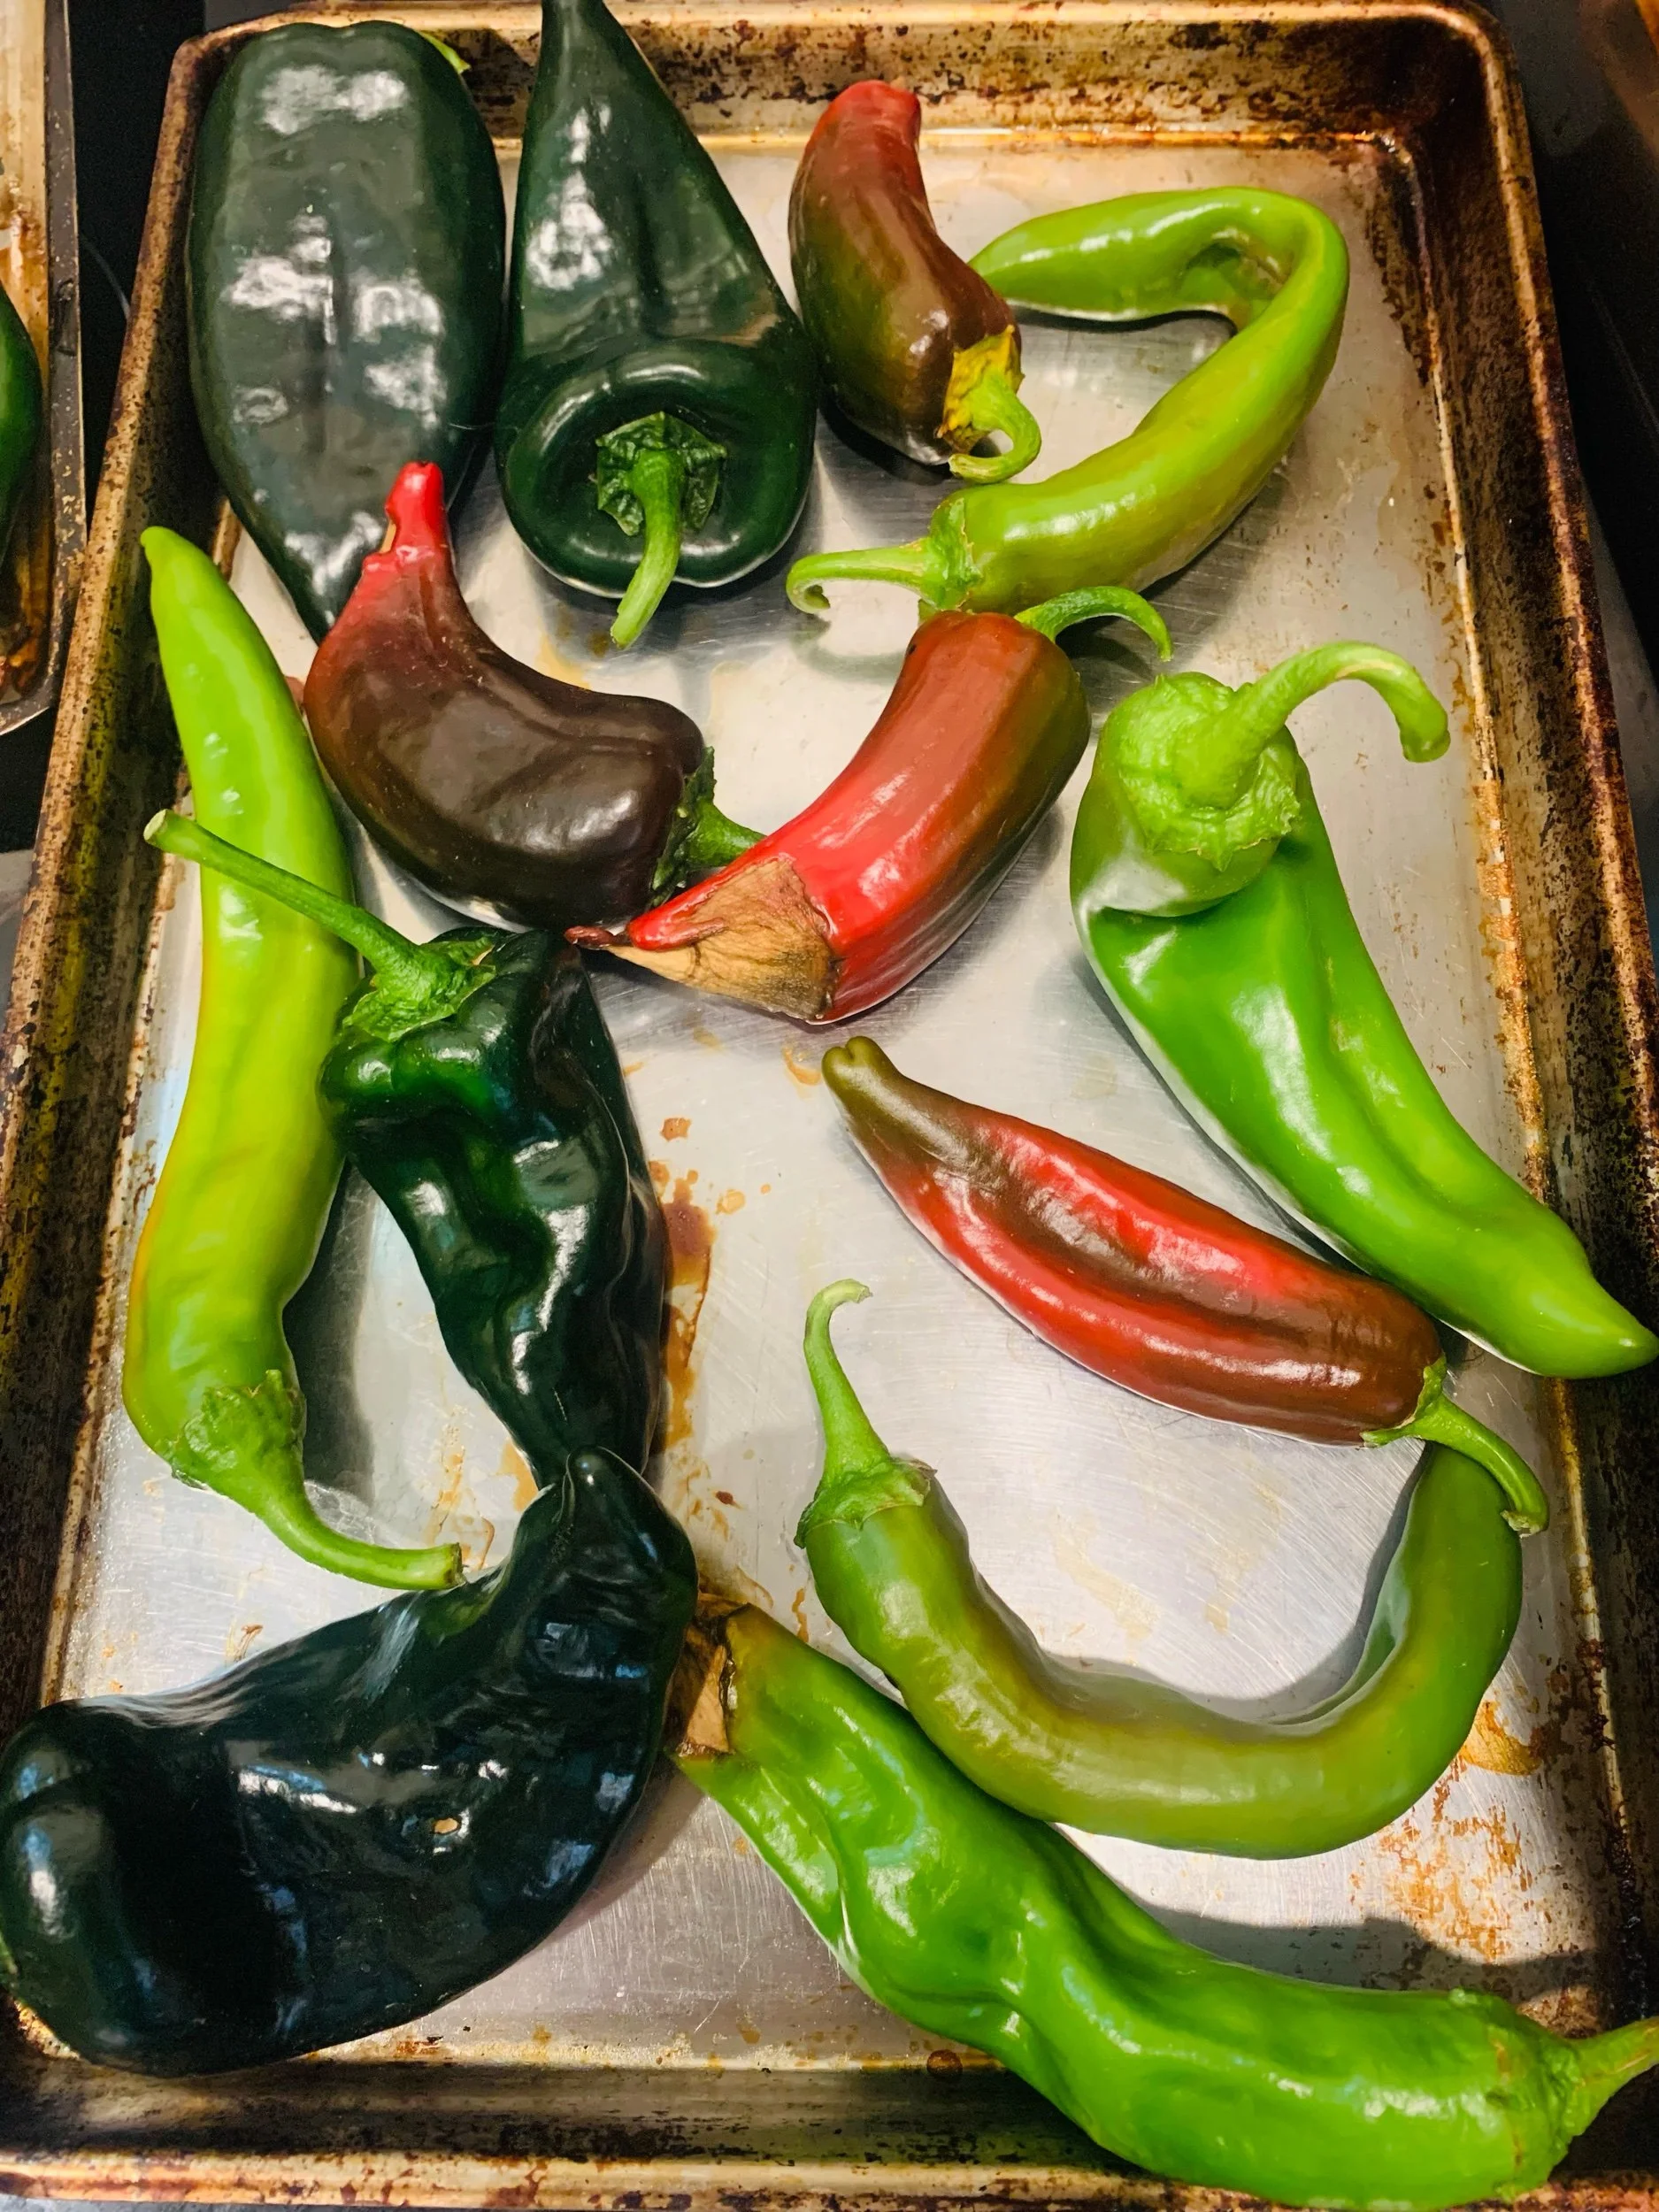
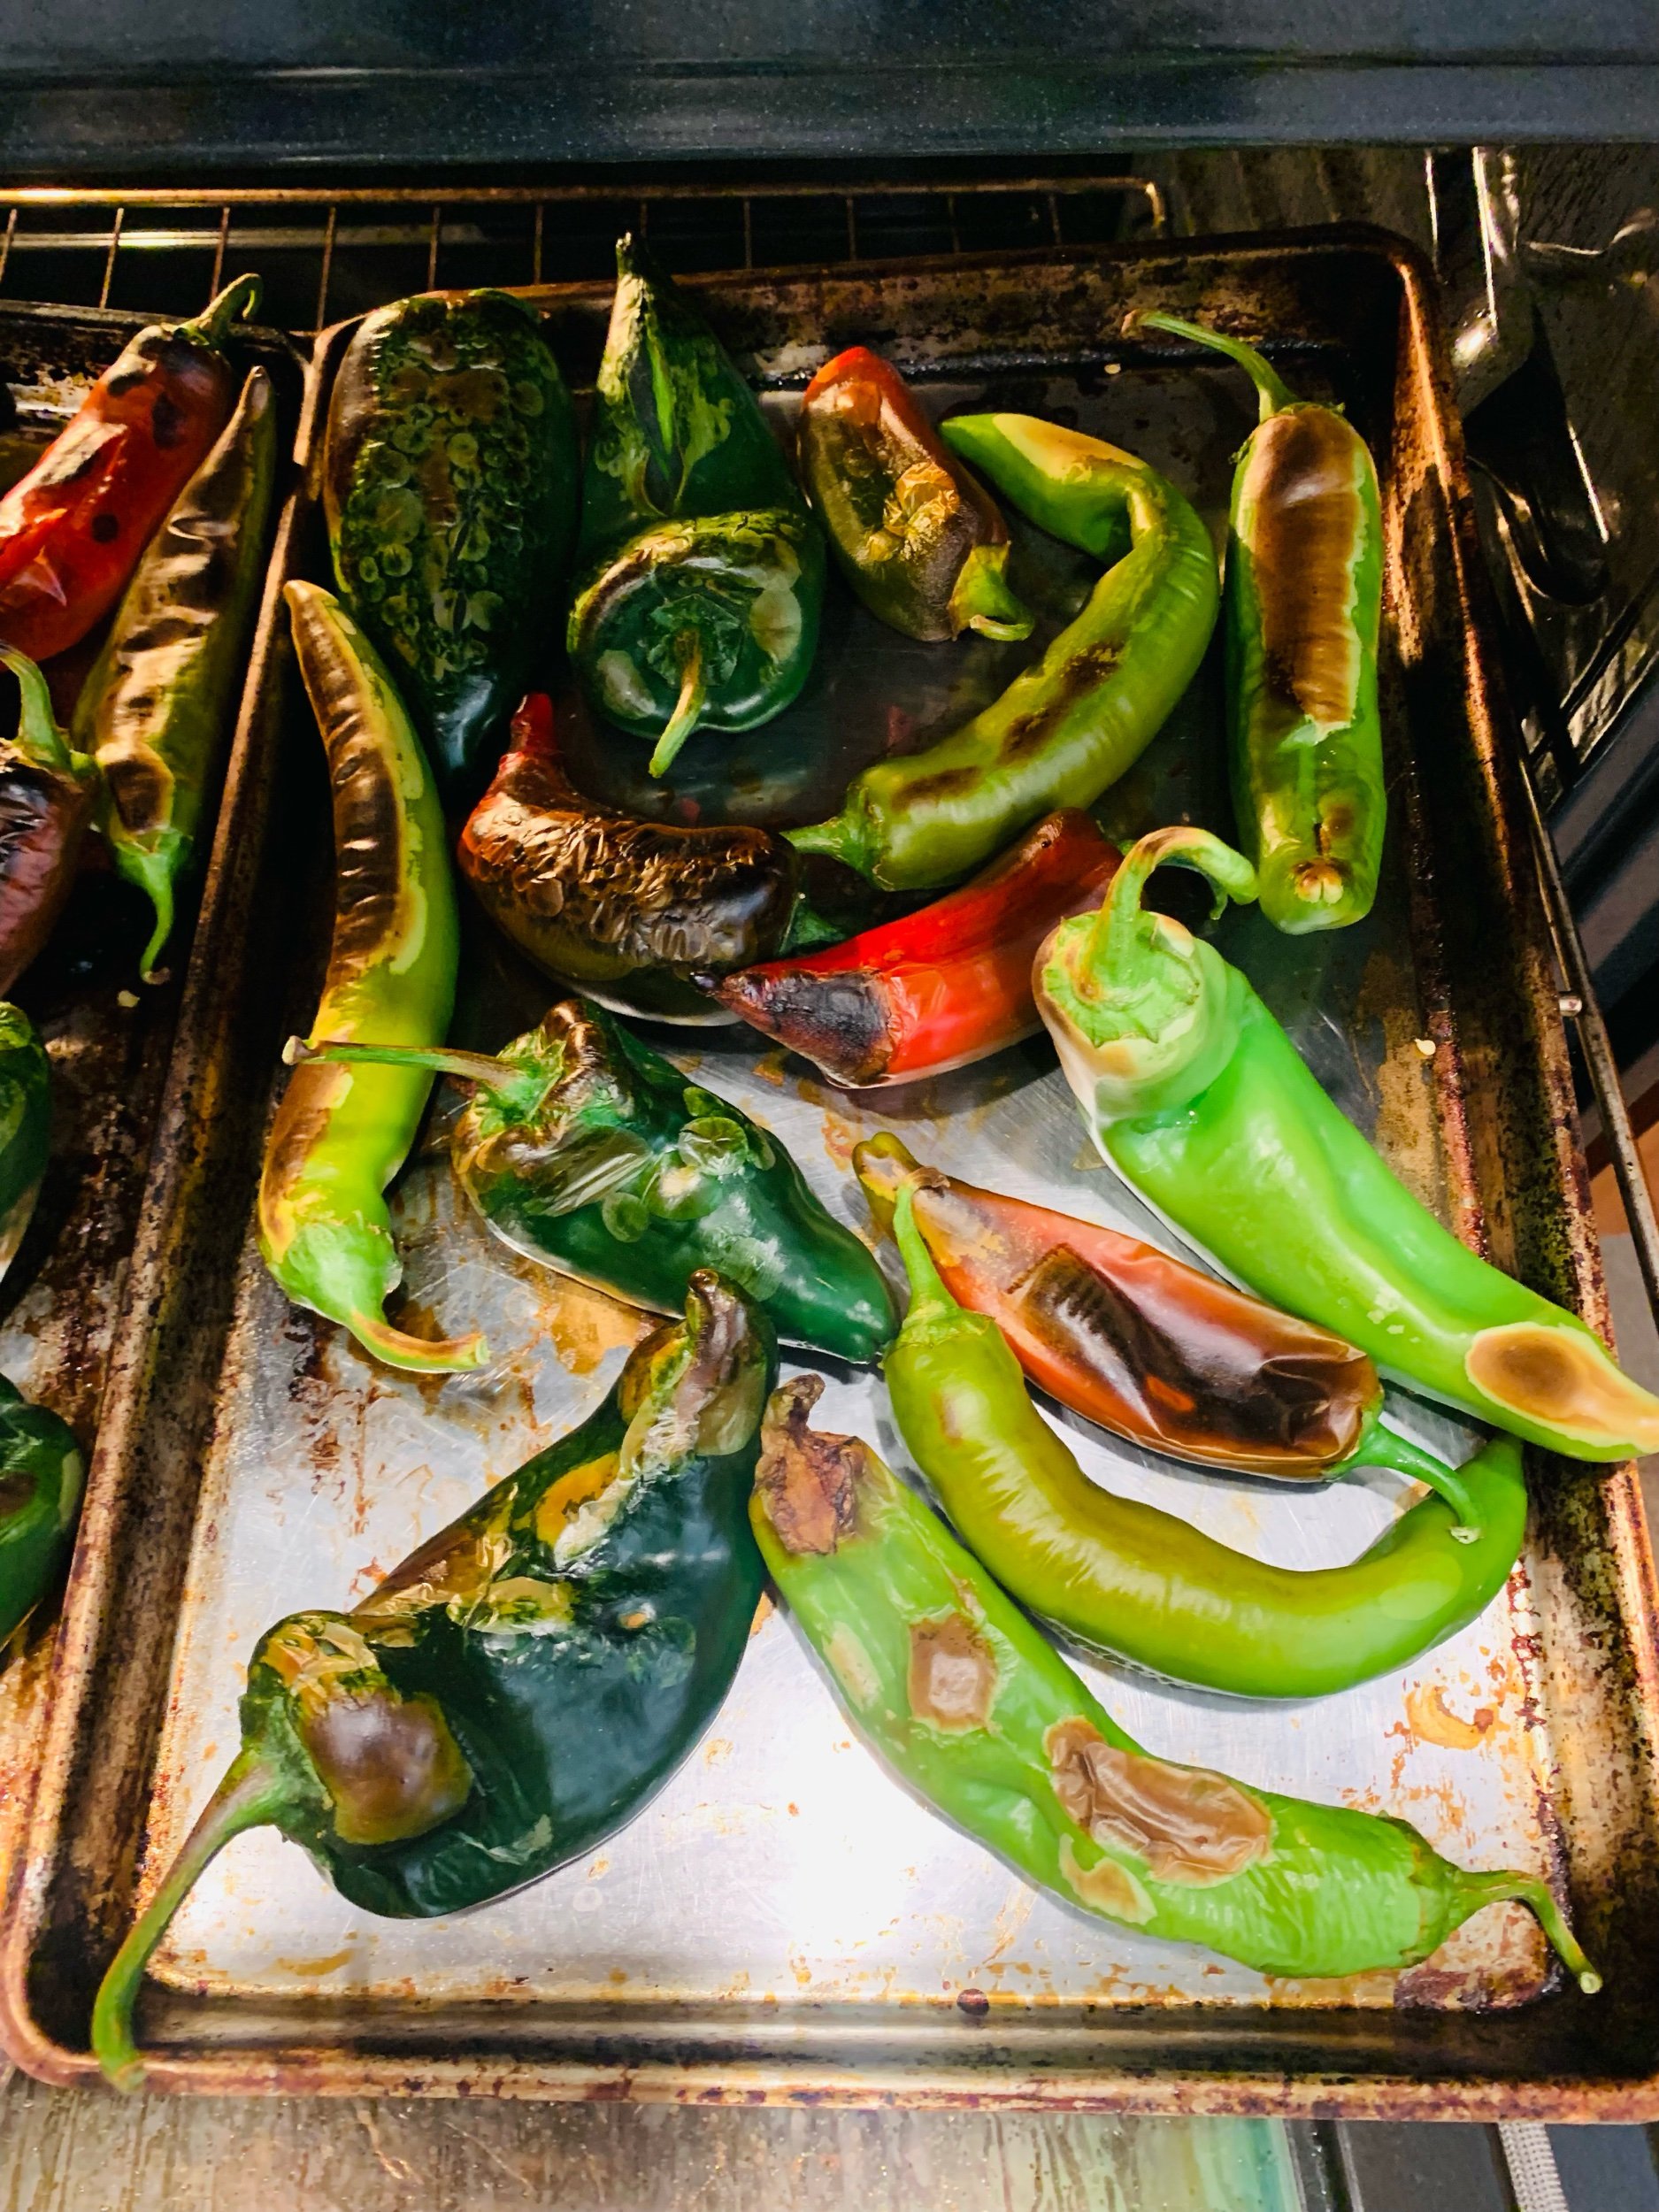
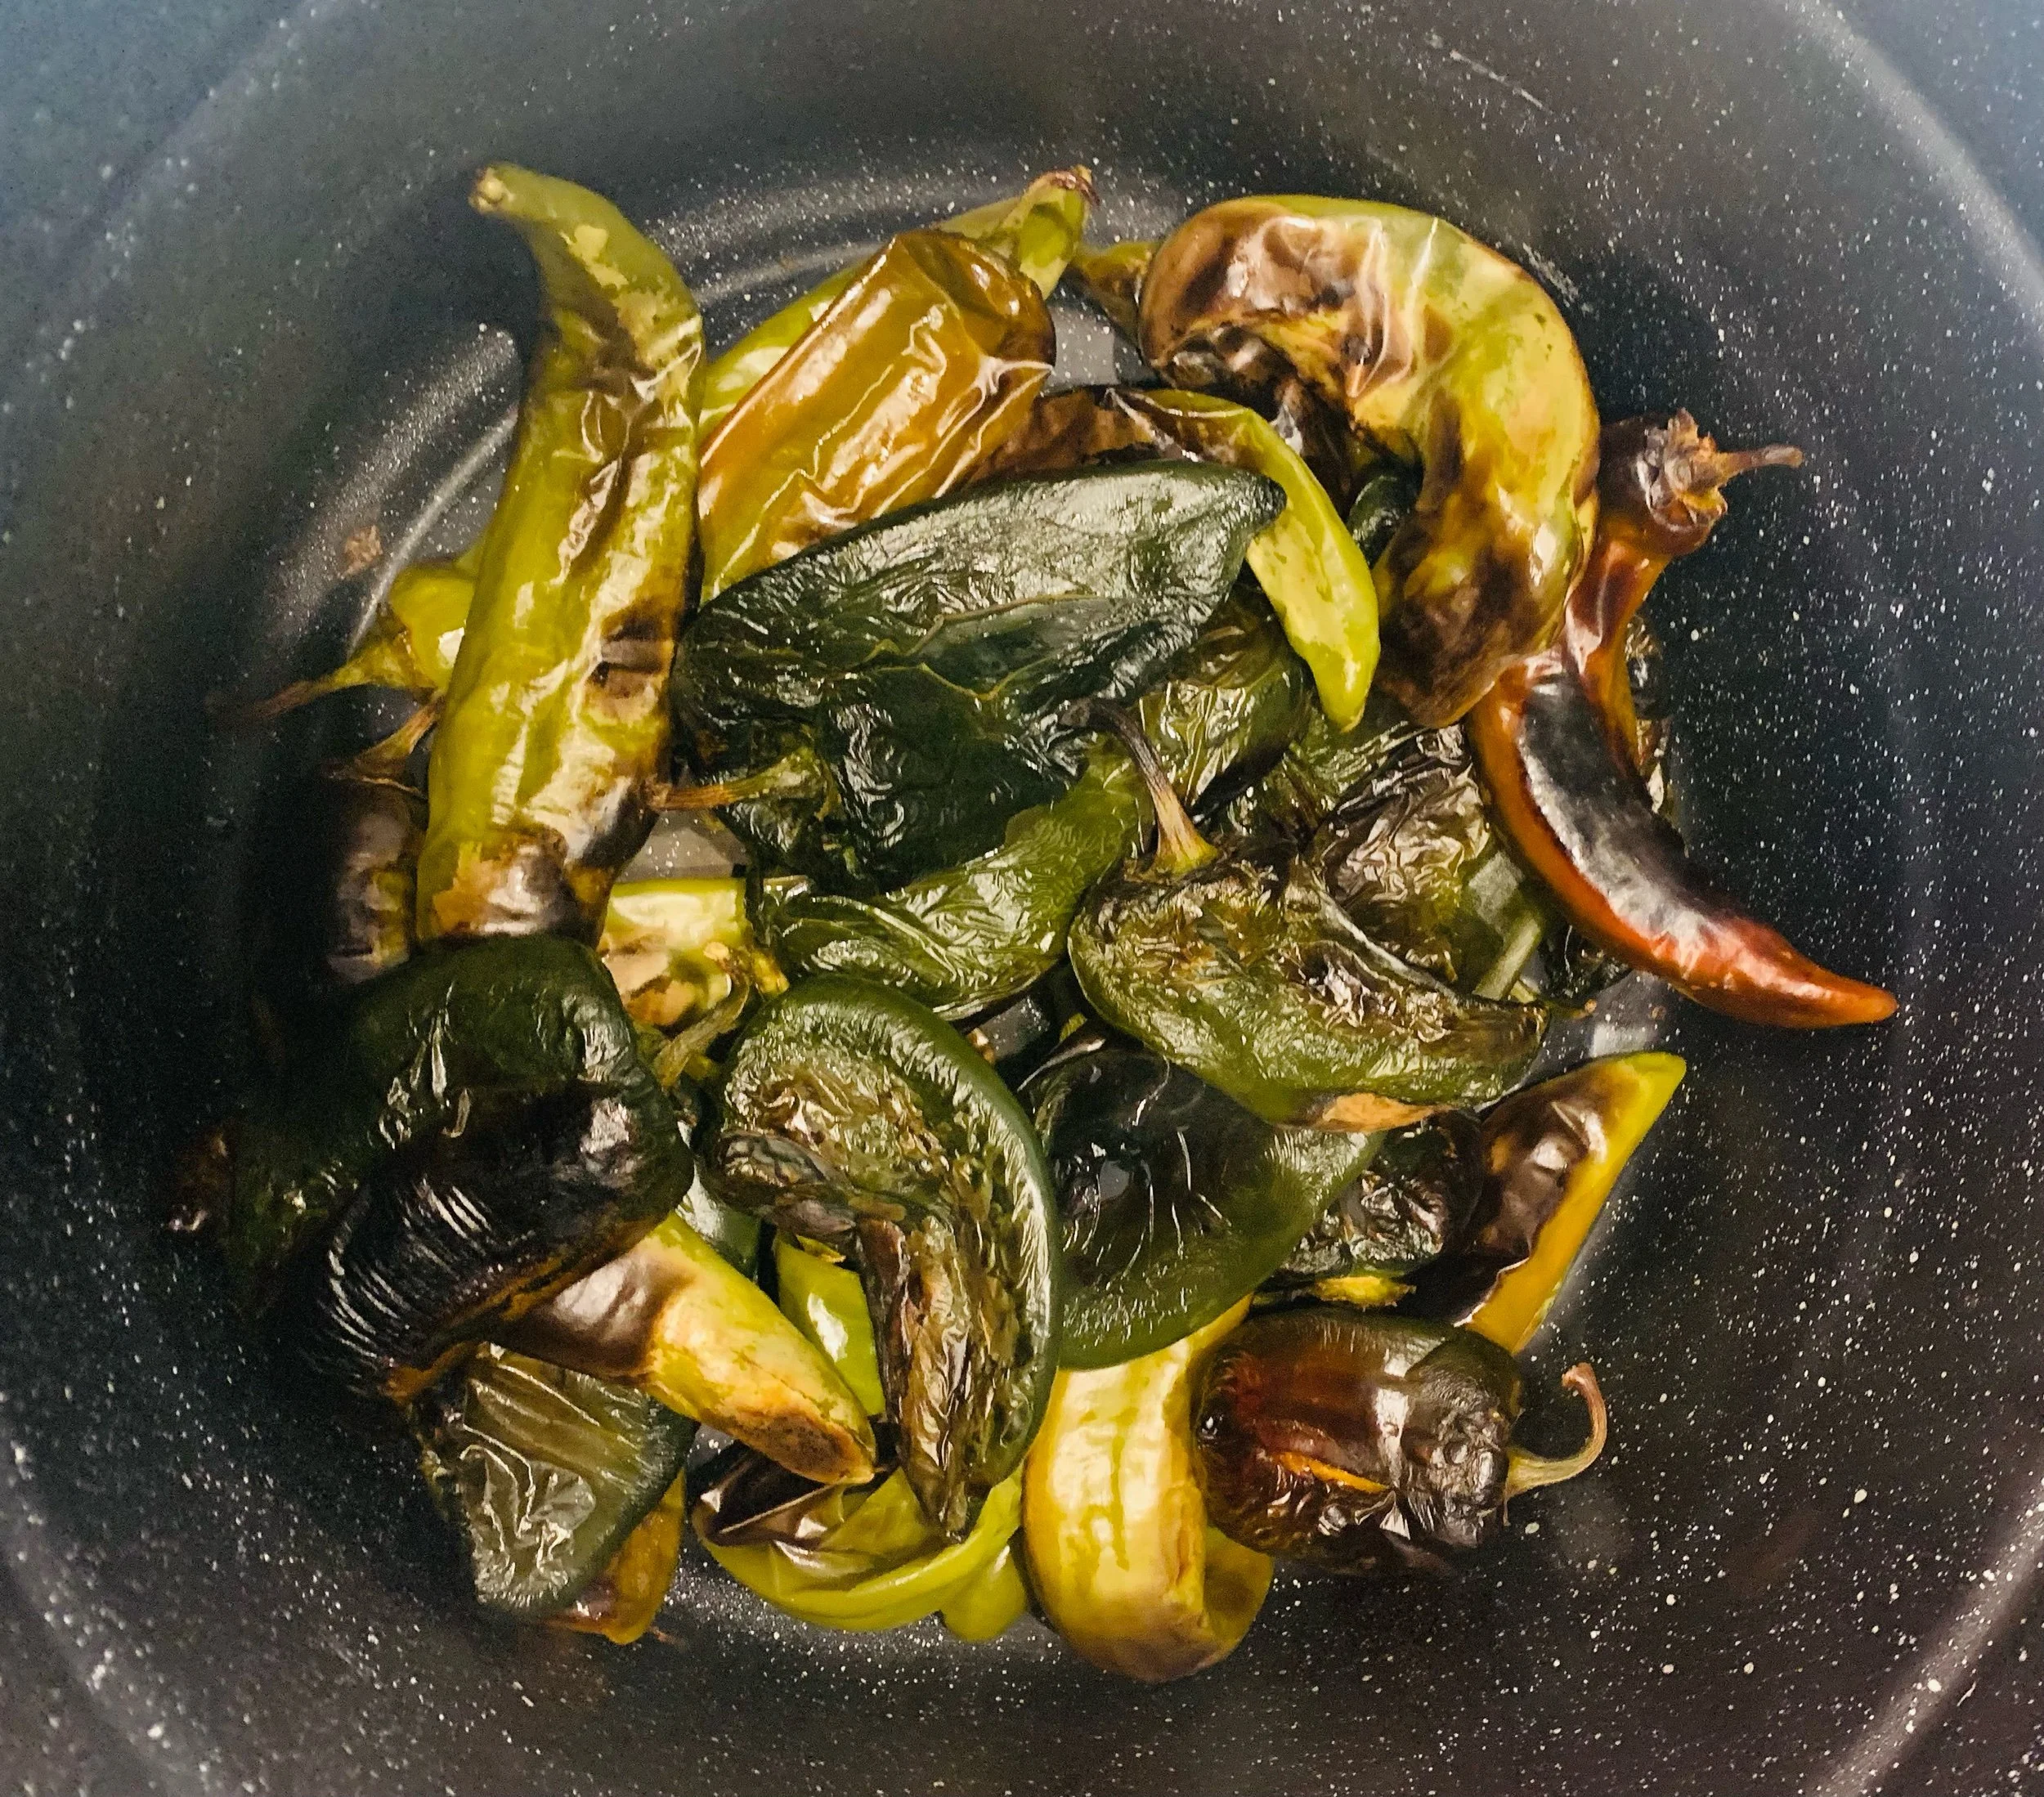
Broil peppers. Turn on the broiler in your oven and place an oven shelf at the highest level. Arrange peppers on a baking sheet in a single layer and broil for 4-5 minutes at a time, turning peppers as they blacken. The goal is to blacken most of the skin without burning the pepper’s flesh.
Loosen skin. Transfer peppers into your lidded pot and allow to sit for 10 or so minutes. This helps to loosen the skin from the peppers. Sometimes I’ll walk away at this point to do other things, allowing the skins to loosen and the peppers to cool.
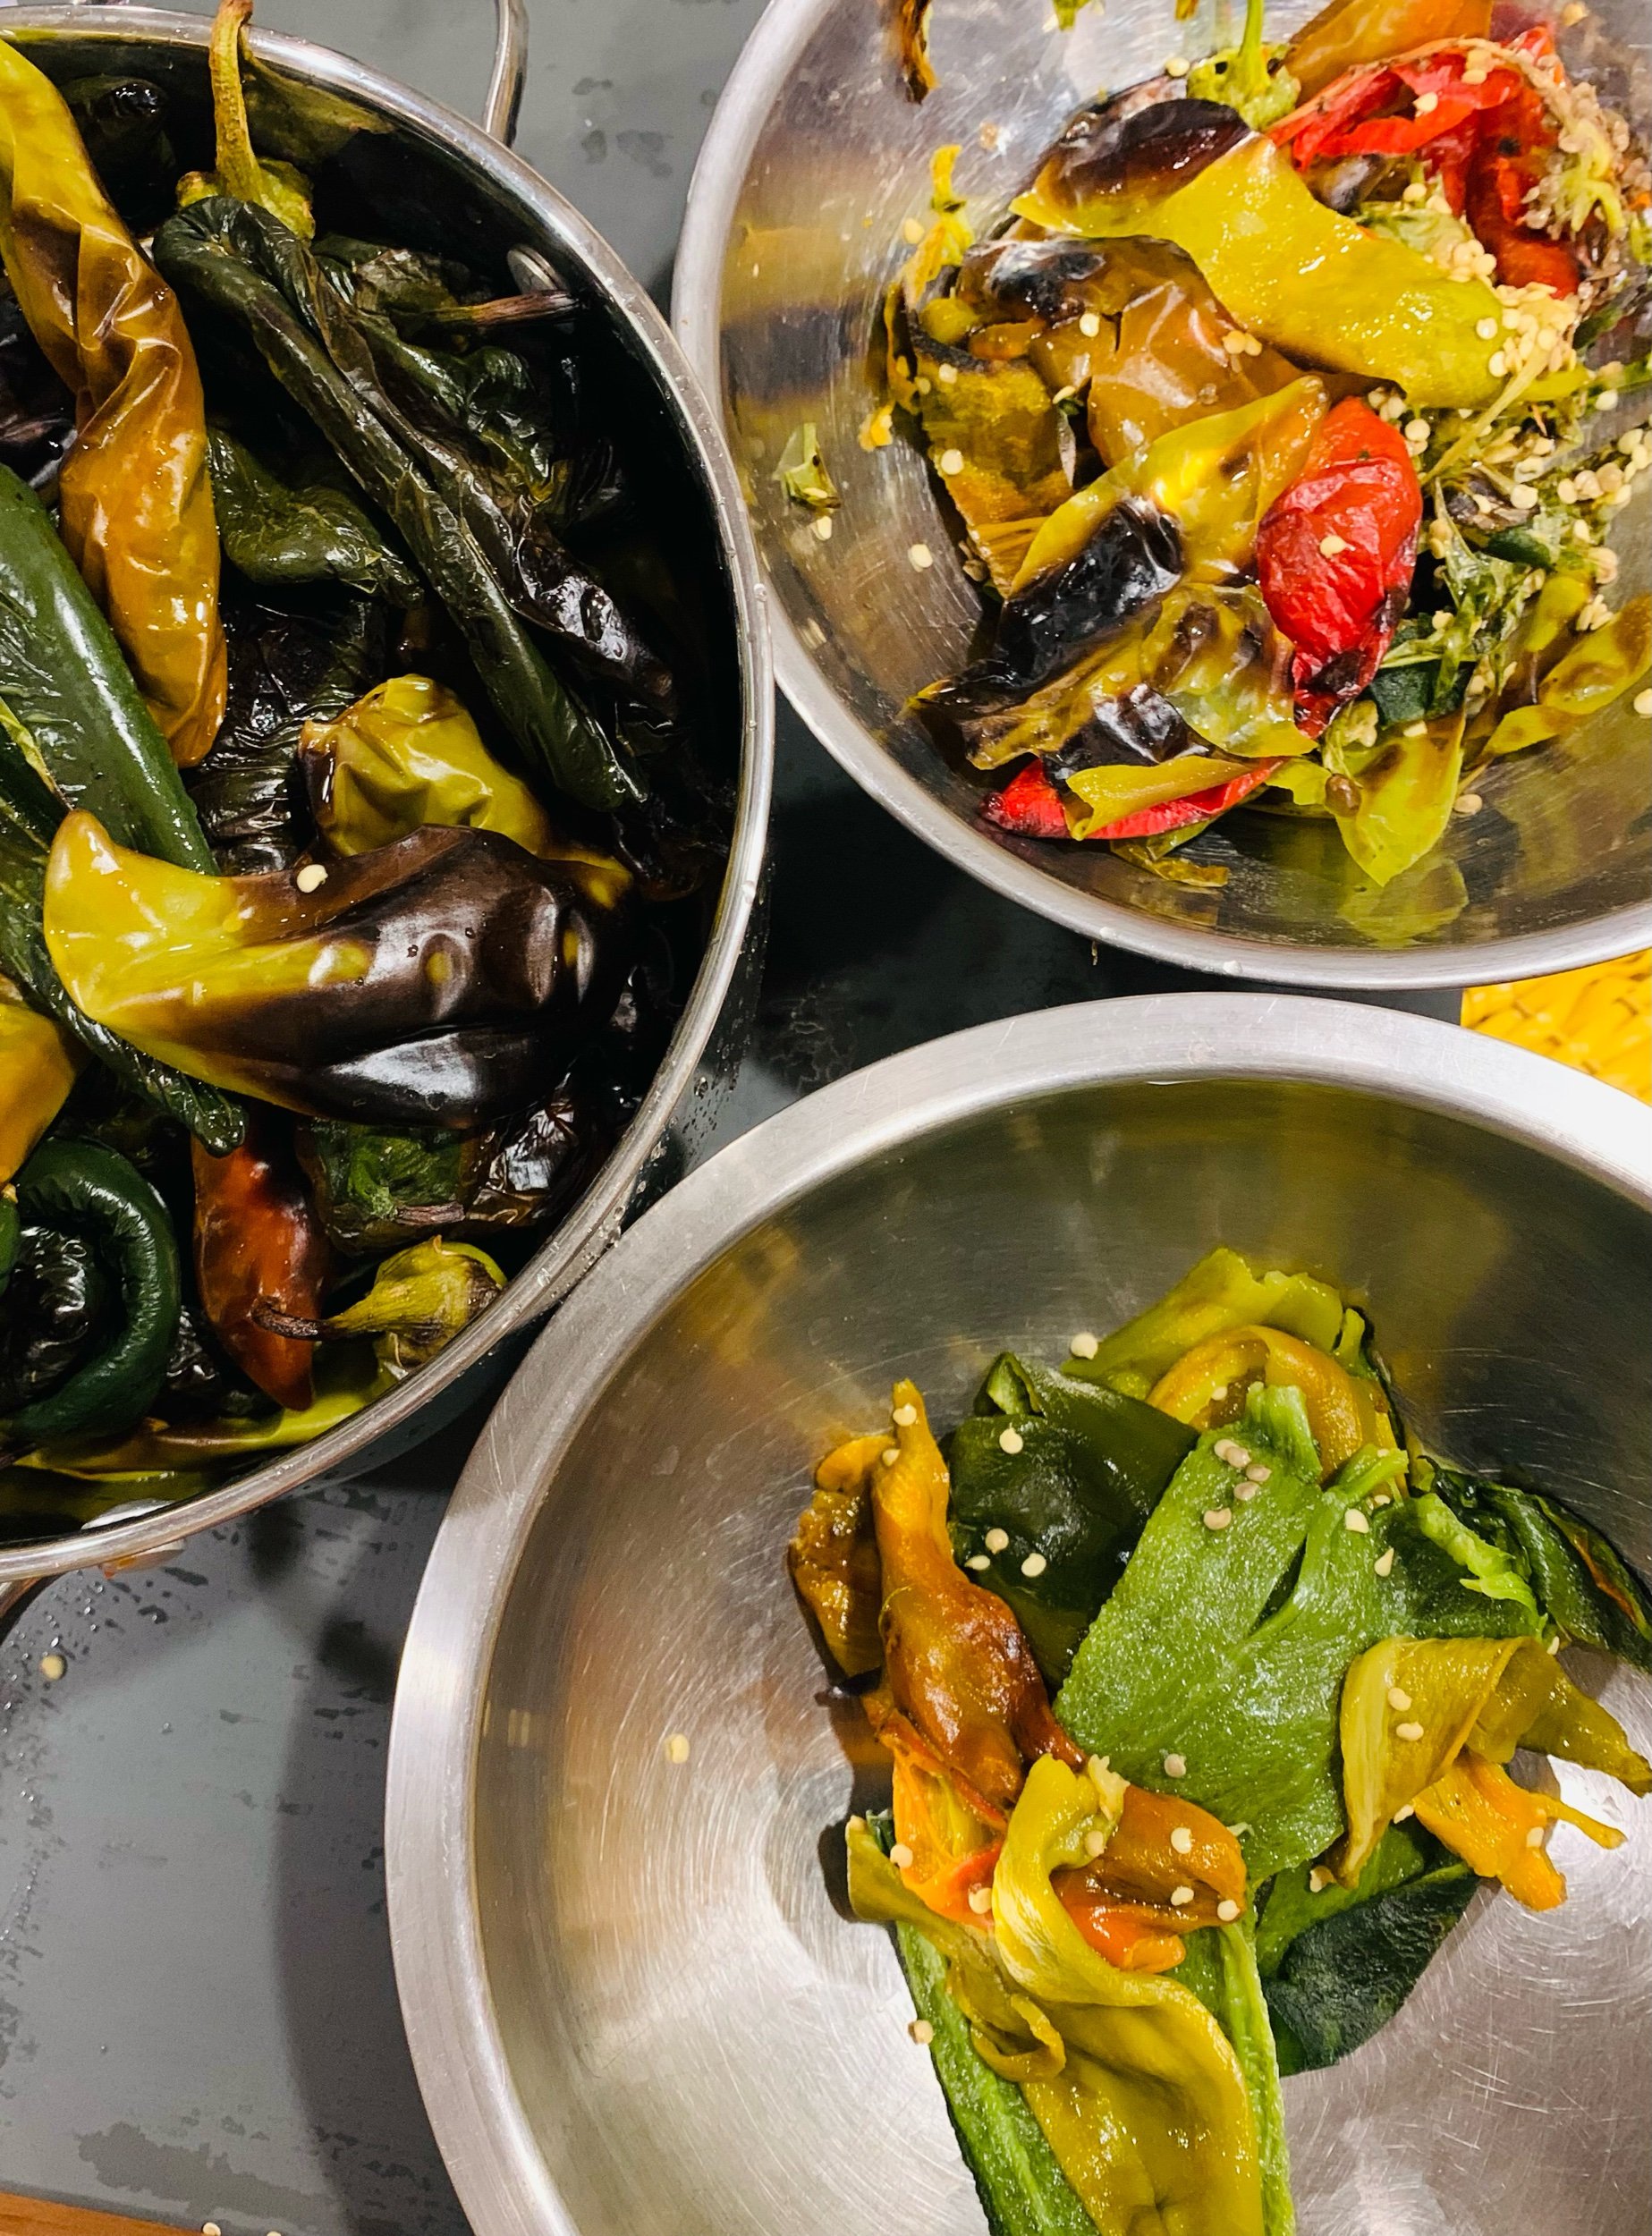
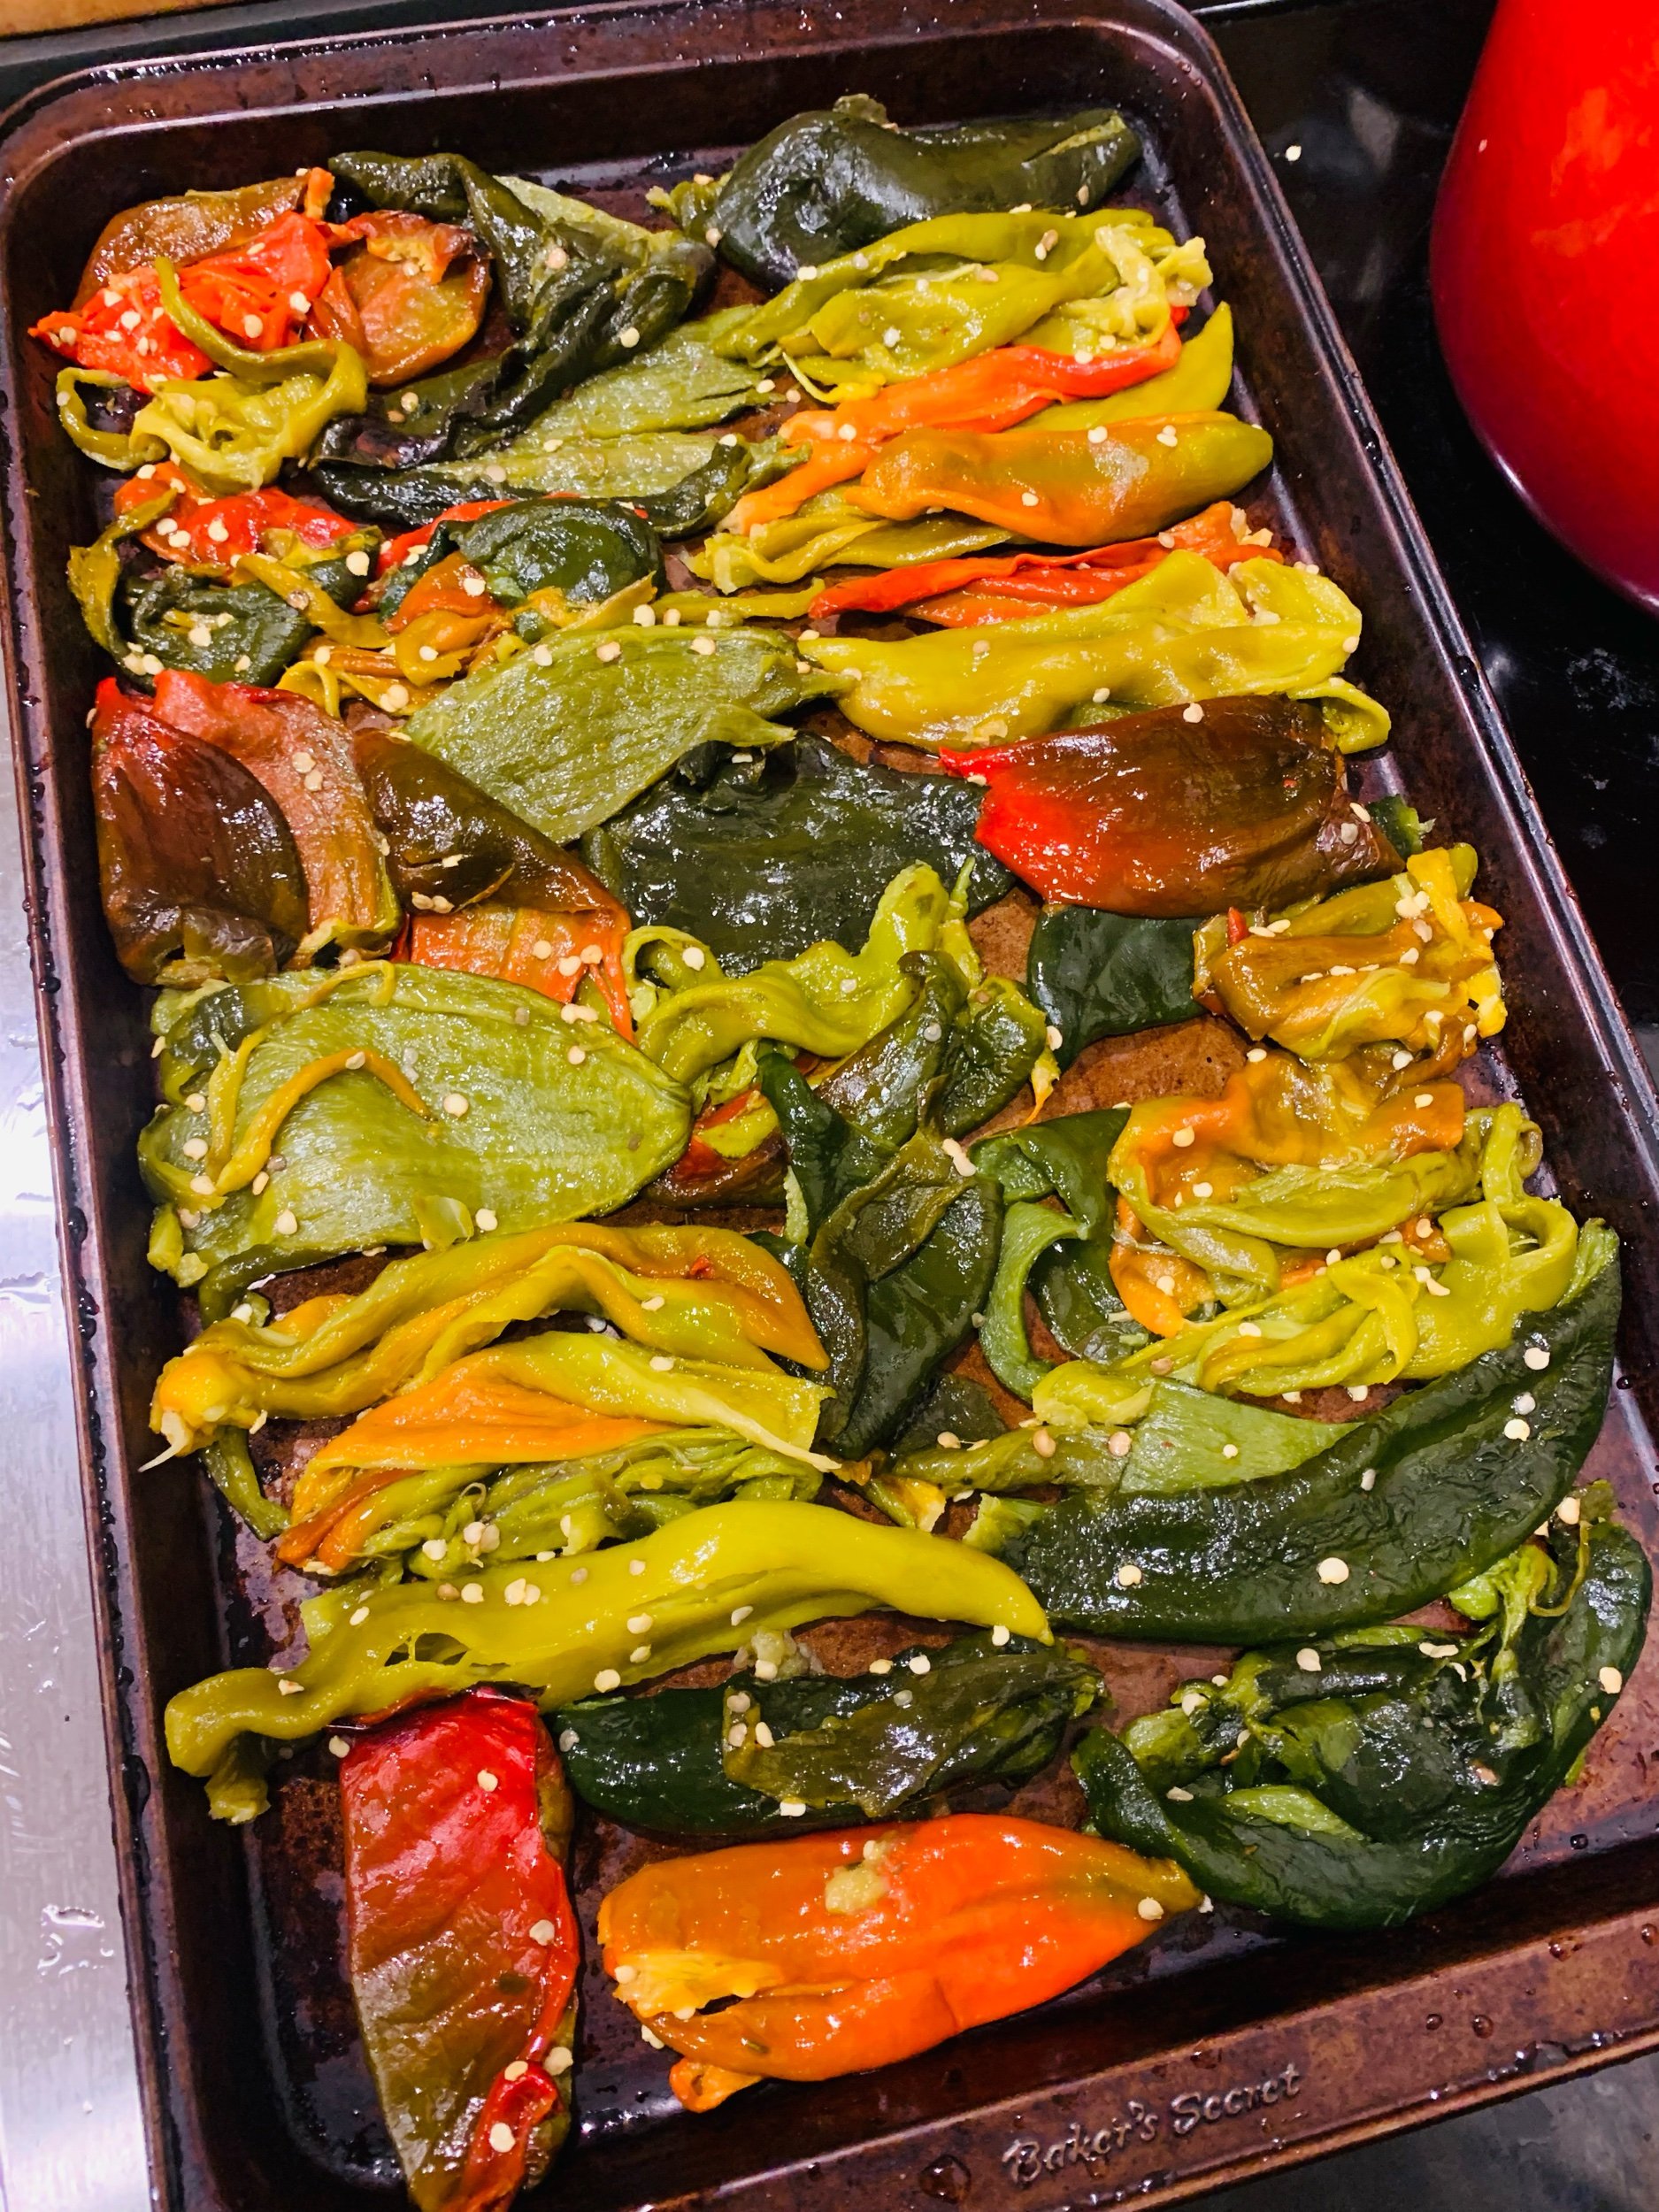
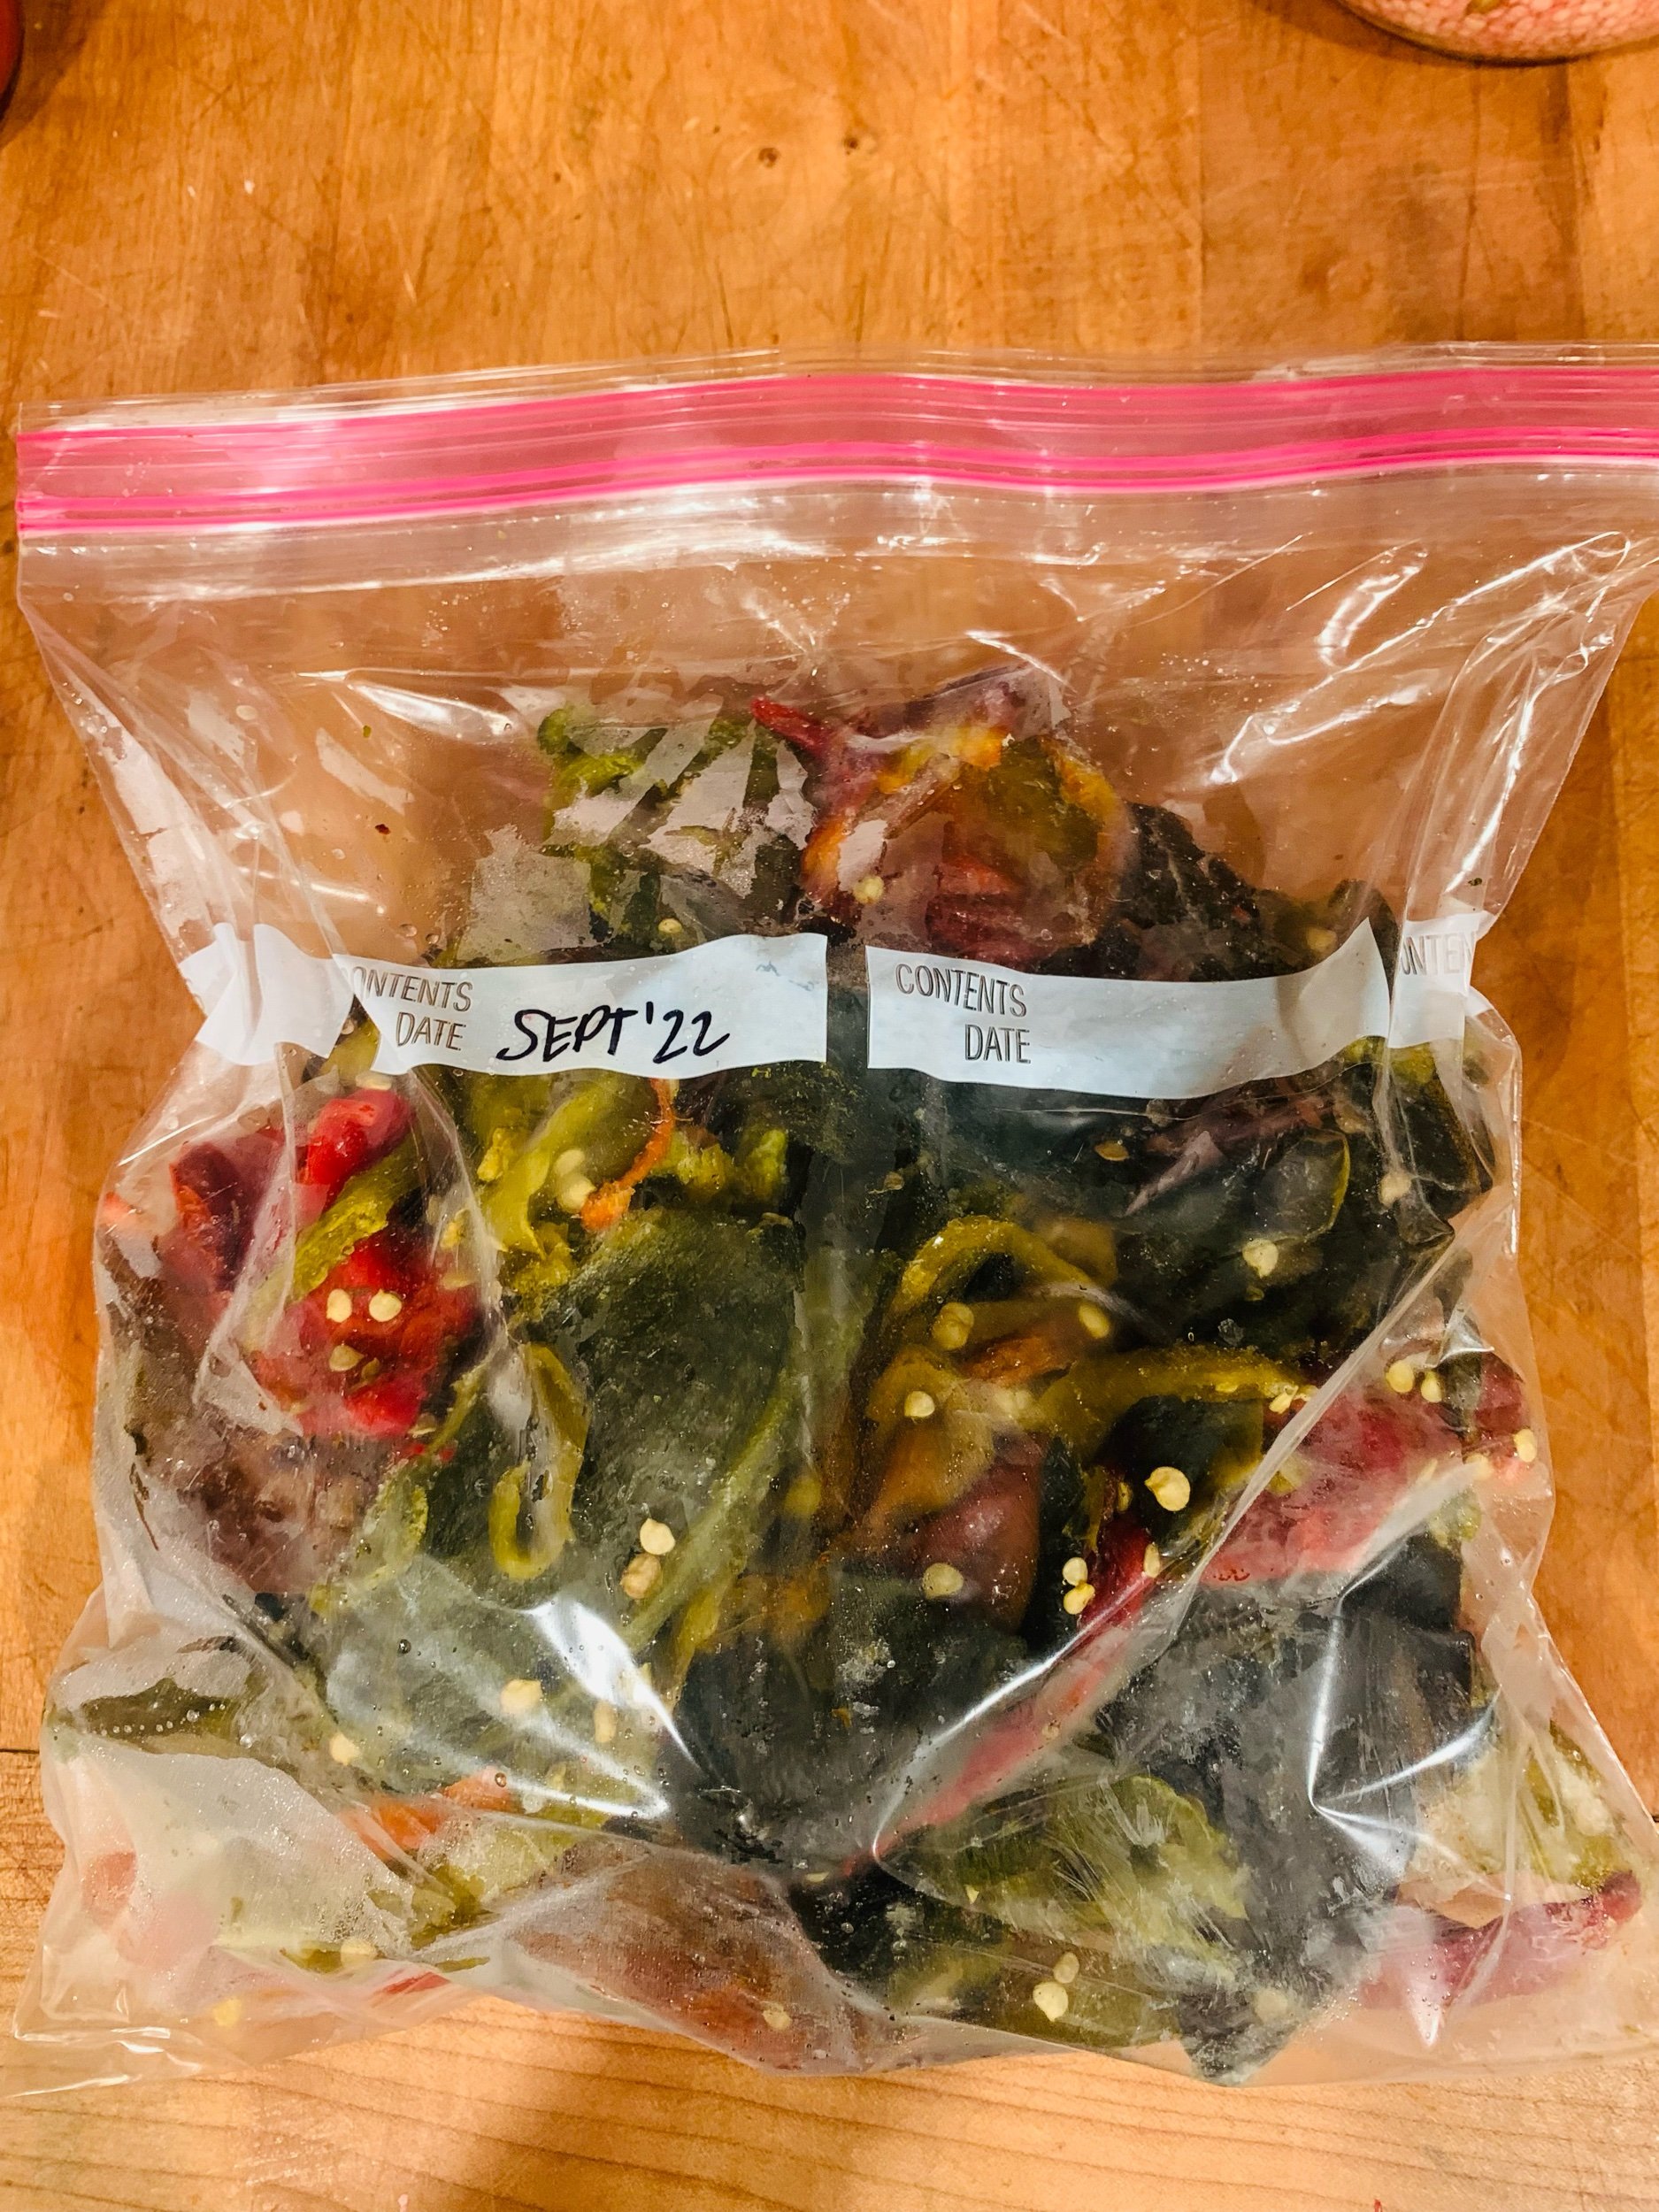
Prep to freeze. Remove seeds, stems and skins from peppers.* Arrange peppers on a baking sheet in a single layer and transfer to the freezer. Once peppers are frozen, place in freezer bags for long term storage. Don’t forget to label with the date!
Other methods: Char peppers on the grill or roast on the oven's highest temperature.
*Scroll to the bottom of the page for a creative application for pepper leftovers!
FERMENTed
Fermented peppers are something special. Not only is the color and flavor incredible, but the process of fermentation increases the amount of Vitamin C our bodies are able to absorb from the peppers. Needless to say, it’s the perfect condiment for a cold winter’s day.
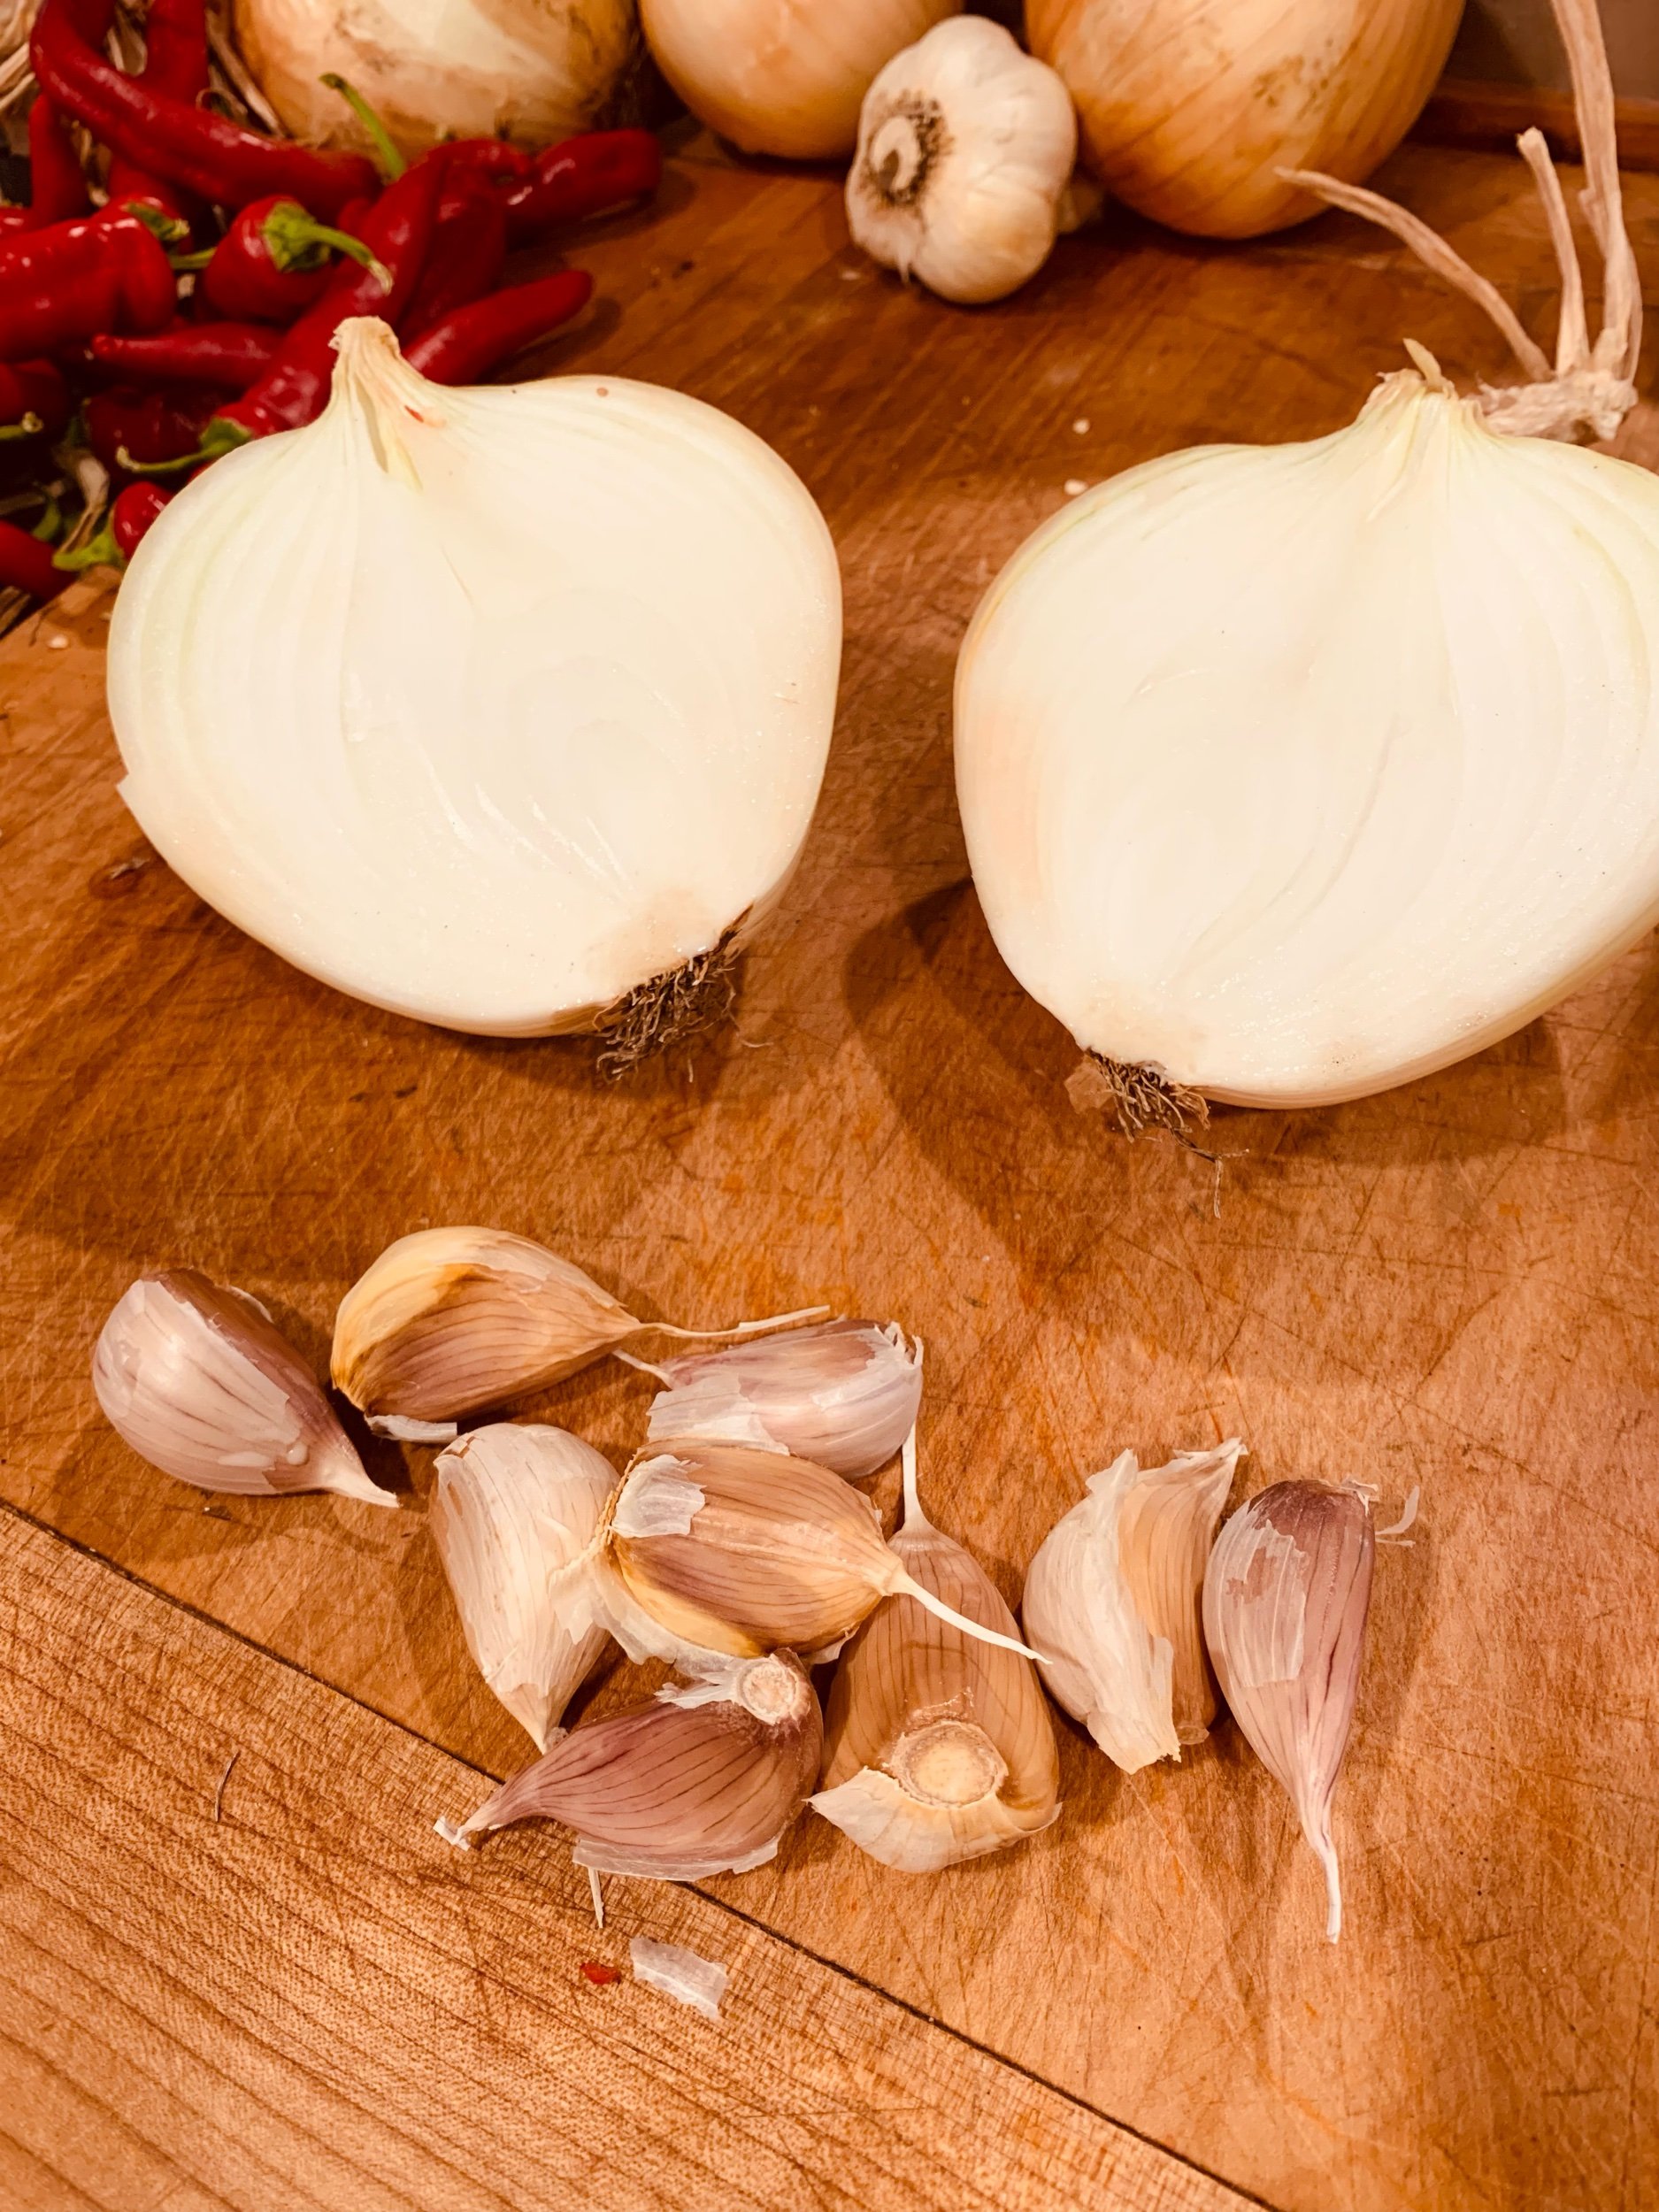
This method of fermentation is called lacto-fermentation and relies on the ratio of vegetables to salt to succeed. For this reason I don’t provide quantities for the peppers or the optional additions. I love this sort of recipe because it can help me move through whatever ingredients I have in mass. To help determine your ratios, know that onions add sweetness and body, carrots add body and color, and garlic and ginger are just good.
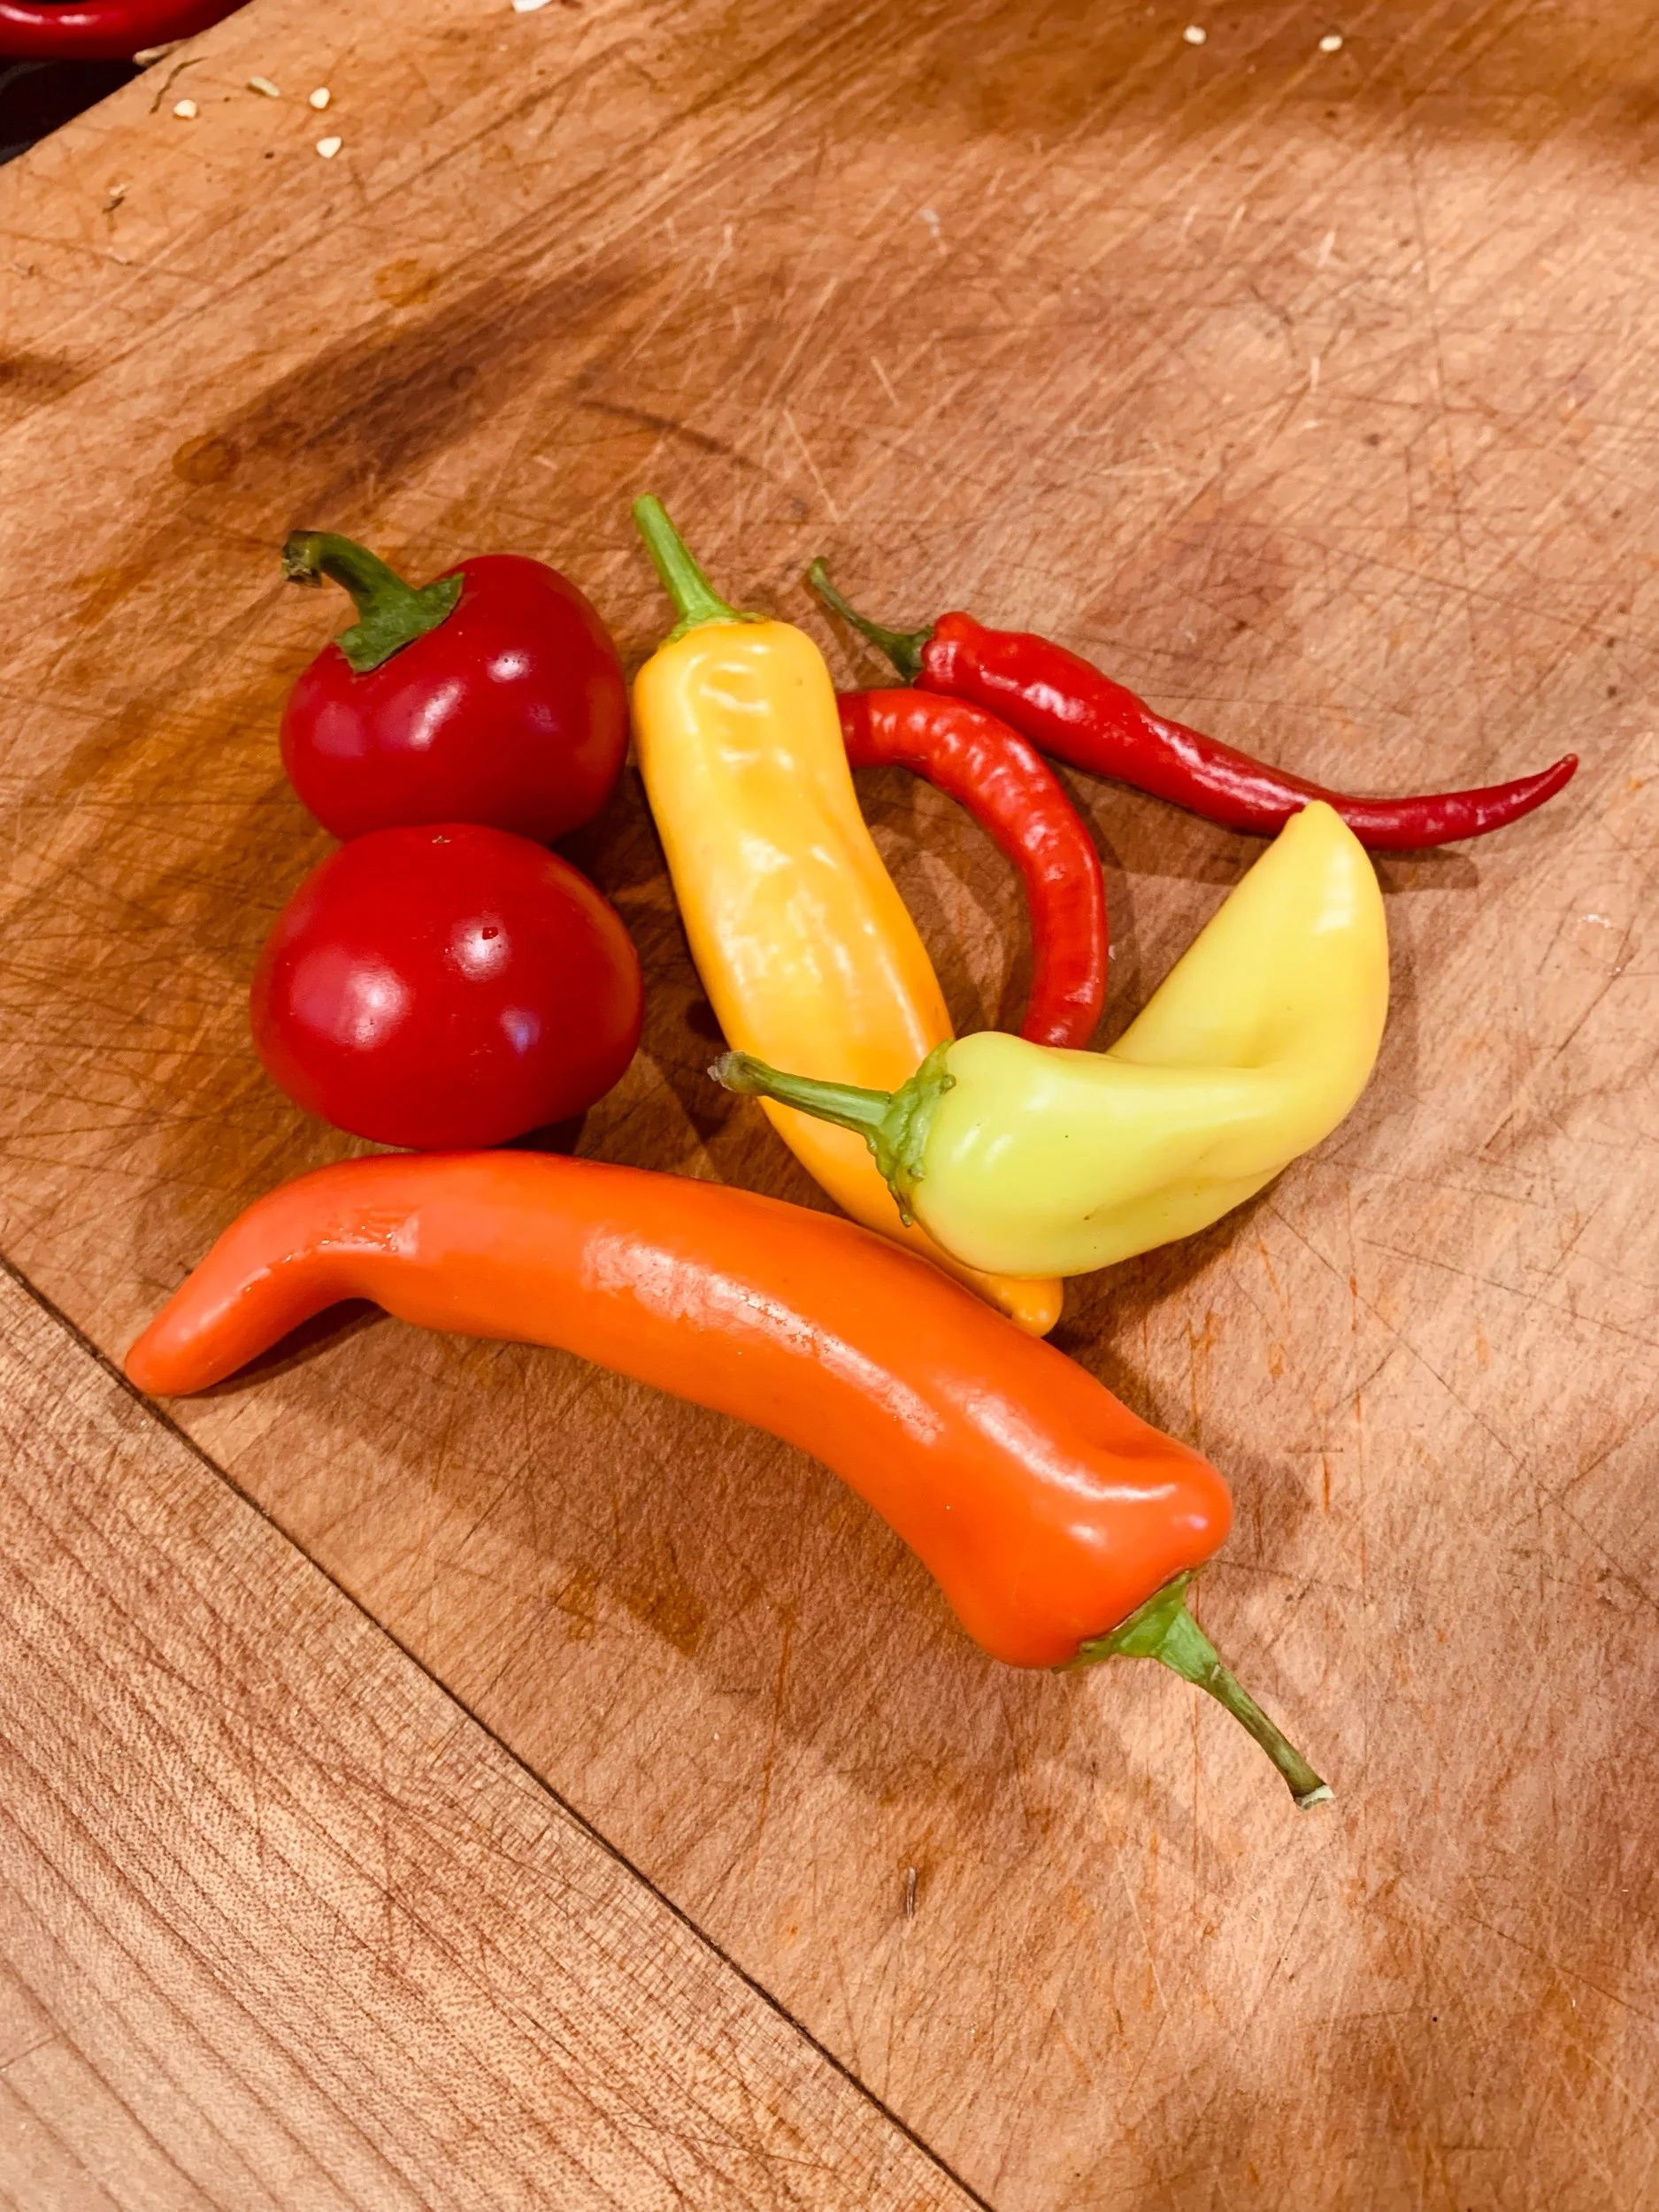
Peppers on the color palette from yellow to red lend to a vibrant red-orange mash that brightens any meal. Use the combination of sweet and hot peppers that you are comfortable with. If the mash turns out too hot to spoon over eggs, you can still stir it into soup for some added heat. And don’t worry about being bored if you use only sweet peppers- the fermentation process will add new dimensions to their flavor that is anything but bland.


Pepper Mash
INGREDIENTS
Peppers of any variety, seeded and roughly chopped
Sea salt, or other salt free of additives
Optional additions: onion, garlic, carrot, ginger
TOOLS
Knife
Cutting board
Food processor or other blending tool
Scale or measuring spoons
INSTRUCTIONS
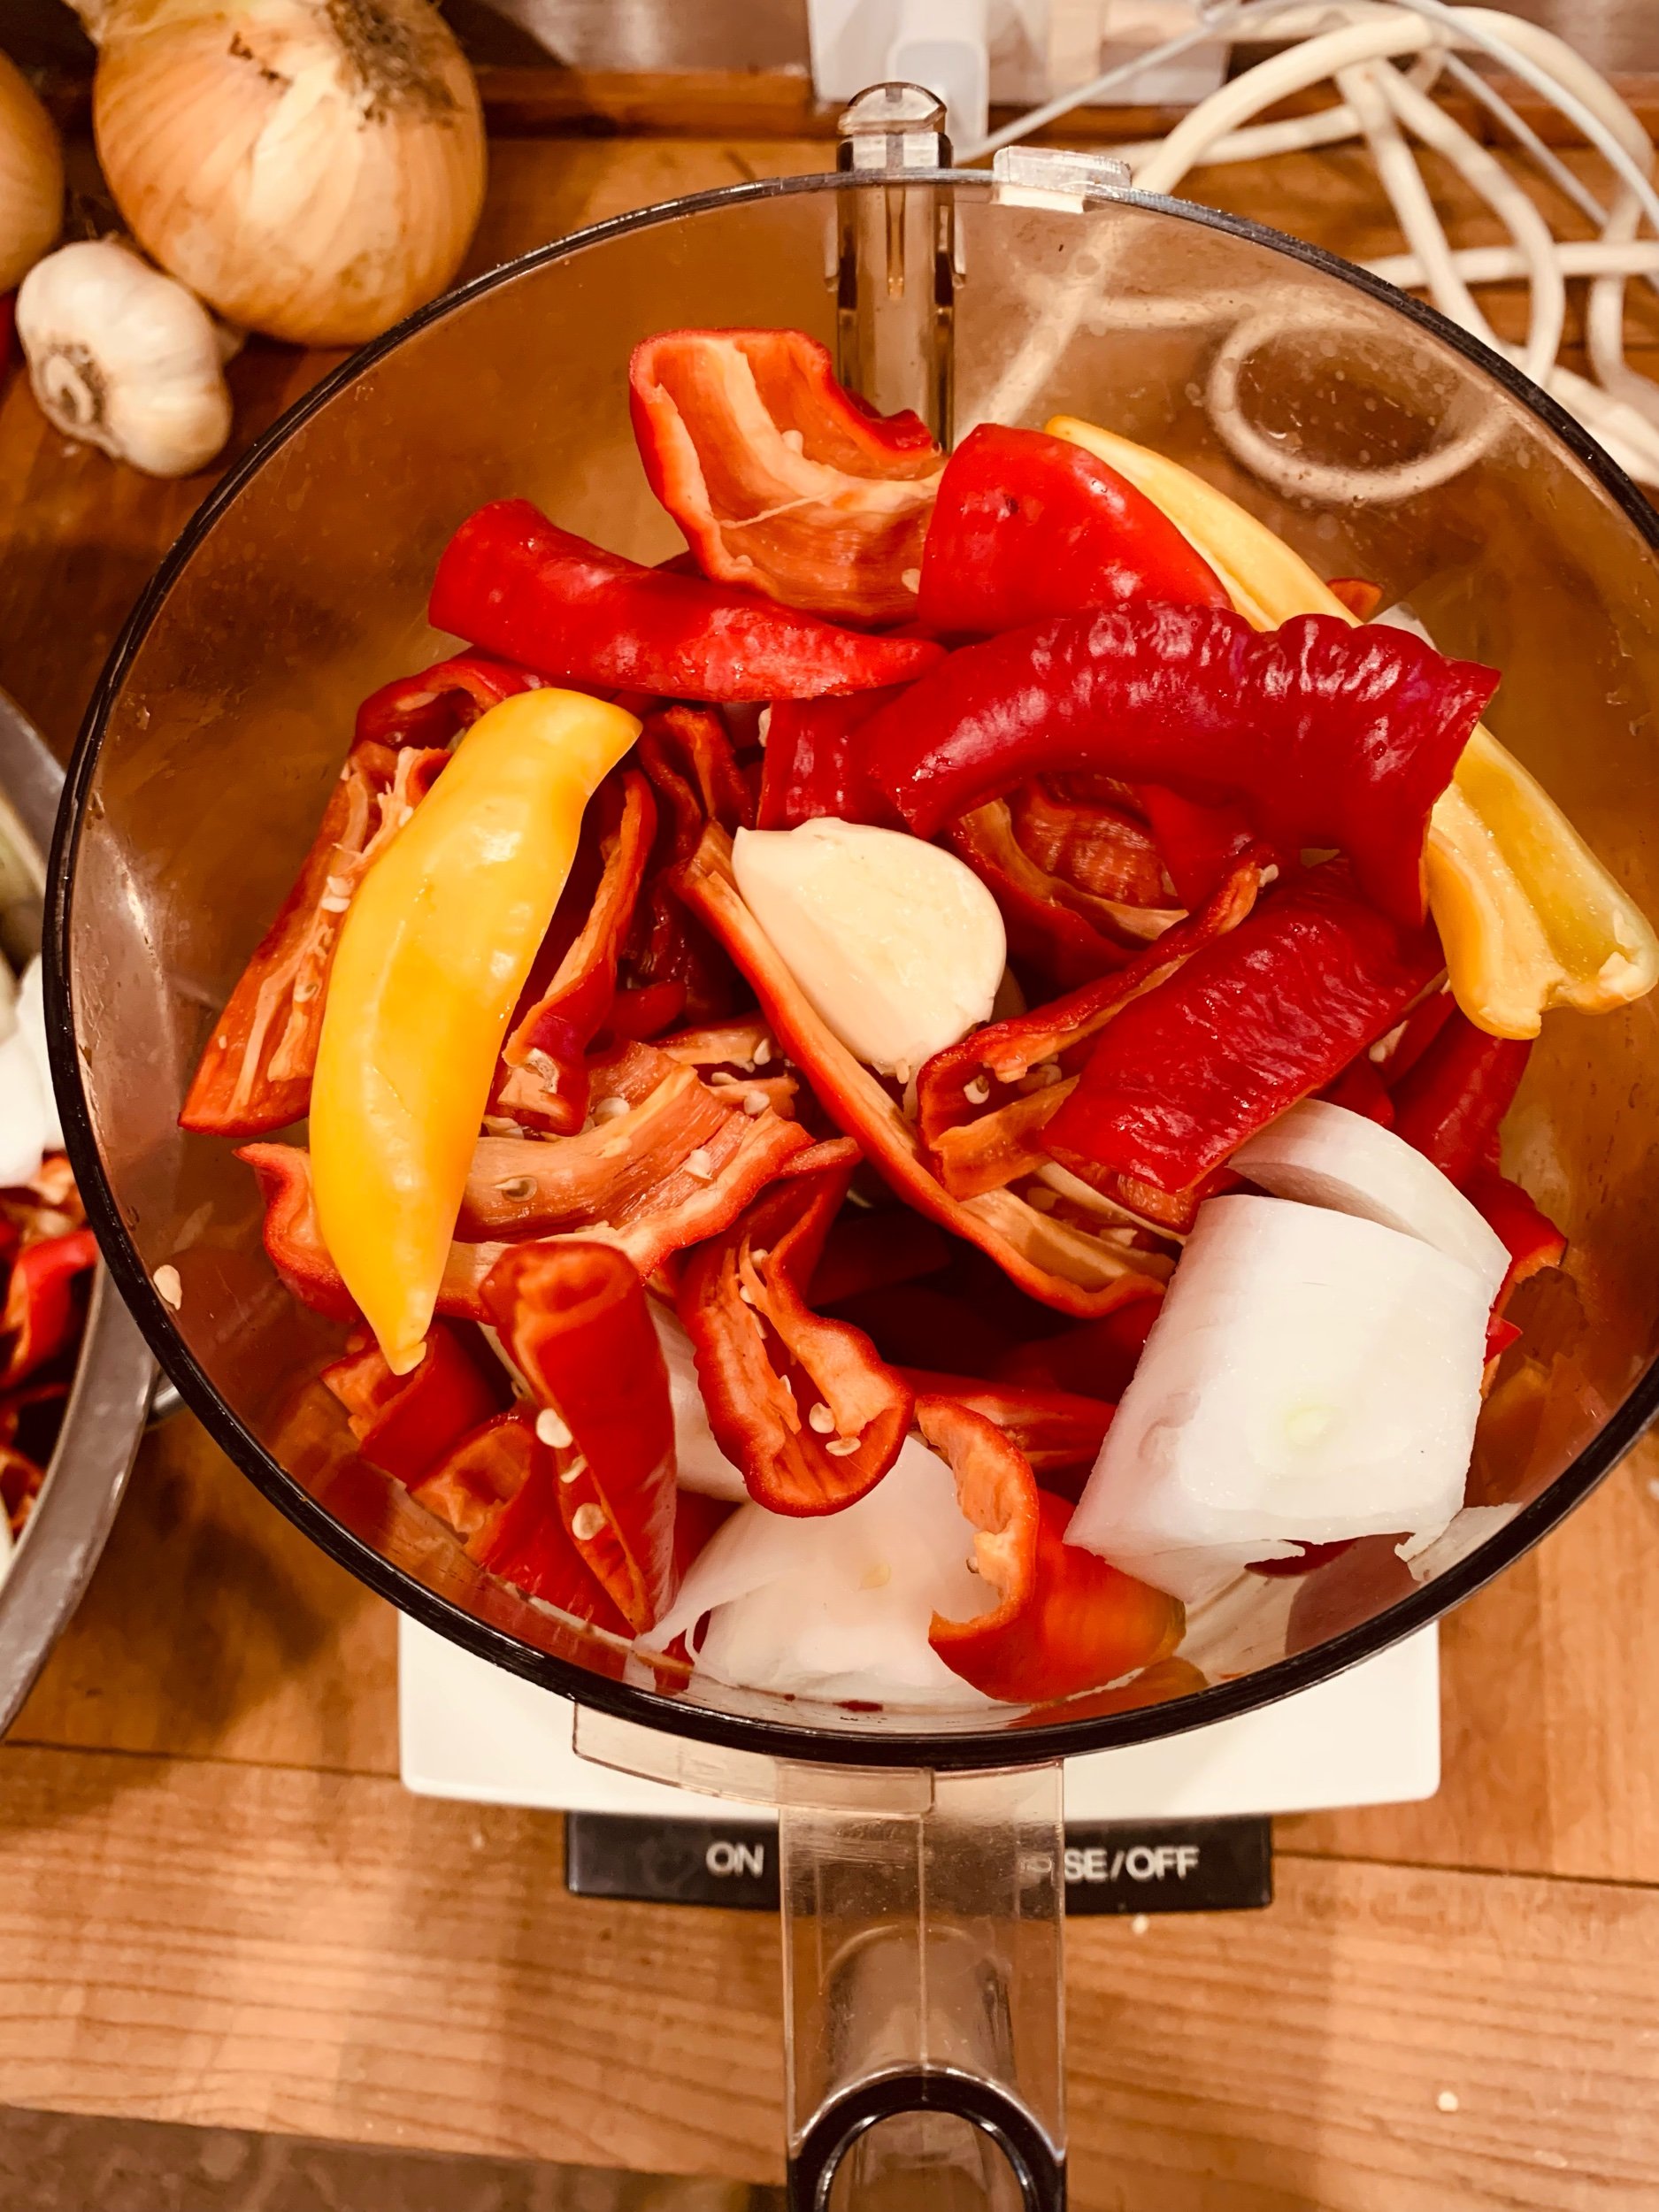
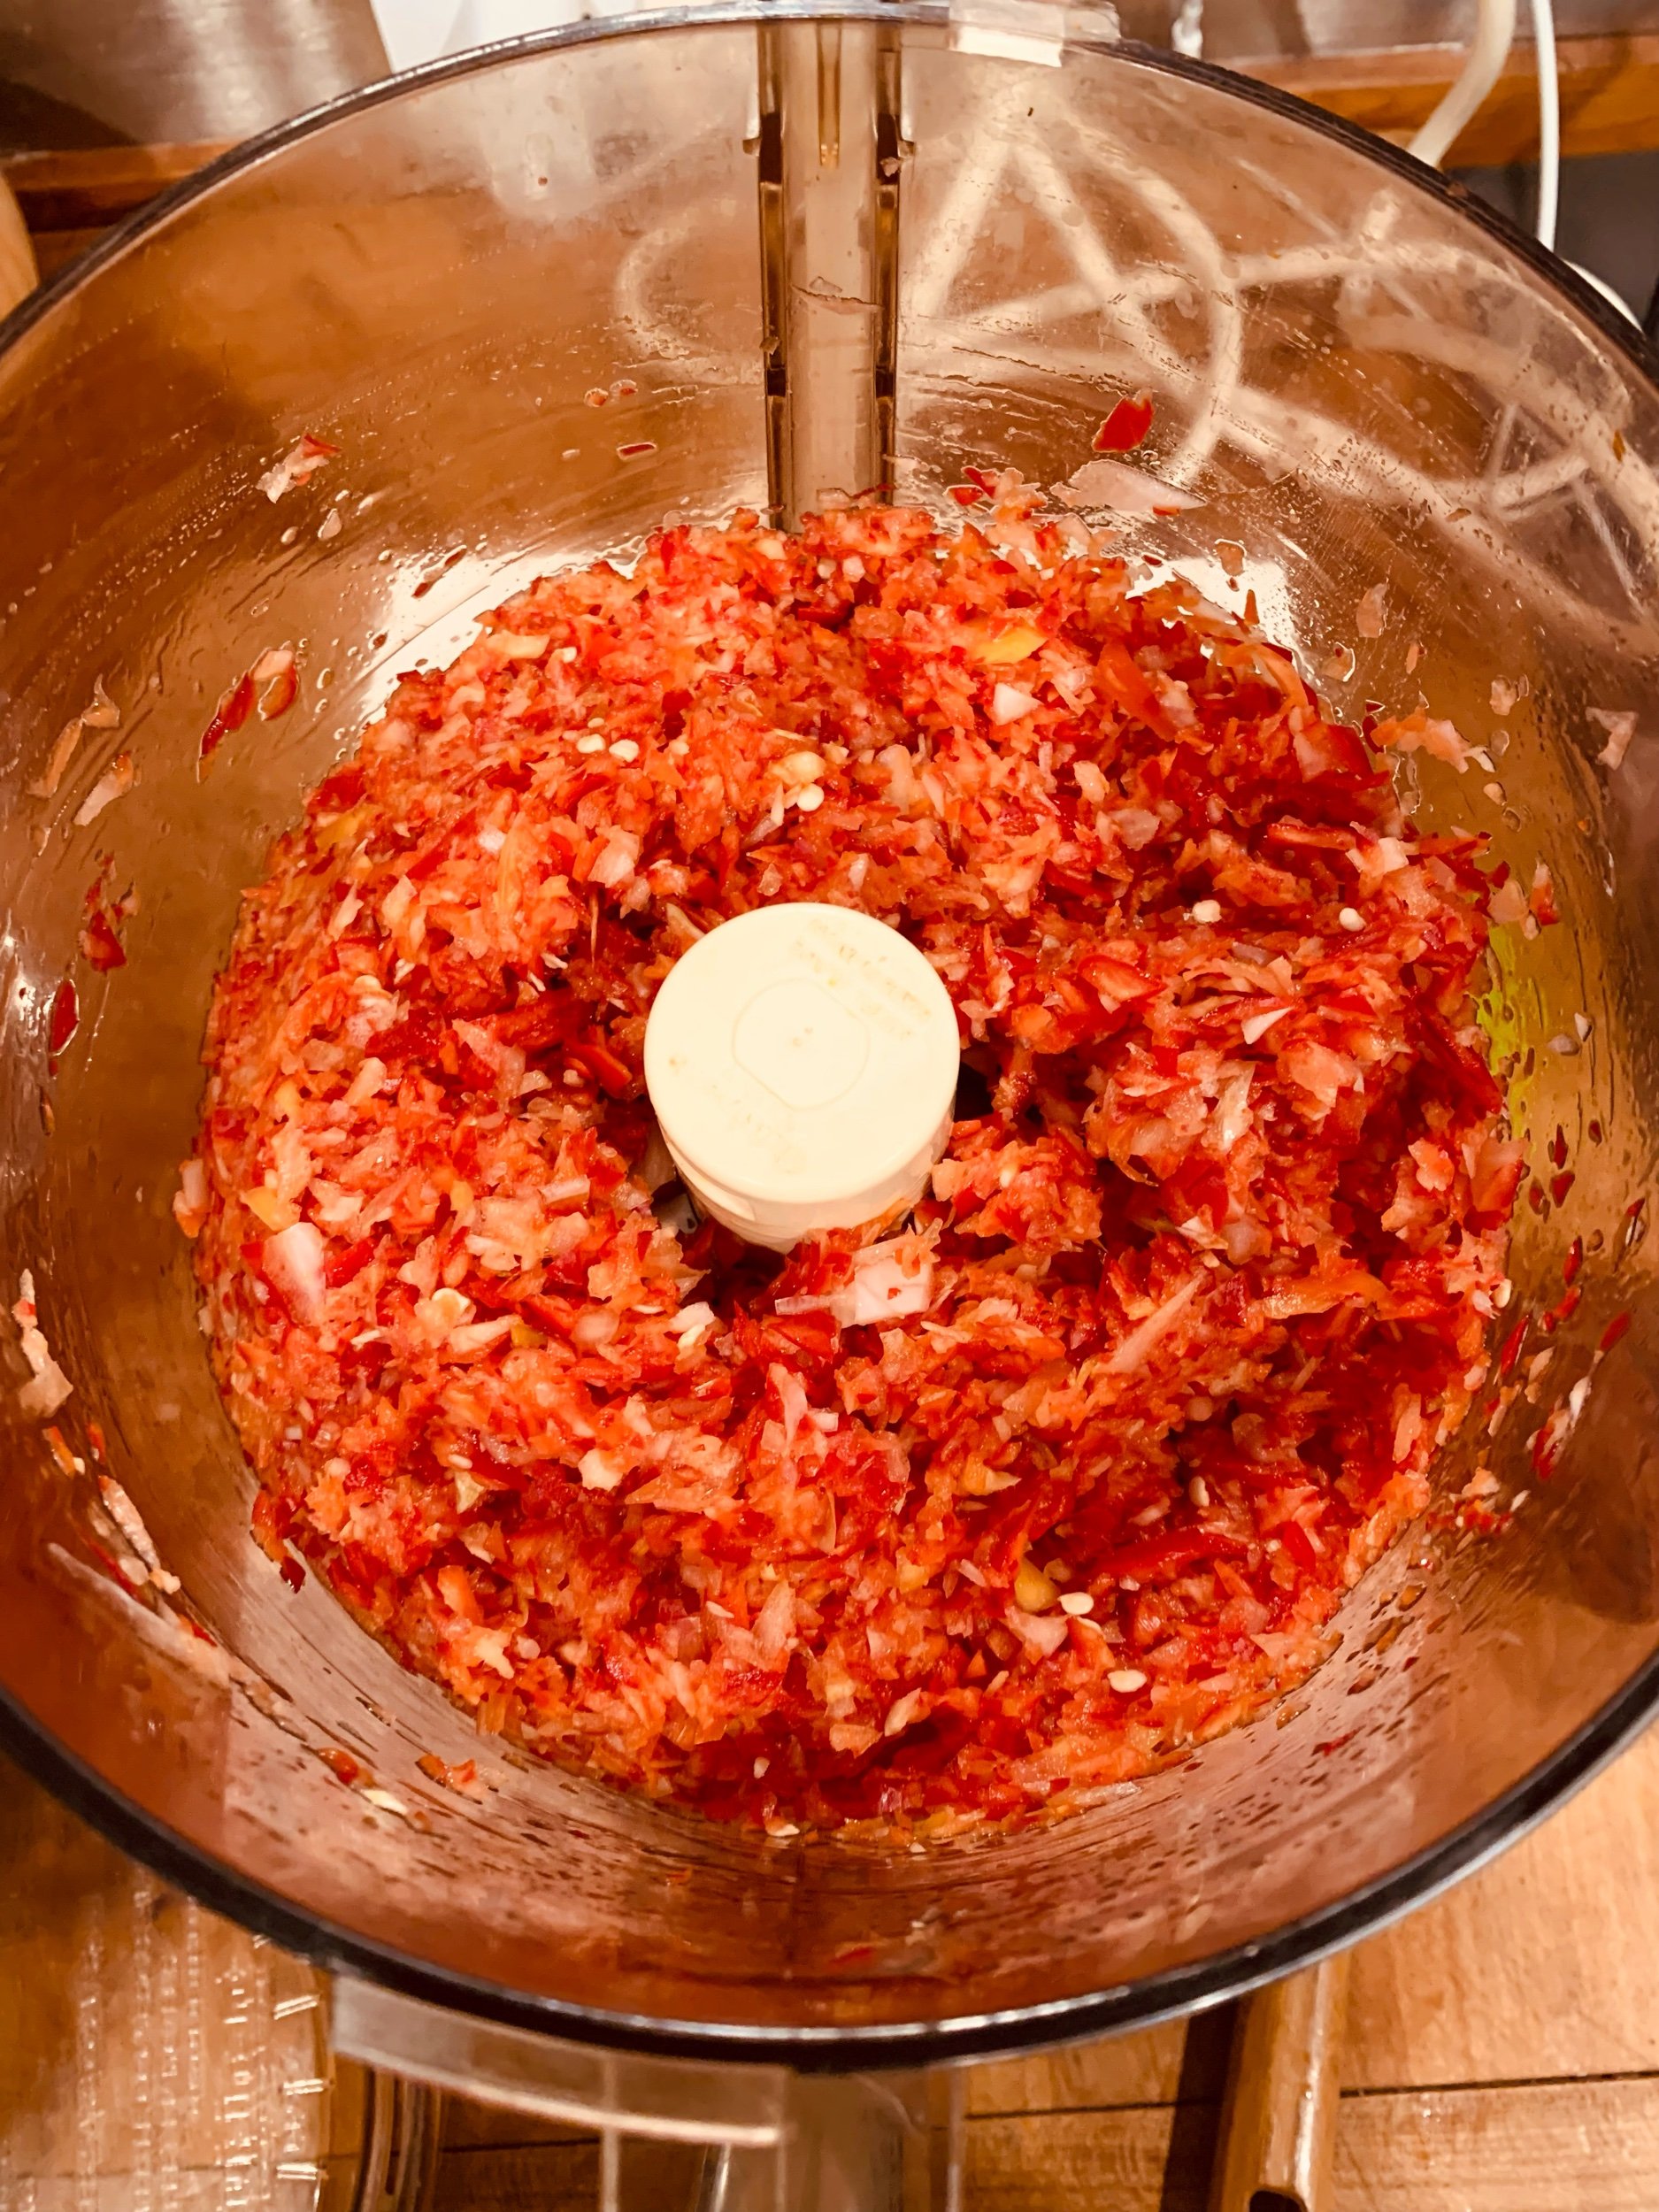
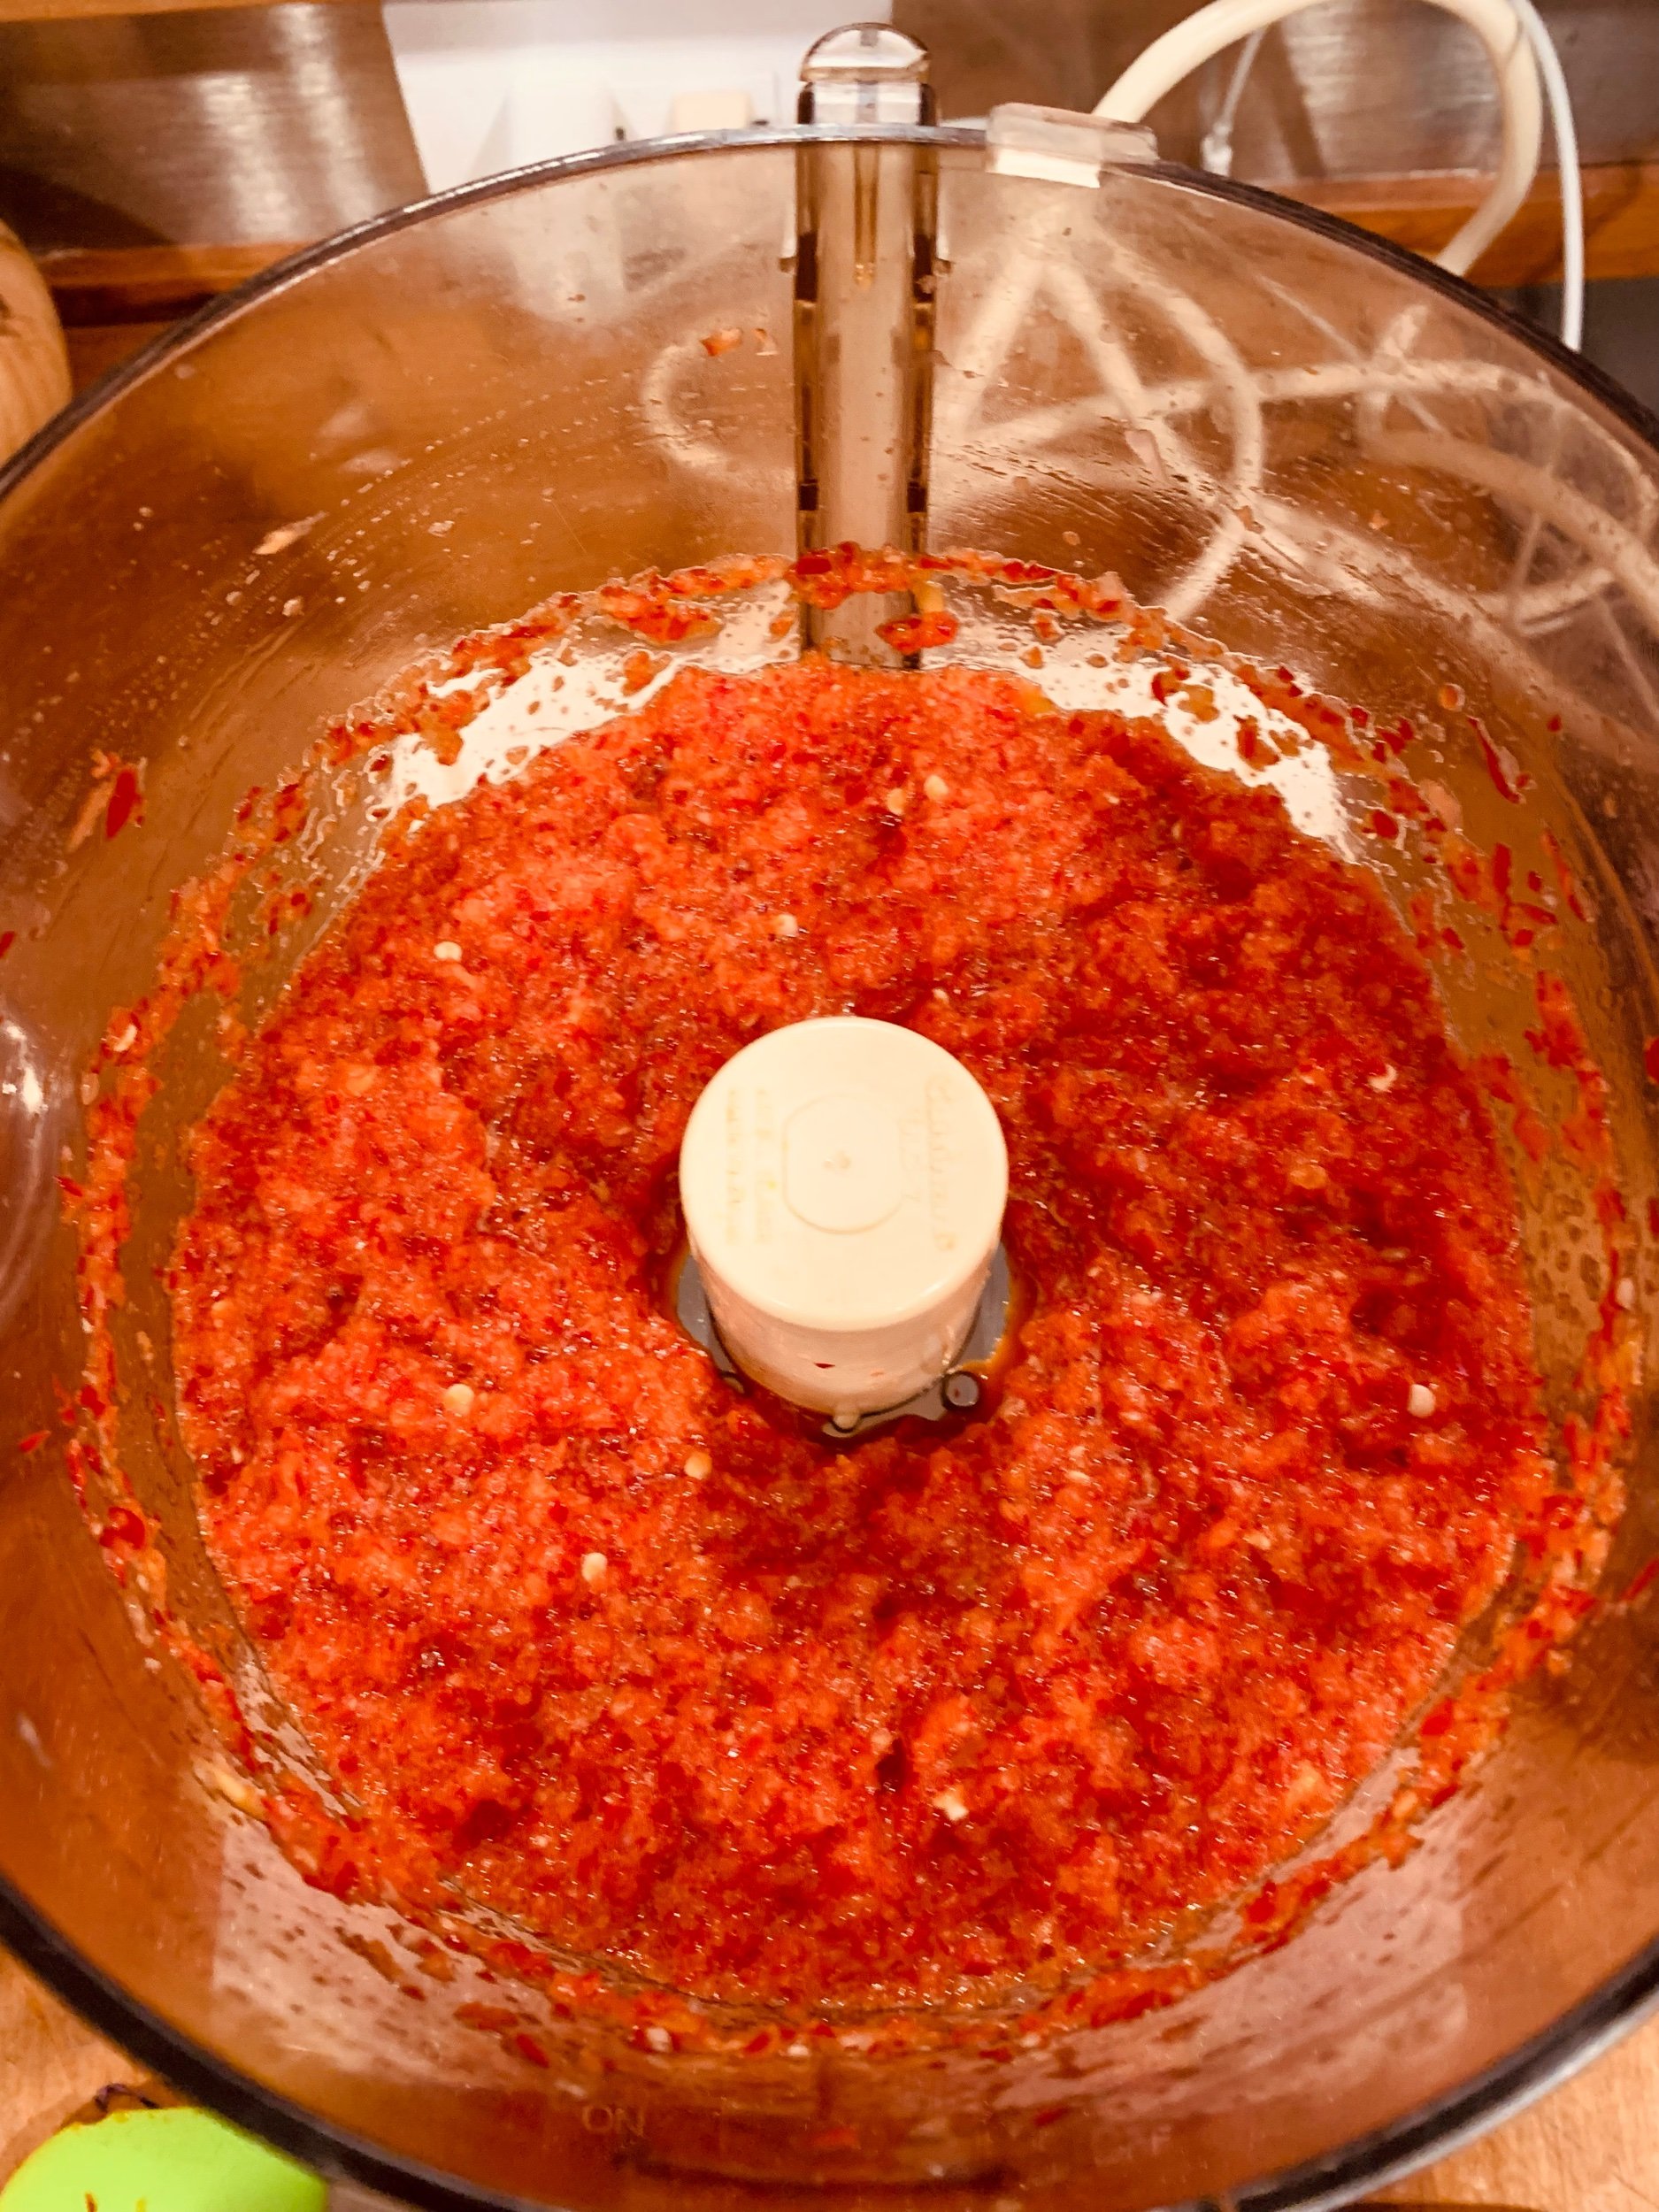
Blend. Add peppers and additional ingredients to the bowl of the food processor and blend until thoroughly pulverized. Work in batches if necessary. As pictured below, I aim to achieve the texture of smooth gazpacho.
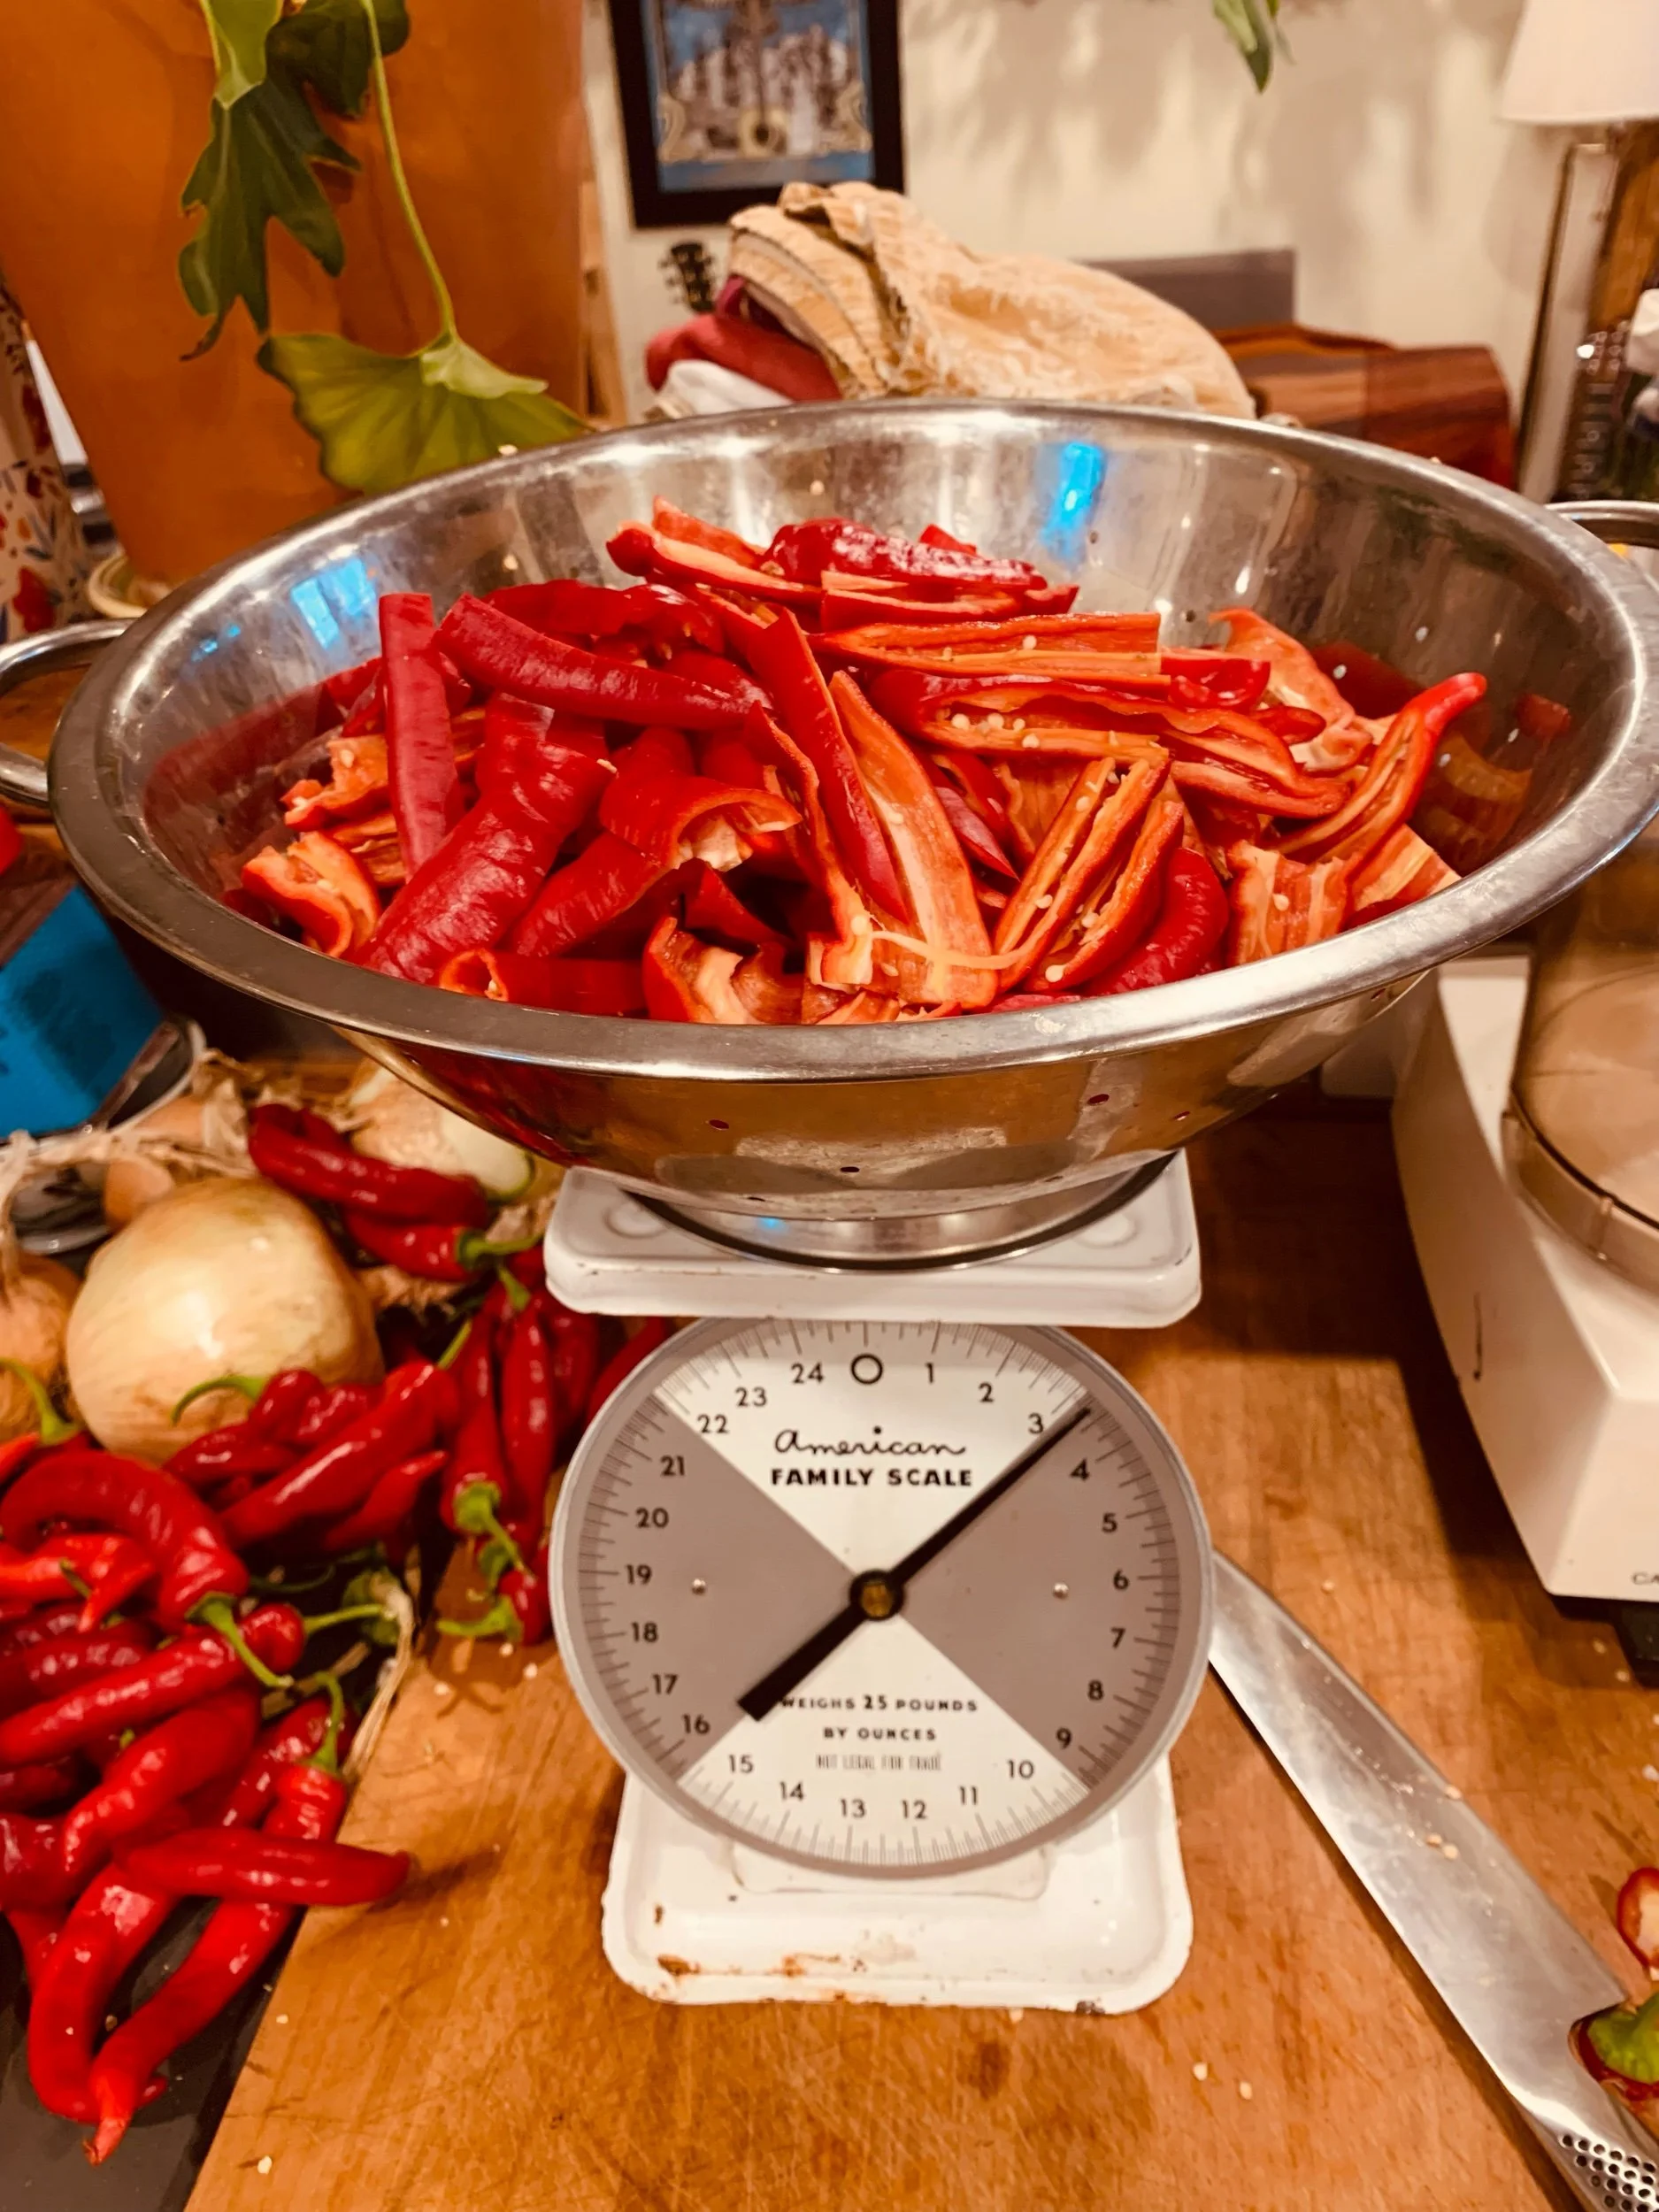
Weigh. Transfer mash from the food processor to a large bowl and weigh, accounting for the weight of the bowl. I use an electric scale measuring in grams for accuracy, but an analog scale also works fine.
Add salt. Weighing your ingredients, salt included, helps to achieve the appropriate ratio of vegetables to salt. The weight of the salt can be between 0.08-3% of the weight of your vegetables. My preferred percentage is 1.5%. To determine this percentage, multiply the weight of the vegetables by 0.015, resulting in the weight of the salt to be added. Stir salt into the mash.
If you are working with a less accurate scale you have the option of measuring your salt by volume.
For every five pounds of vegetables, add three tablespoons of salt.
Transfer to a fermentation vessel. If you don’t have a vessel large enough to contain the whole batch, divide your mash between a few containers. Whatever you’re using, allow for headspace (space between the contents of the jar and the rim). For this reason I generally avoid fermenting in anything smaller than a quart-sized jar.
There are all sorts of vessels specifically designed for fermentation. I use glass jars of various sizes. The mash pictured below weighed close to five pounds and fit nicely into a gallon jar.
Headspace. The salt in your concoction will draw liquid from the vegetables which, without headspace, could overflow and make a mess of your counter. Furthermore, headspace allows room for a follower.
A follower is an item placed atop your ferment which keeps the vegetables submerged in brine. This facilitates the anaerobic environment necessary for lacto-fermentation. The final photo of the series below depicts the use of ziplock bags to weight the ferment.
Ziplock Follower. Fit one ziplock inside another (gallon-size for a big batch, quart-size for a smaller batch) and press the bottom of the bag onto the top of the veggies in the vessel. Add water to the inner bag. As it fills, you will see the liquid from the ferment rise and create a seal around the bag. Close both bags and your follower is complete.
Ferment for 2 to 3 weeks. Keep out of direct sunlight. You will know when the ferment is “ripe” when it gives off a pungent, pickle-like smell and is distinctly sour to taste.
Refrigerate and enjoy. Once your ferment has reached its perfect ripeness, lid and refrigerate for indefinite enjoyment. I recommend eating this with eggs, in tacos, added to stir fry and stirred into soup.
CANNED
Hot sauce is almost as common as salt and pepper when it comes to condiments. Making it yourself is a true pleasure. And a little can go a long way. This hot sauce recipe has been modified from a recipe in my go-to book on food preservation, Mrs. Wheelbarrow’s Practical Pantry. It starts with steeping the ingredients in vinegar overnight before blending it all together and canning it.
I prefer a hot sauce with a heat balanced by the fruit-forward flavor of sweet peppers. For this reason I use half sweet, half hot peppers, resulting in a condiment that my friends and family, five-year-old nephews included, can enjoy without apprehension. If you’re a real heat lover, by all means up the ratio of hot to sweet peppers! But I encourage you to keep a few sweets in the mix to deepen the flavor.
Note: Handle hot peppers with caution! I keep a pair of plastic gloves in my kitchen just for this purpose. One pair will last an entire season if not longer.

HOT SAUCE
Yield: approximately 32 oz.
INGREDIENTS
1 pound hot peppers, or a combination of hot and sweet
2 cups white, cider or other 5% vinegar
6 cloves garlic
1 Tablespoon sea salt, or other additive-free salt
1 peach or nectarine, pit removed and roughly chopped
1/2 teaspoon mustard
1/2 teaspoon grated ginger
Honey to taste
TOOLS
Gloves for handling peppers (optional)
Knife
Cutting board
Measuring cups and spoons
Large jar (1/2 gallon if available) for steeping peppers in vinegar
Heavy bottomed soup pot
Immersion blender or other blending tool
Water bath canner
Canning jars with lids and rings (4 8-oz. jars should be enough)
Ladle
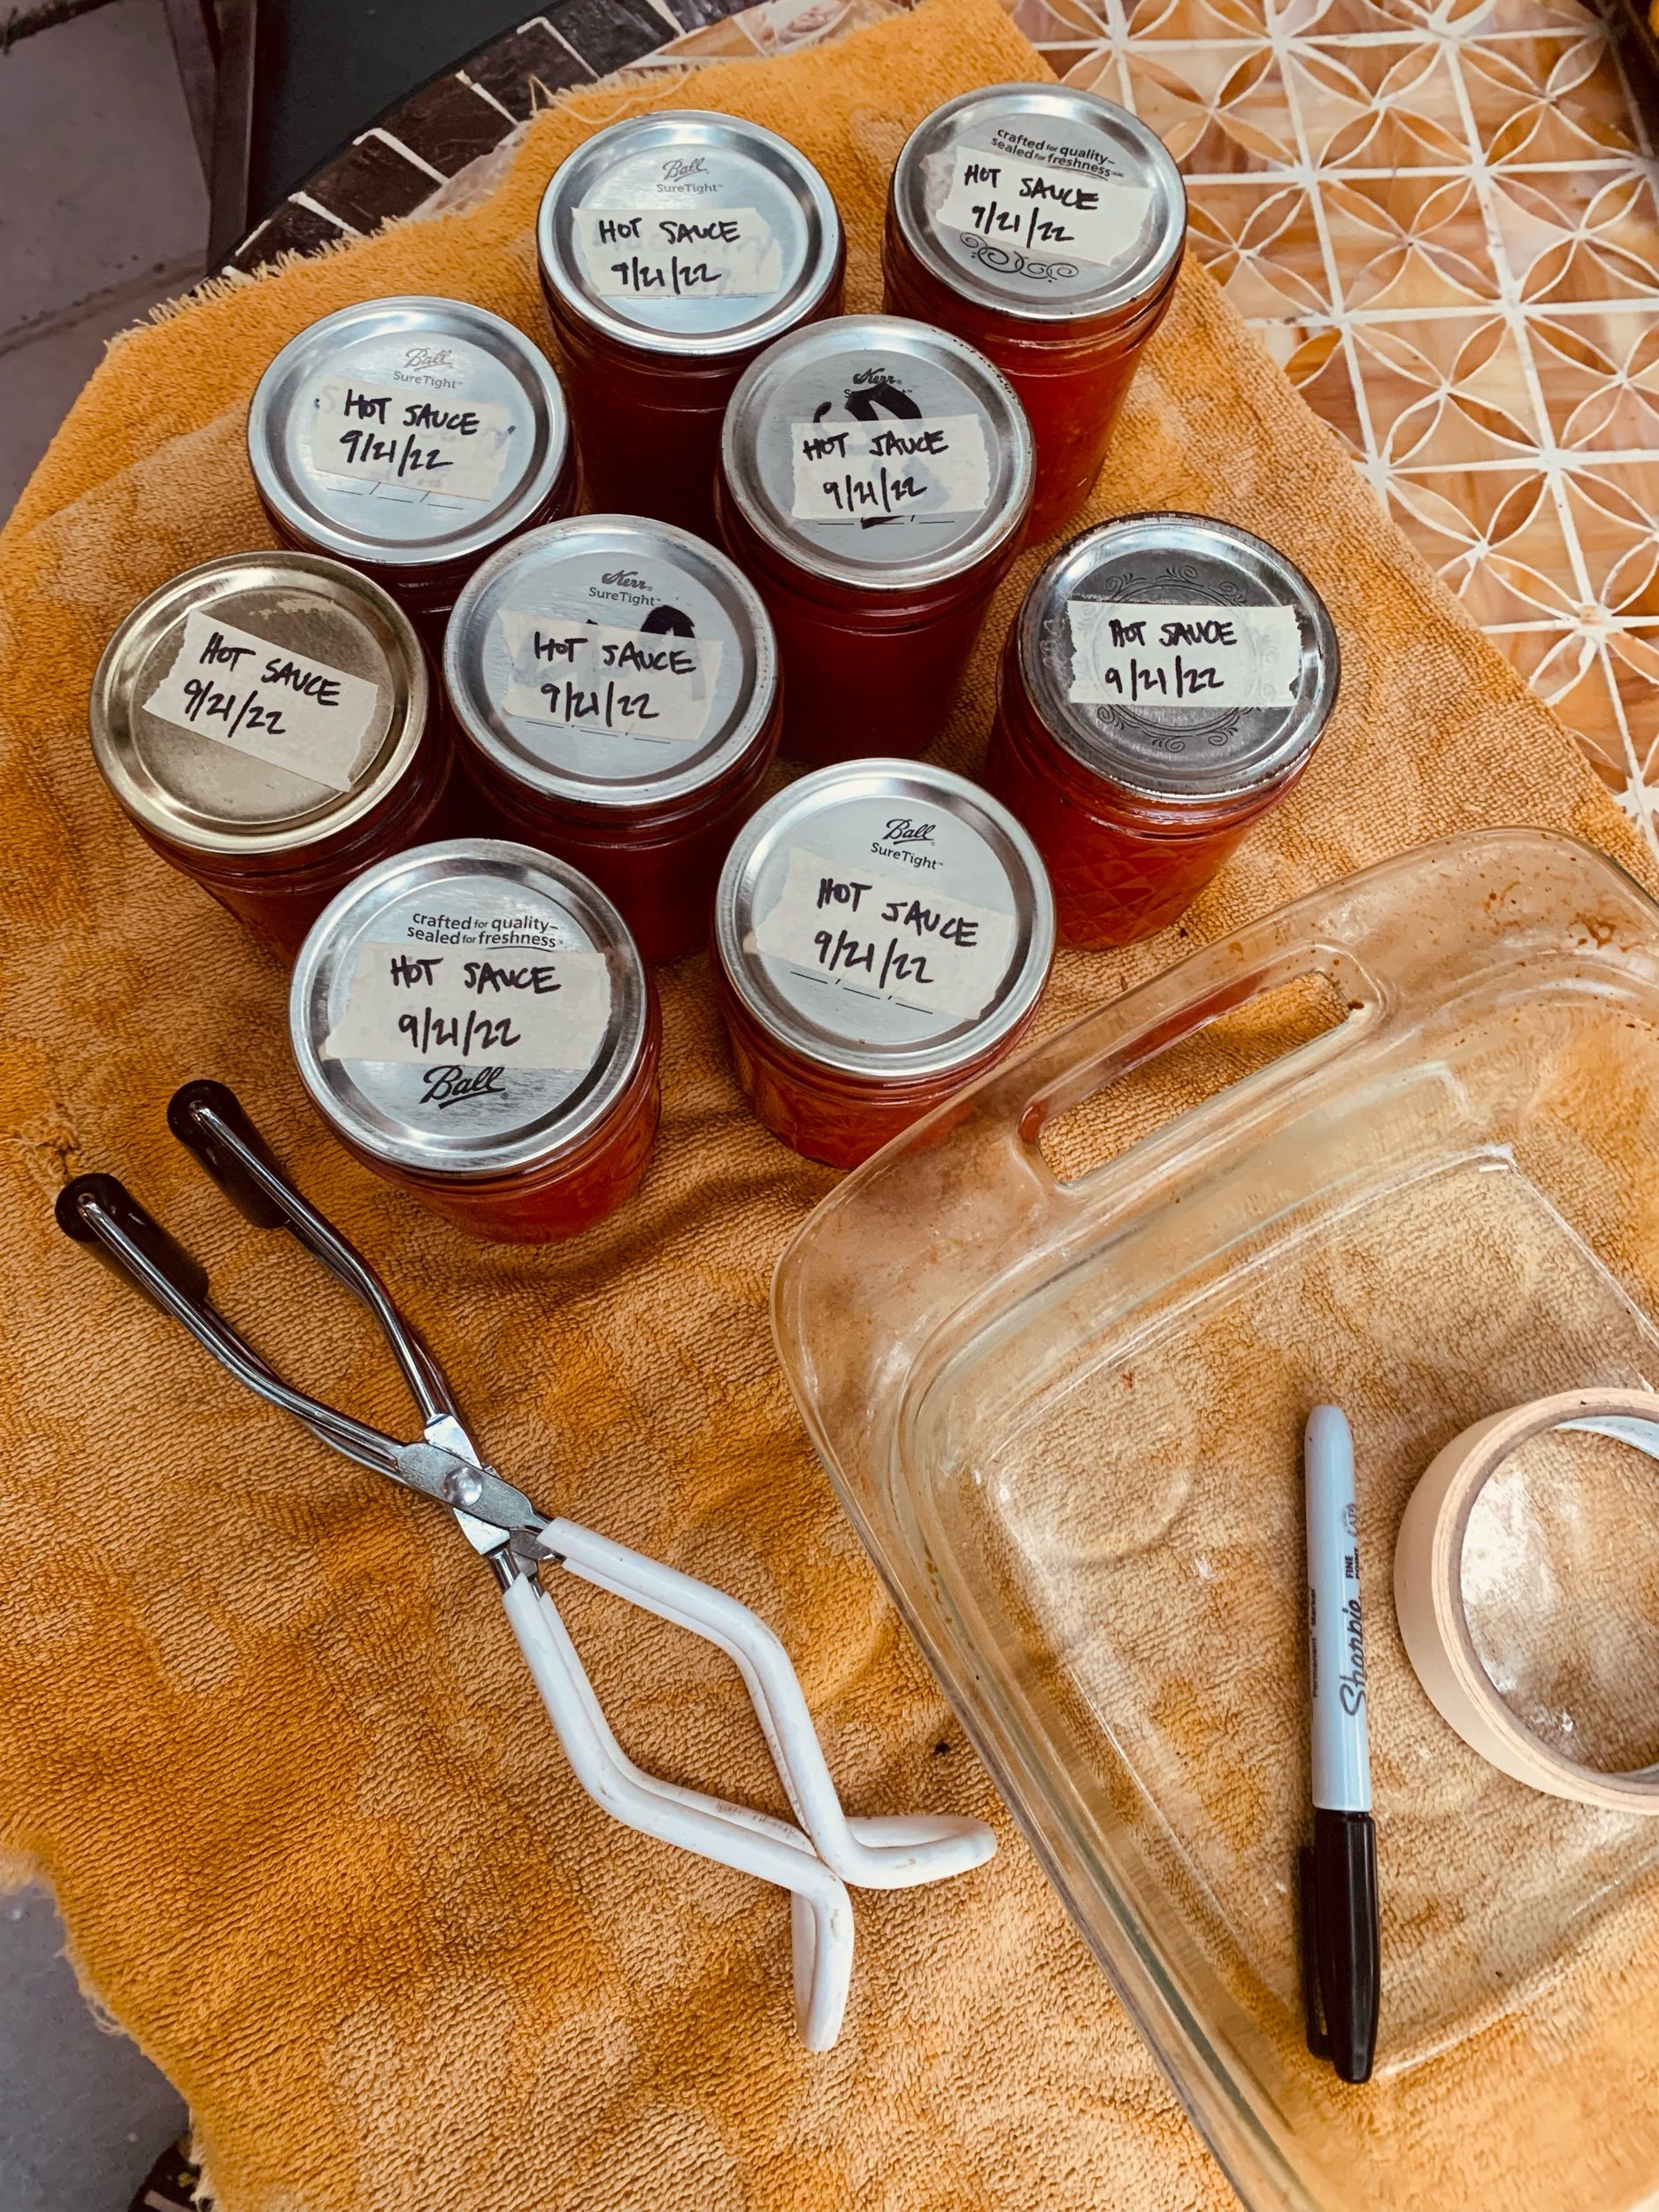
Wide-mouth funnel (see bottom-left photo)
Canning tongs (see bottom-right photo)
INSTRUCTIONS
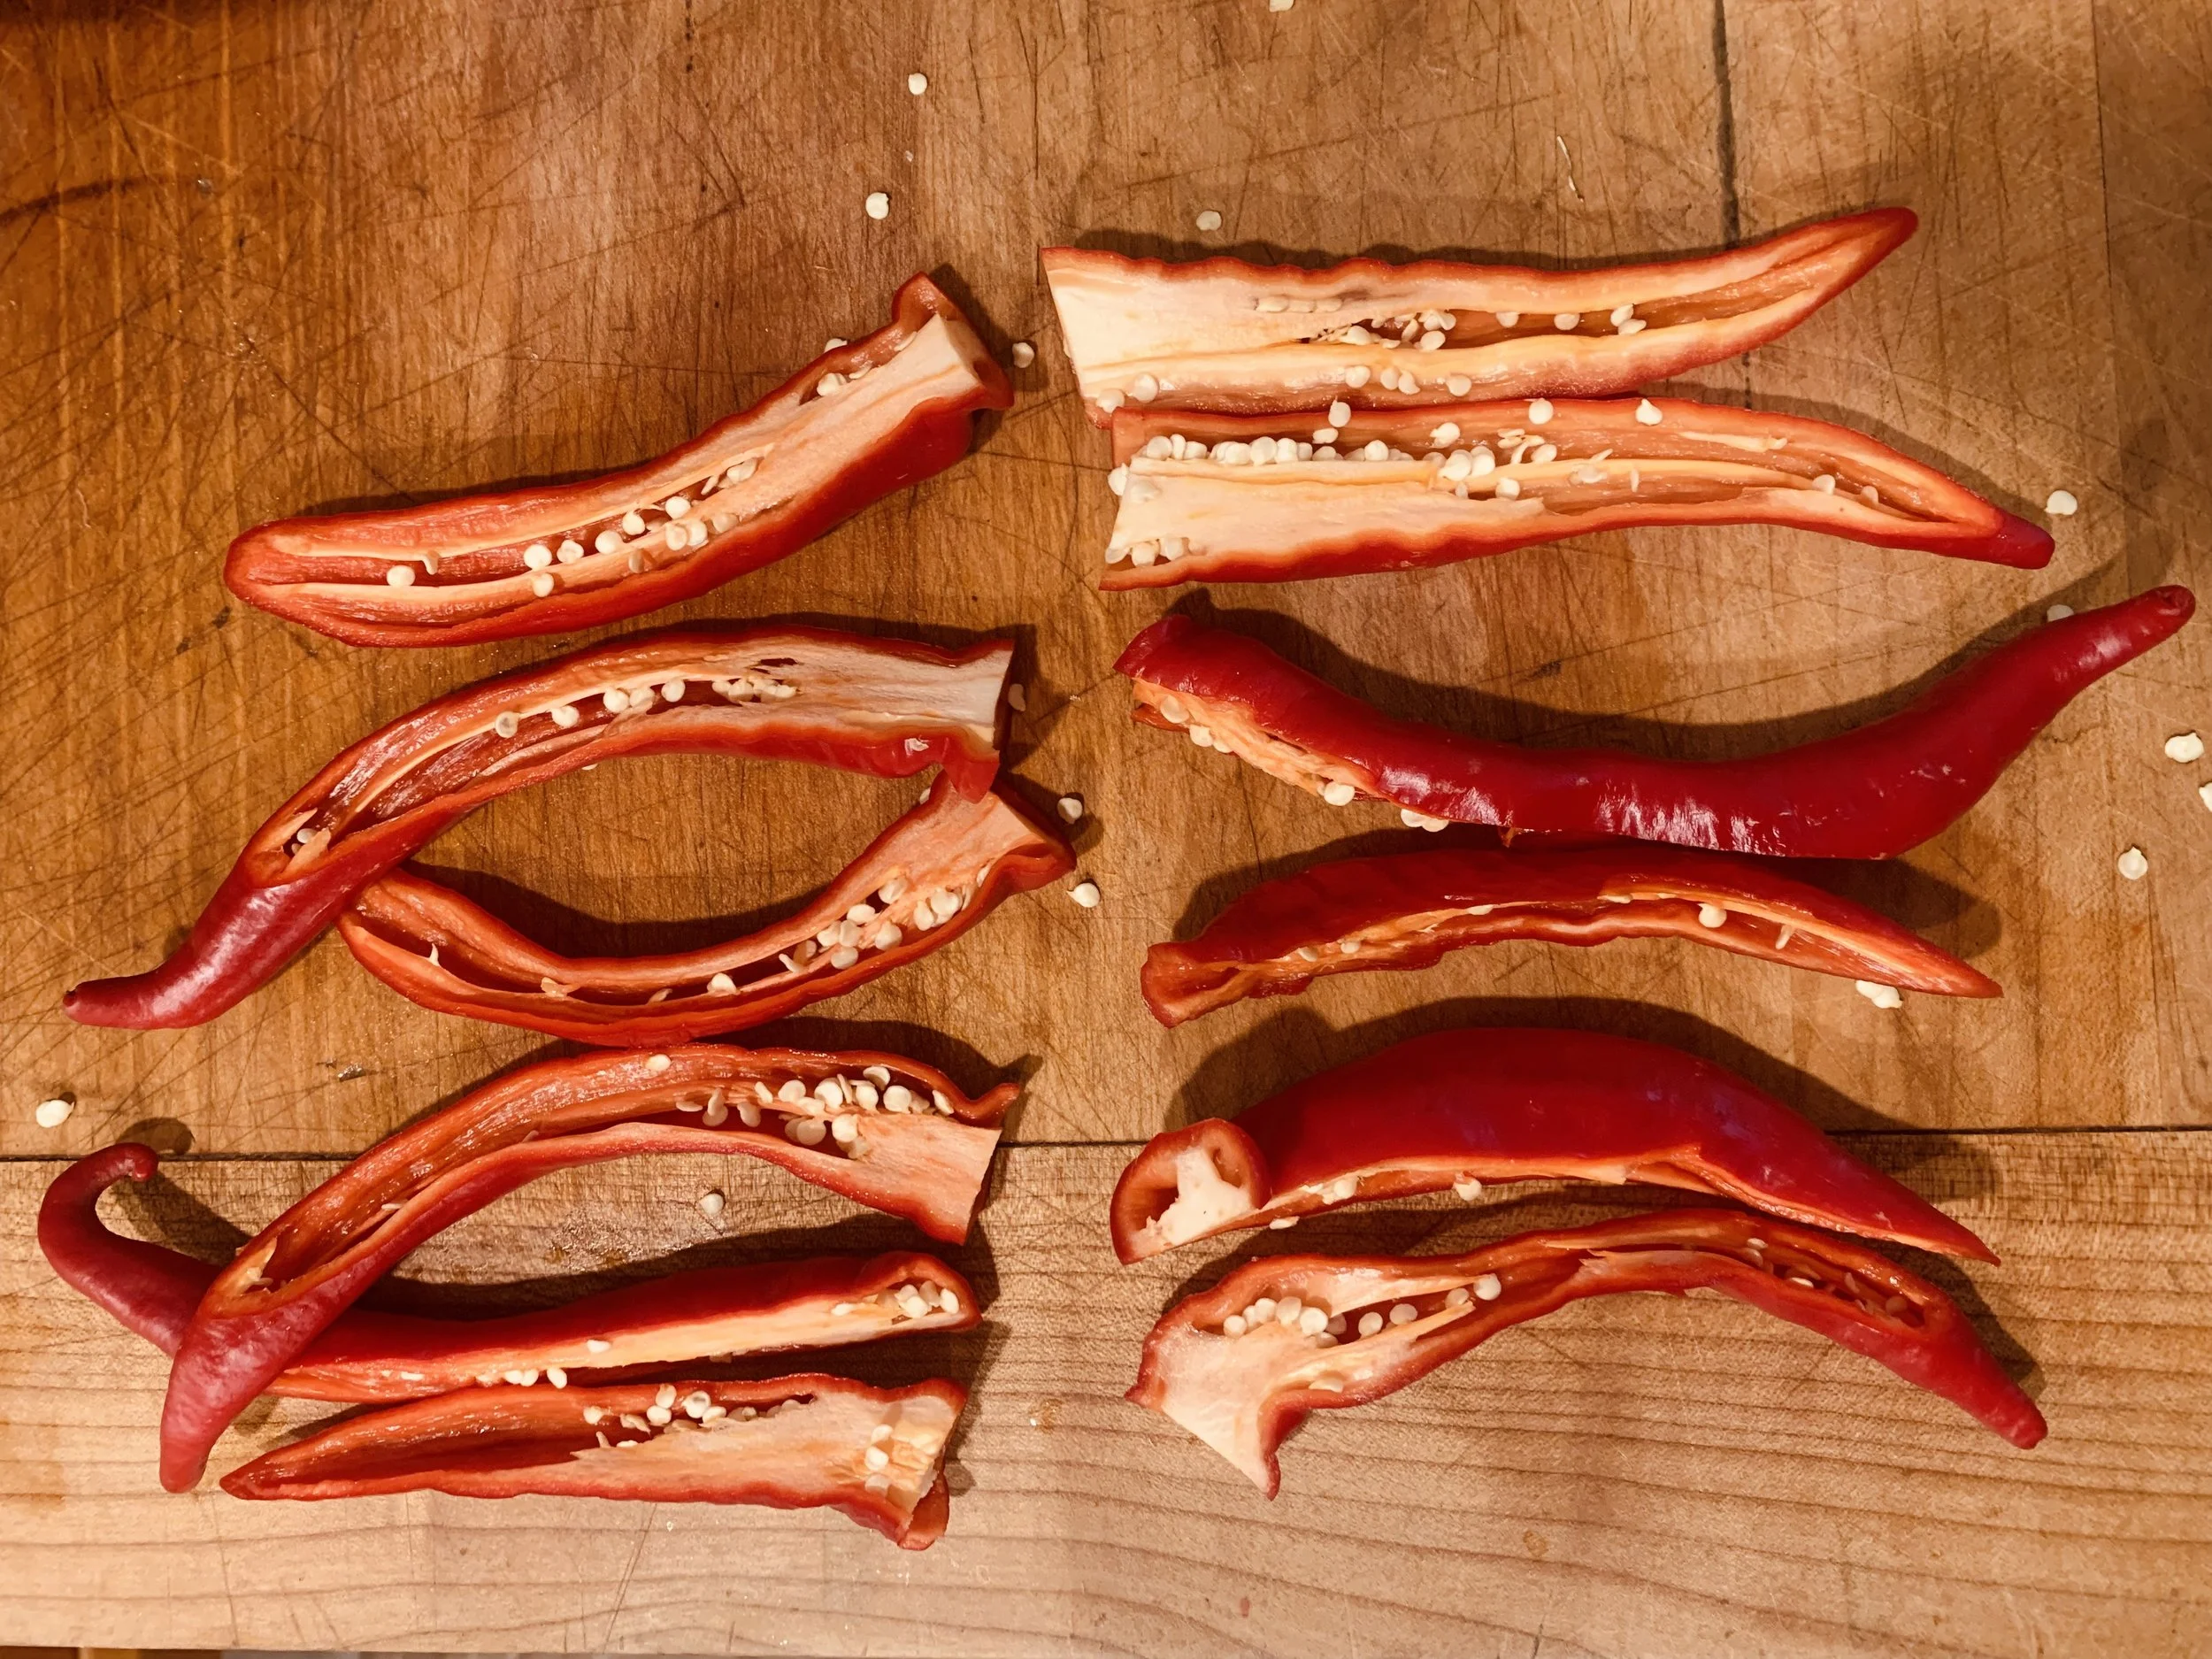
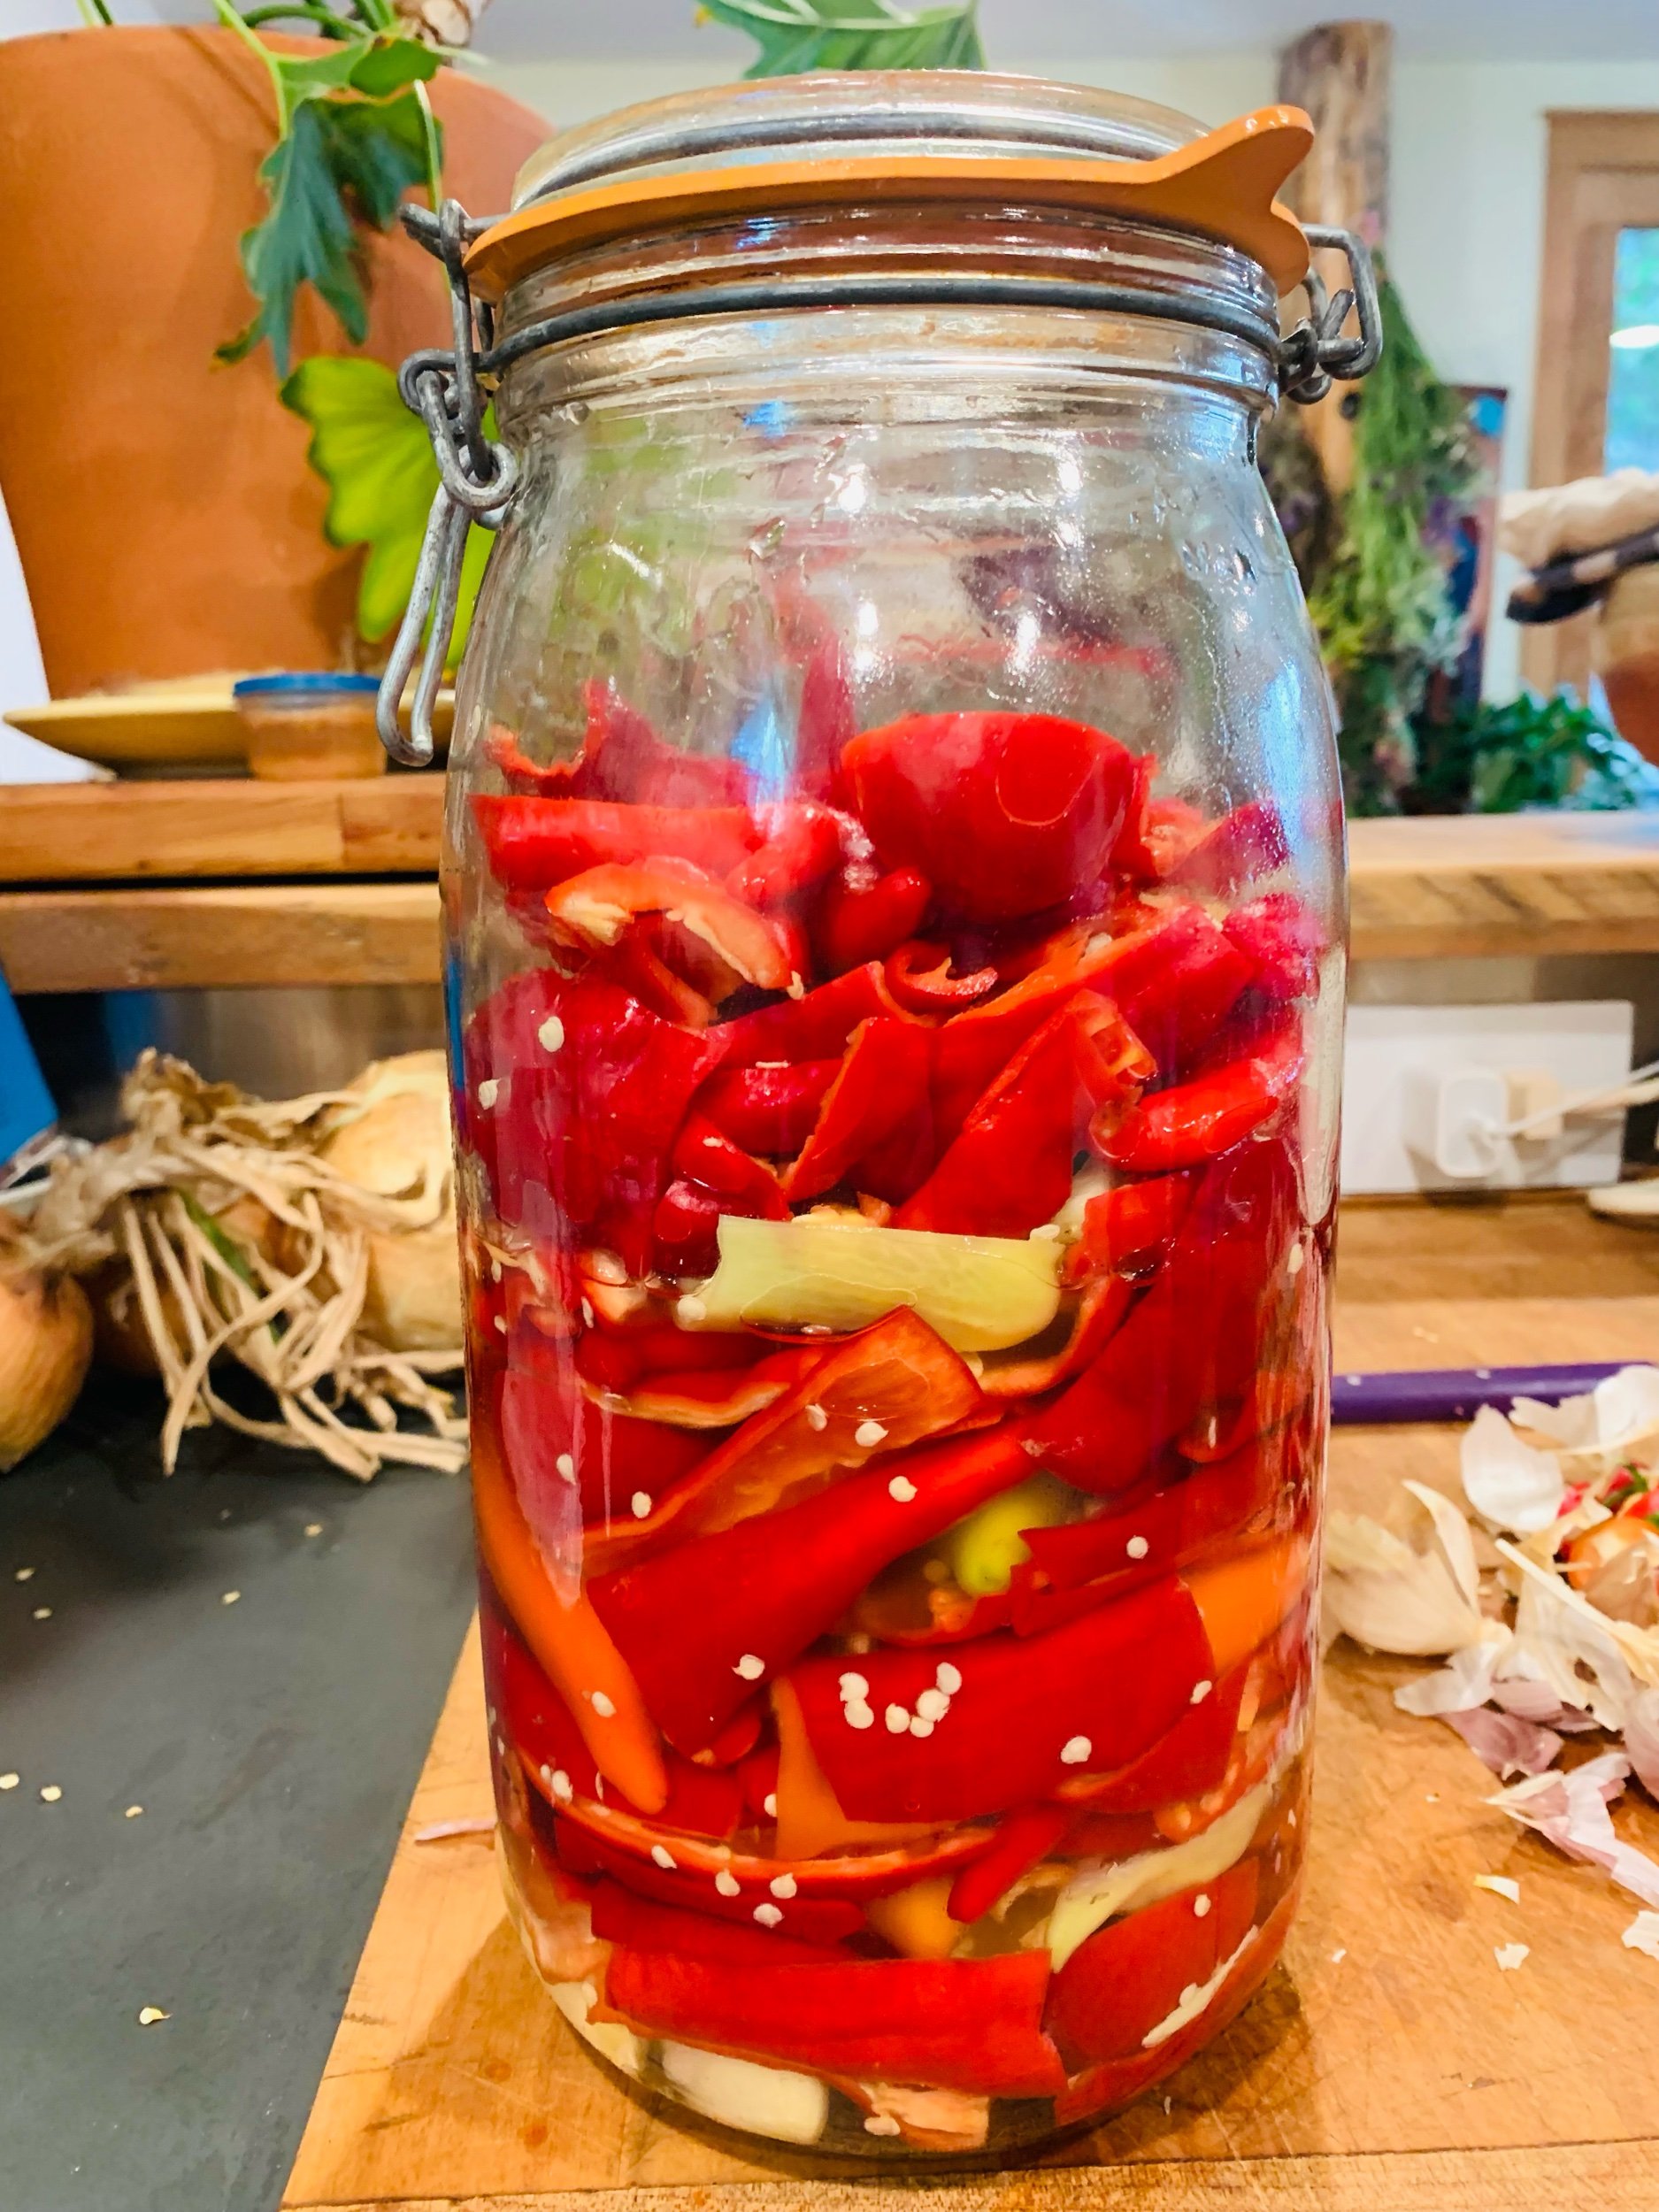
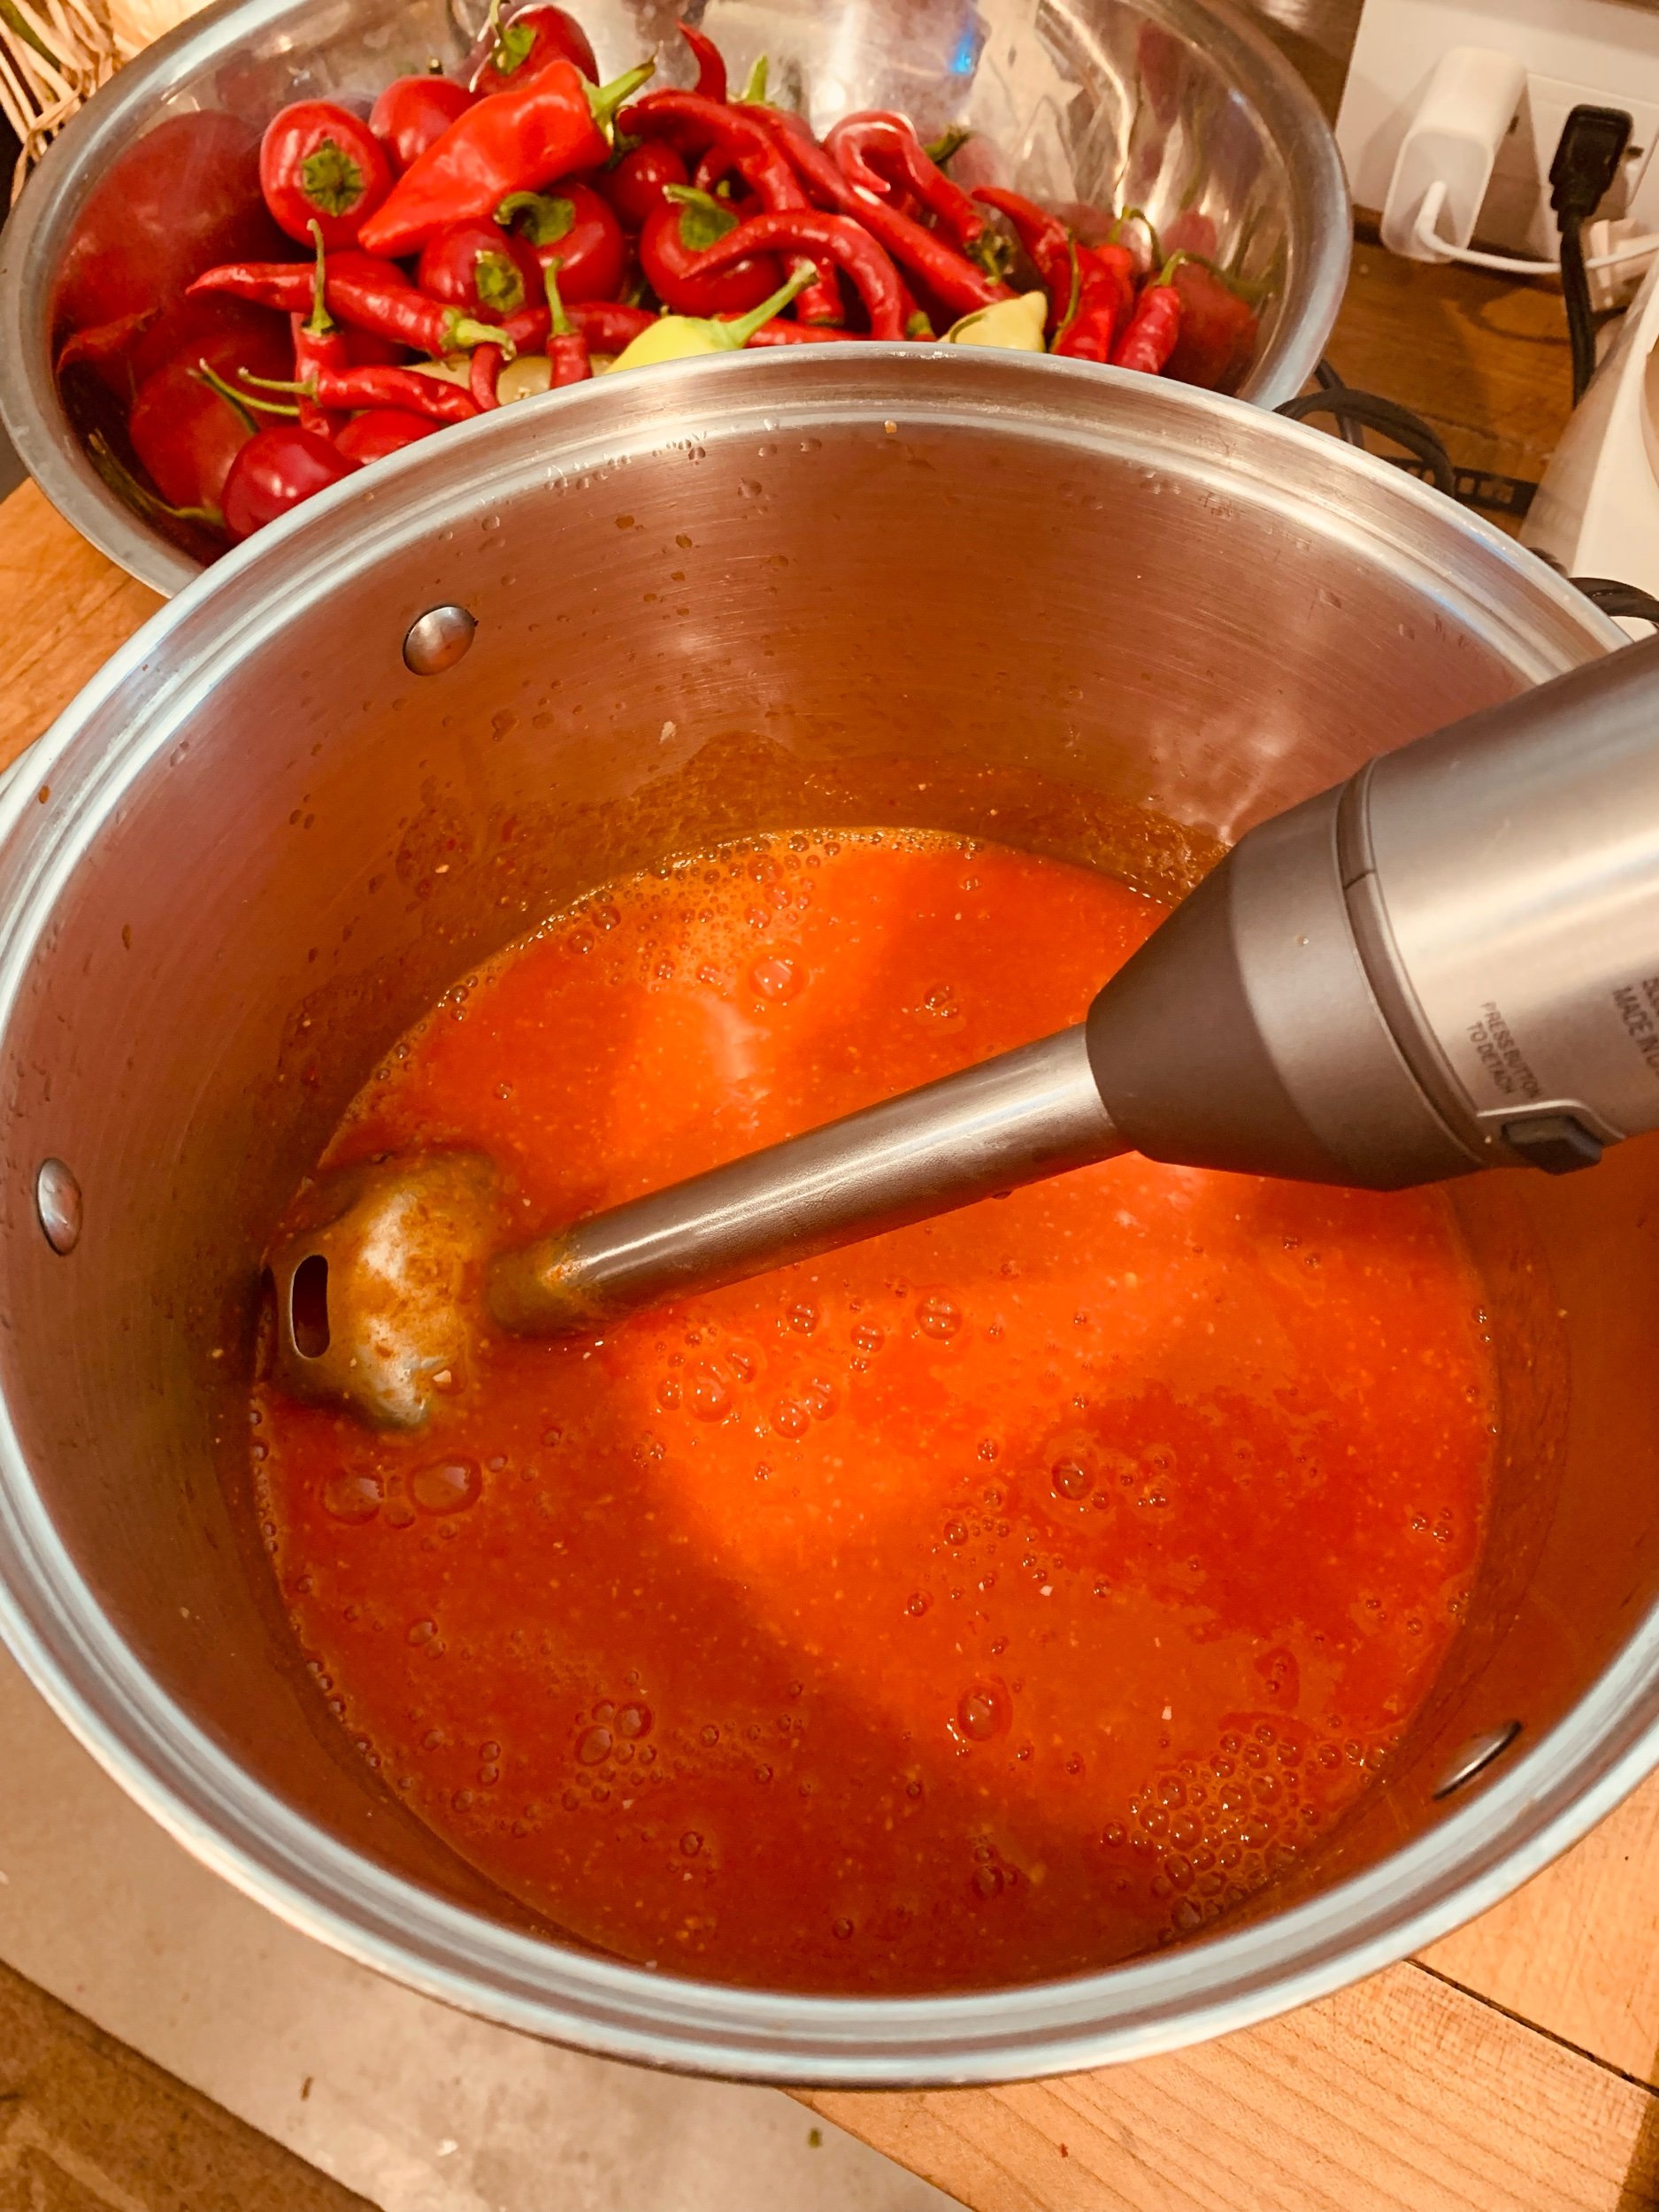
Prep and brine. Remove seeds and stems from peppers. Combine vinegar, garlic and salt in a large, stirring to dissolve salt. Add peppers, cover and let sit for 8-hours or overnight to brine.
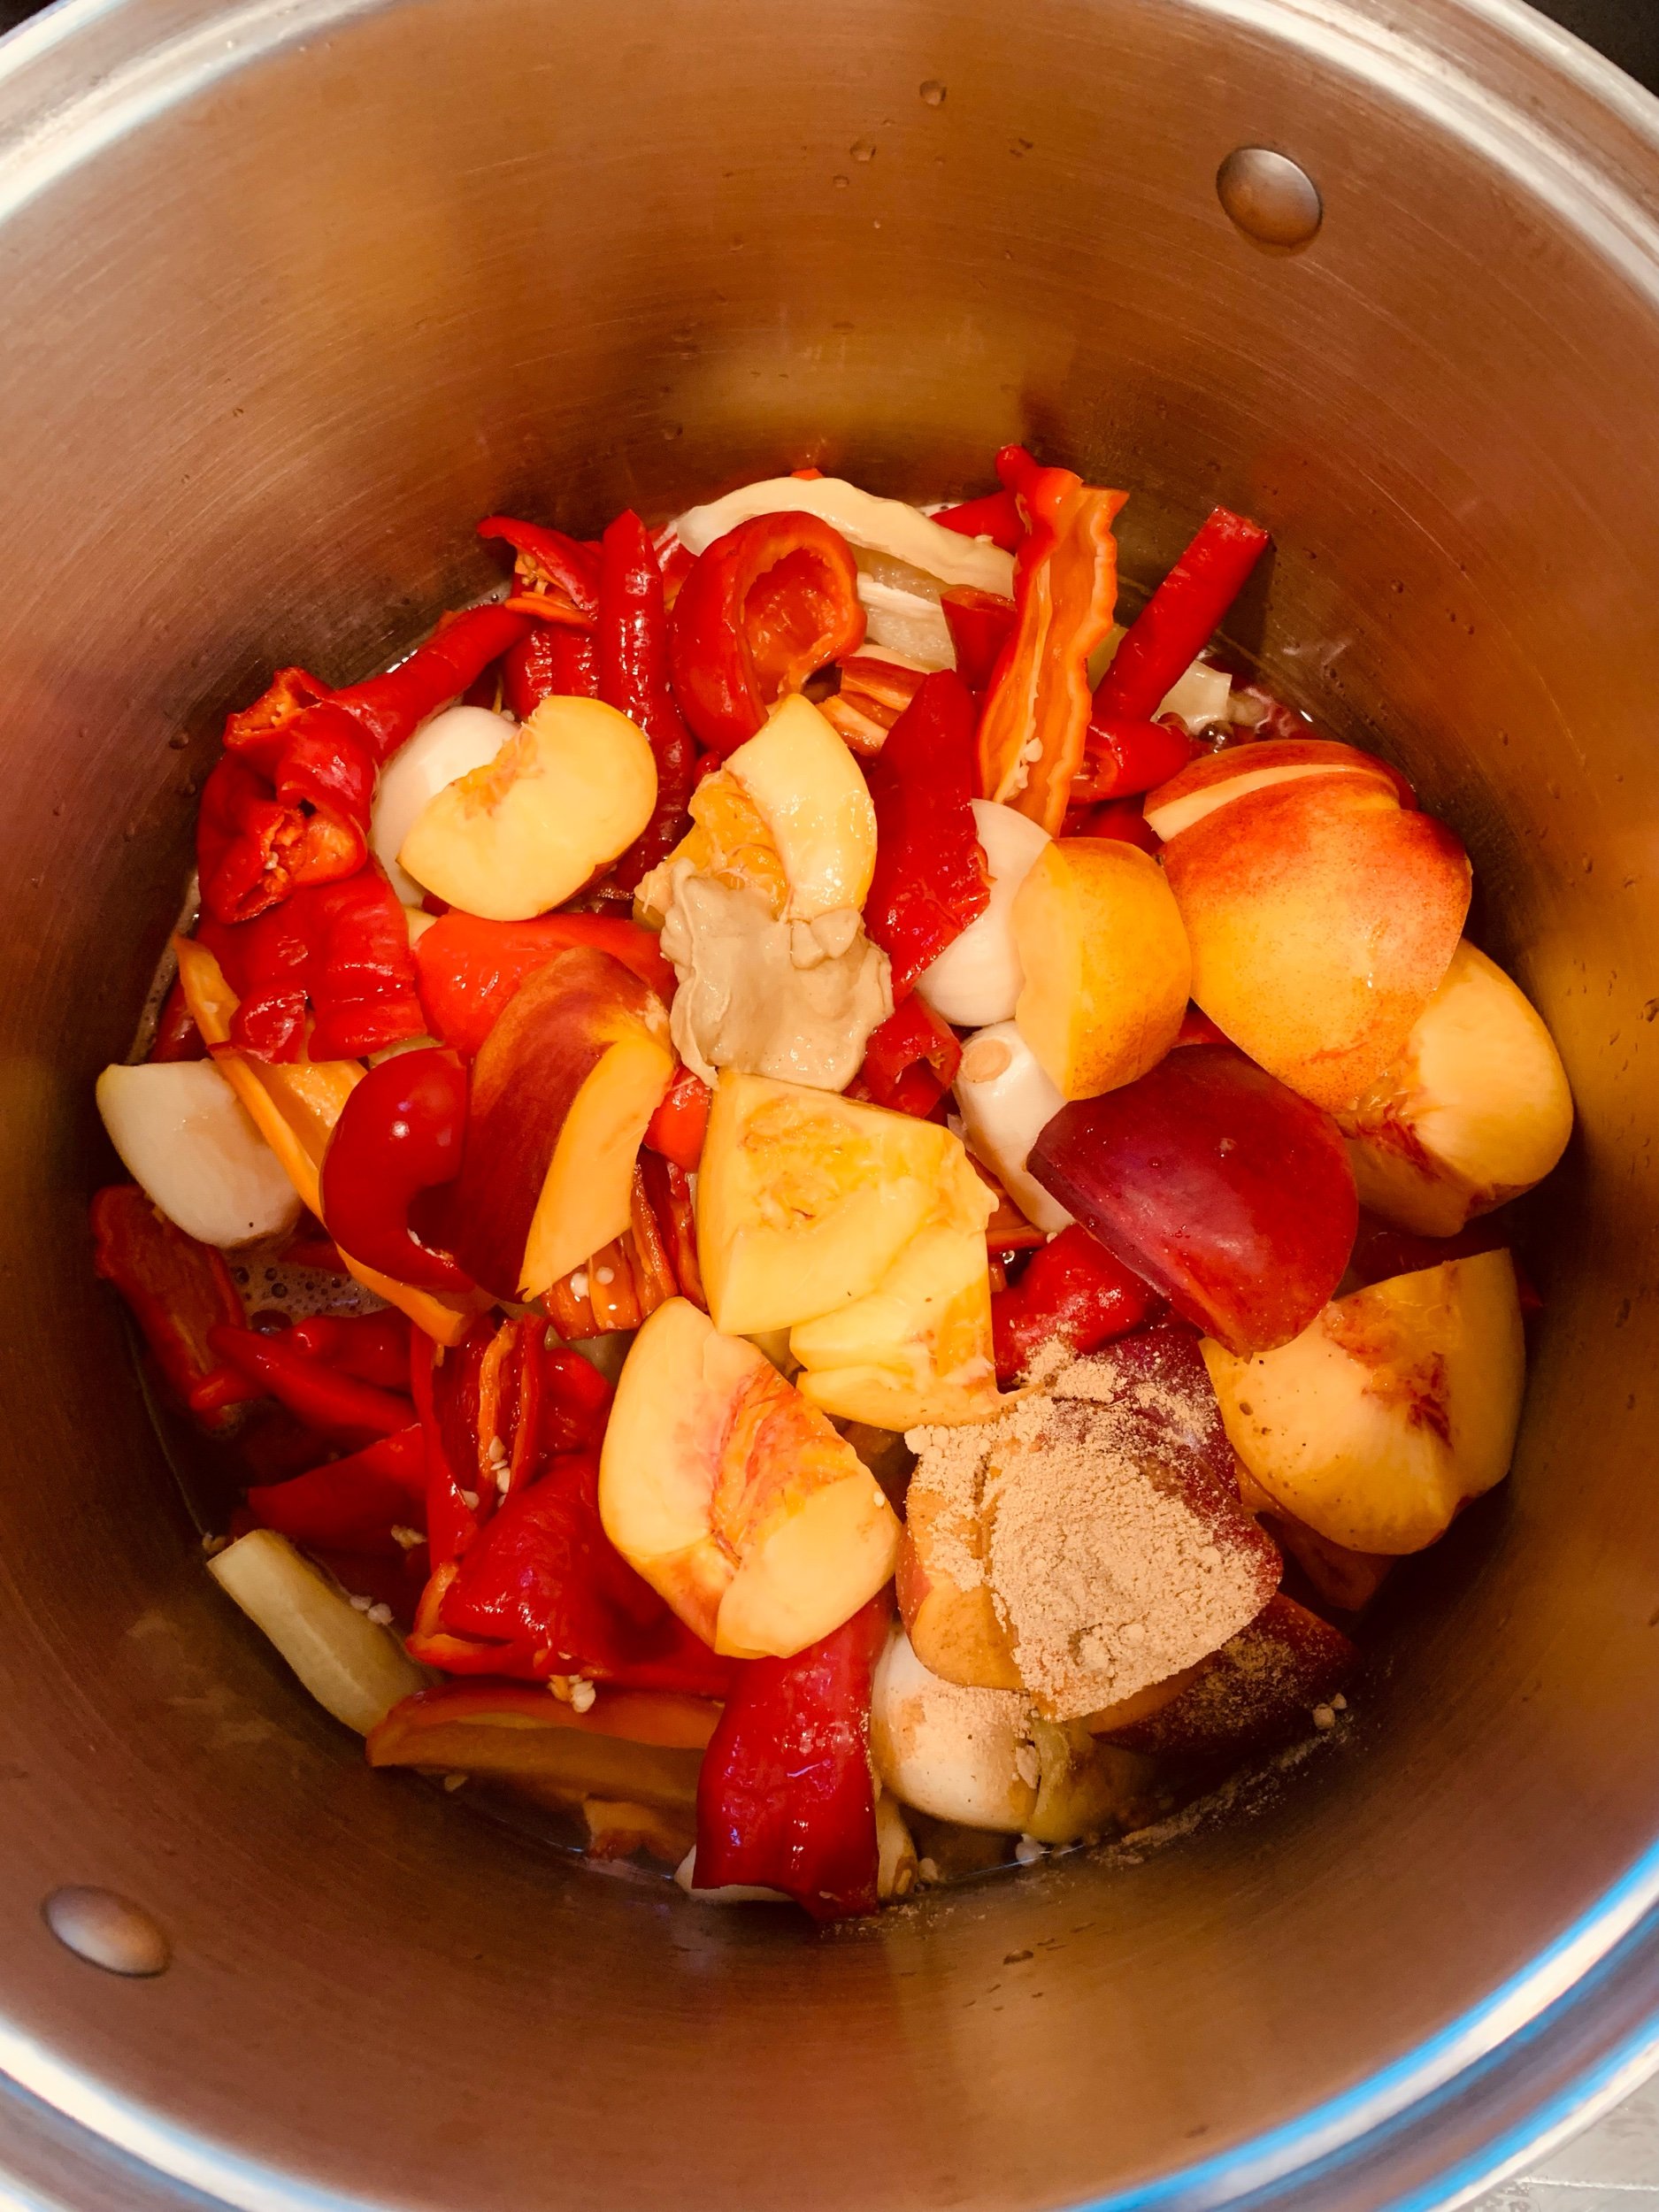
Heat sauce. Transfer peppers, garlic and brine into a soup pot. Add peach or nectarine, mustard and ginger and bring to a boil. Continue to boil for 3 minutes.
Note: avoid inhaling the potent fumes!
Puree until smooth. An immersion blender is an incredibly handy and efficient tool for this recipe and for pureeing hot foods in general. Once thoroughly smooth you may choose to pour the sauce through a fine sieve to eliminate any unwanted chunks.
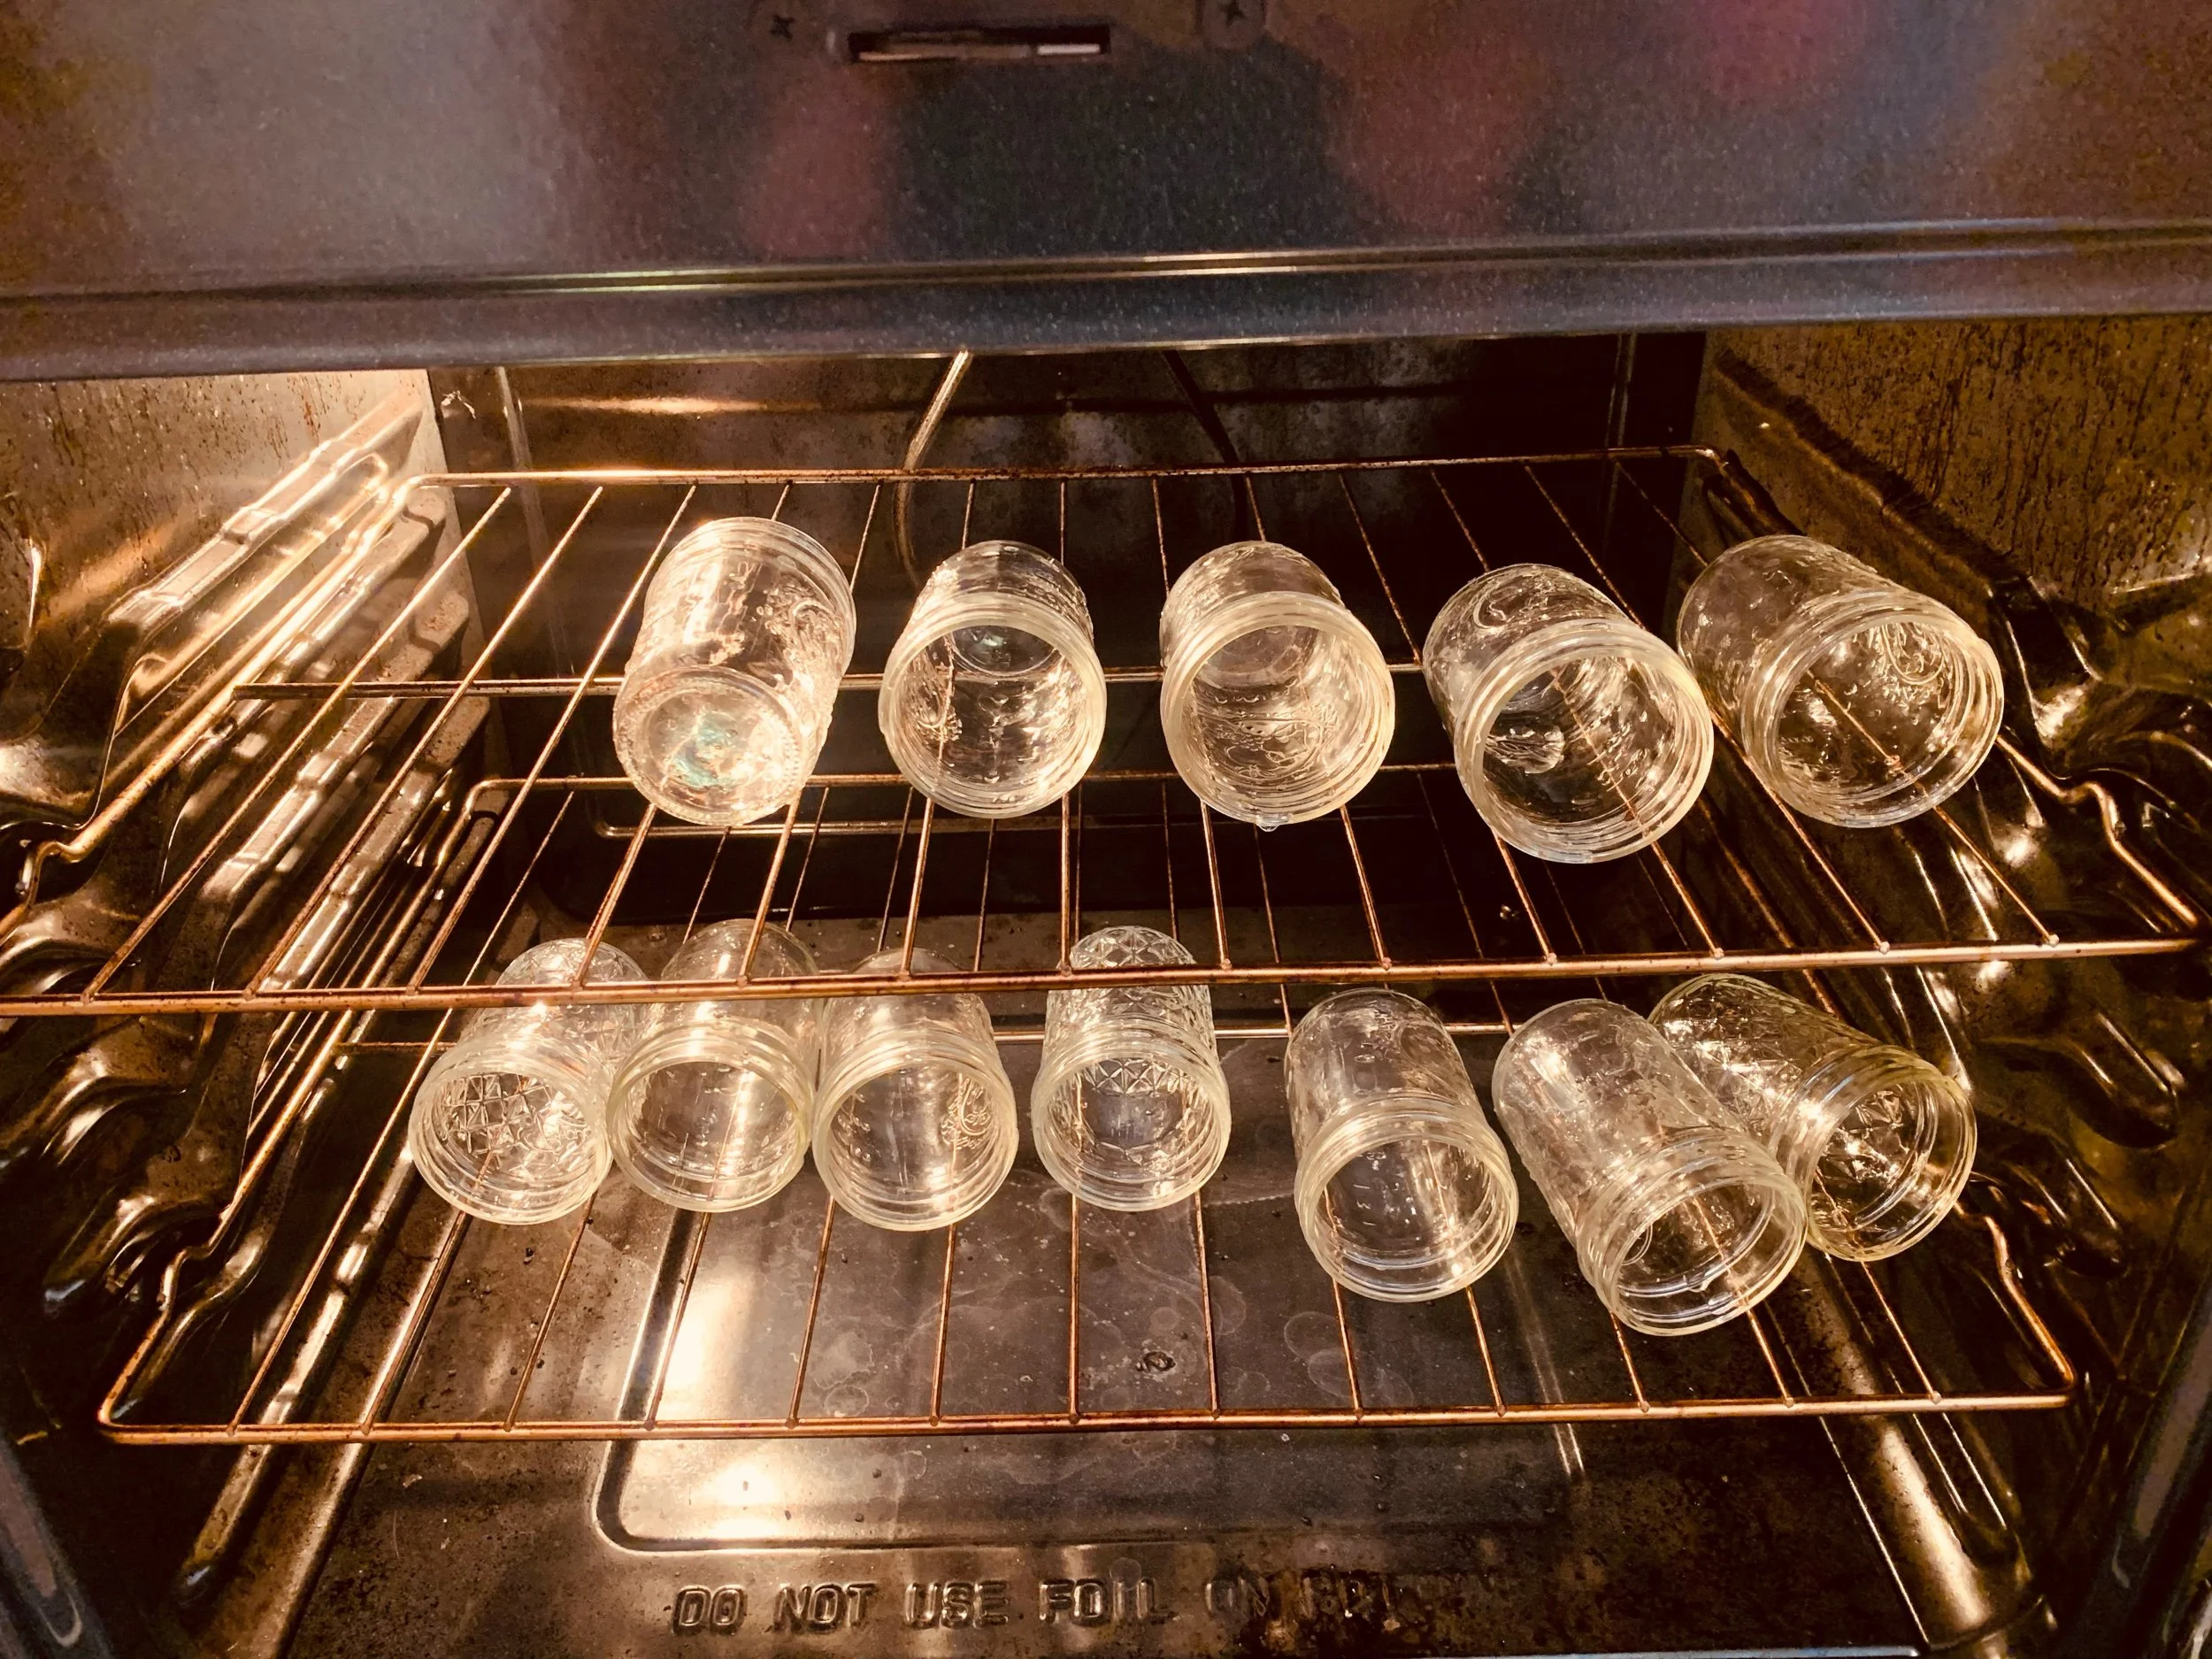
Prepare water bath and jars for canning. Fill water bath half way with water and bring to a boil. Wash jars and place in oven at the lowest heat setting (my oven goes as low as 170°F) for 10-20 minutes. Place lids in a small pot of water, bring to a boil, then remove from heat and let sit until ready to use.
Once water in water bath has boiled, turn off the heat and allow to cool until all jars have been filled and added.
Continue cooking. Bring your sauce back to a boil and give it a taste as it reheats. Consider adding a bit of honey if it lacks dimension. Boil for 5 minutes as you prep your canning station.
Fill jars. Remove warm jars from oven, fit with wide-mouth funnel and fill with hot sauce, leaving ½ inch head space. Wipe rims with a clean cloth, place lids and rings on jars and use jar tongs to transfer to the water bath.
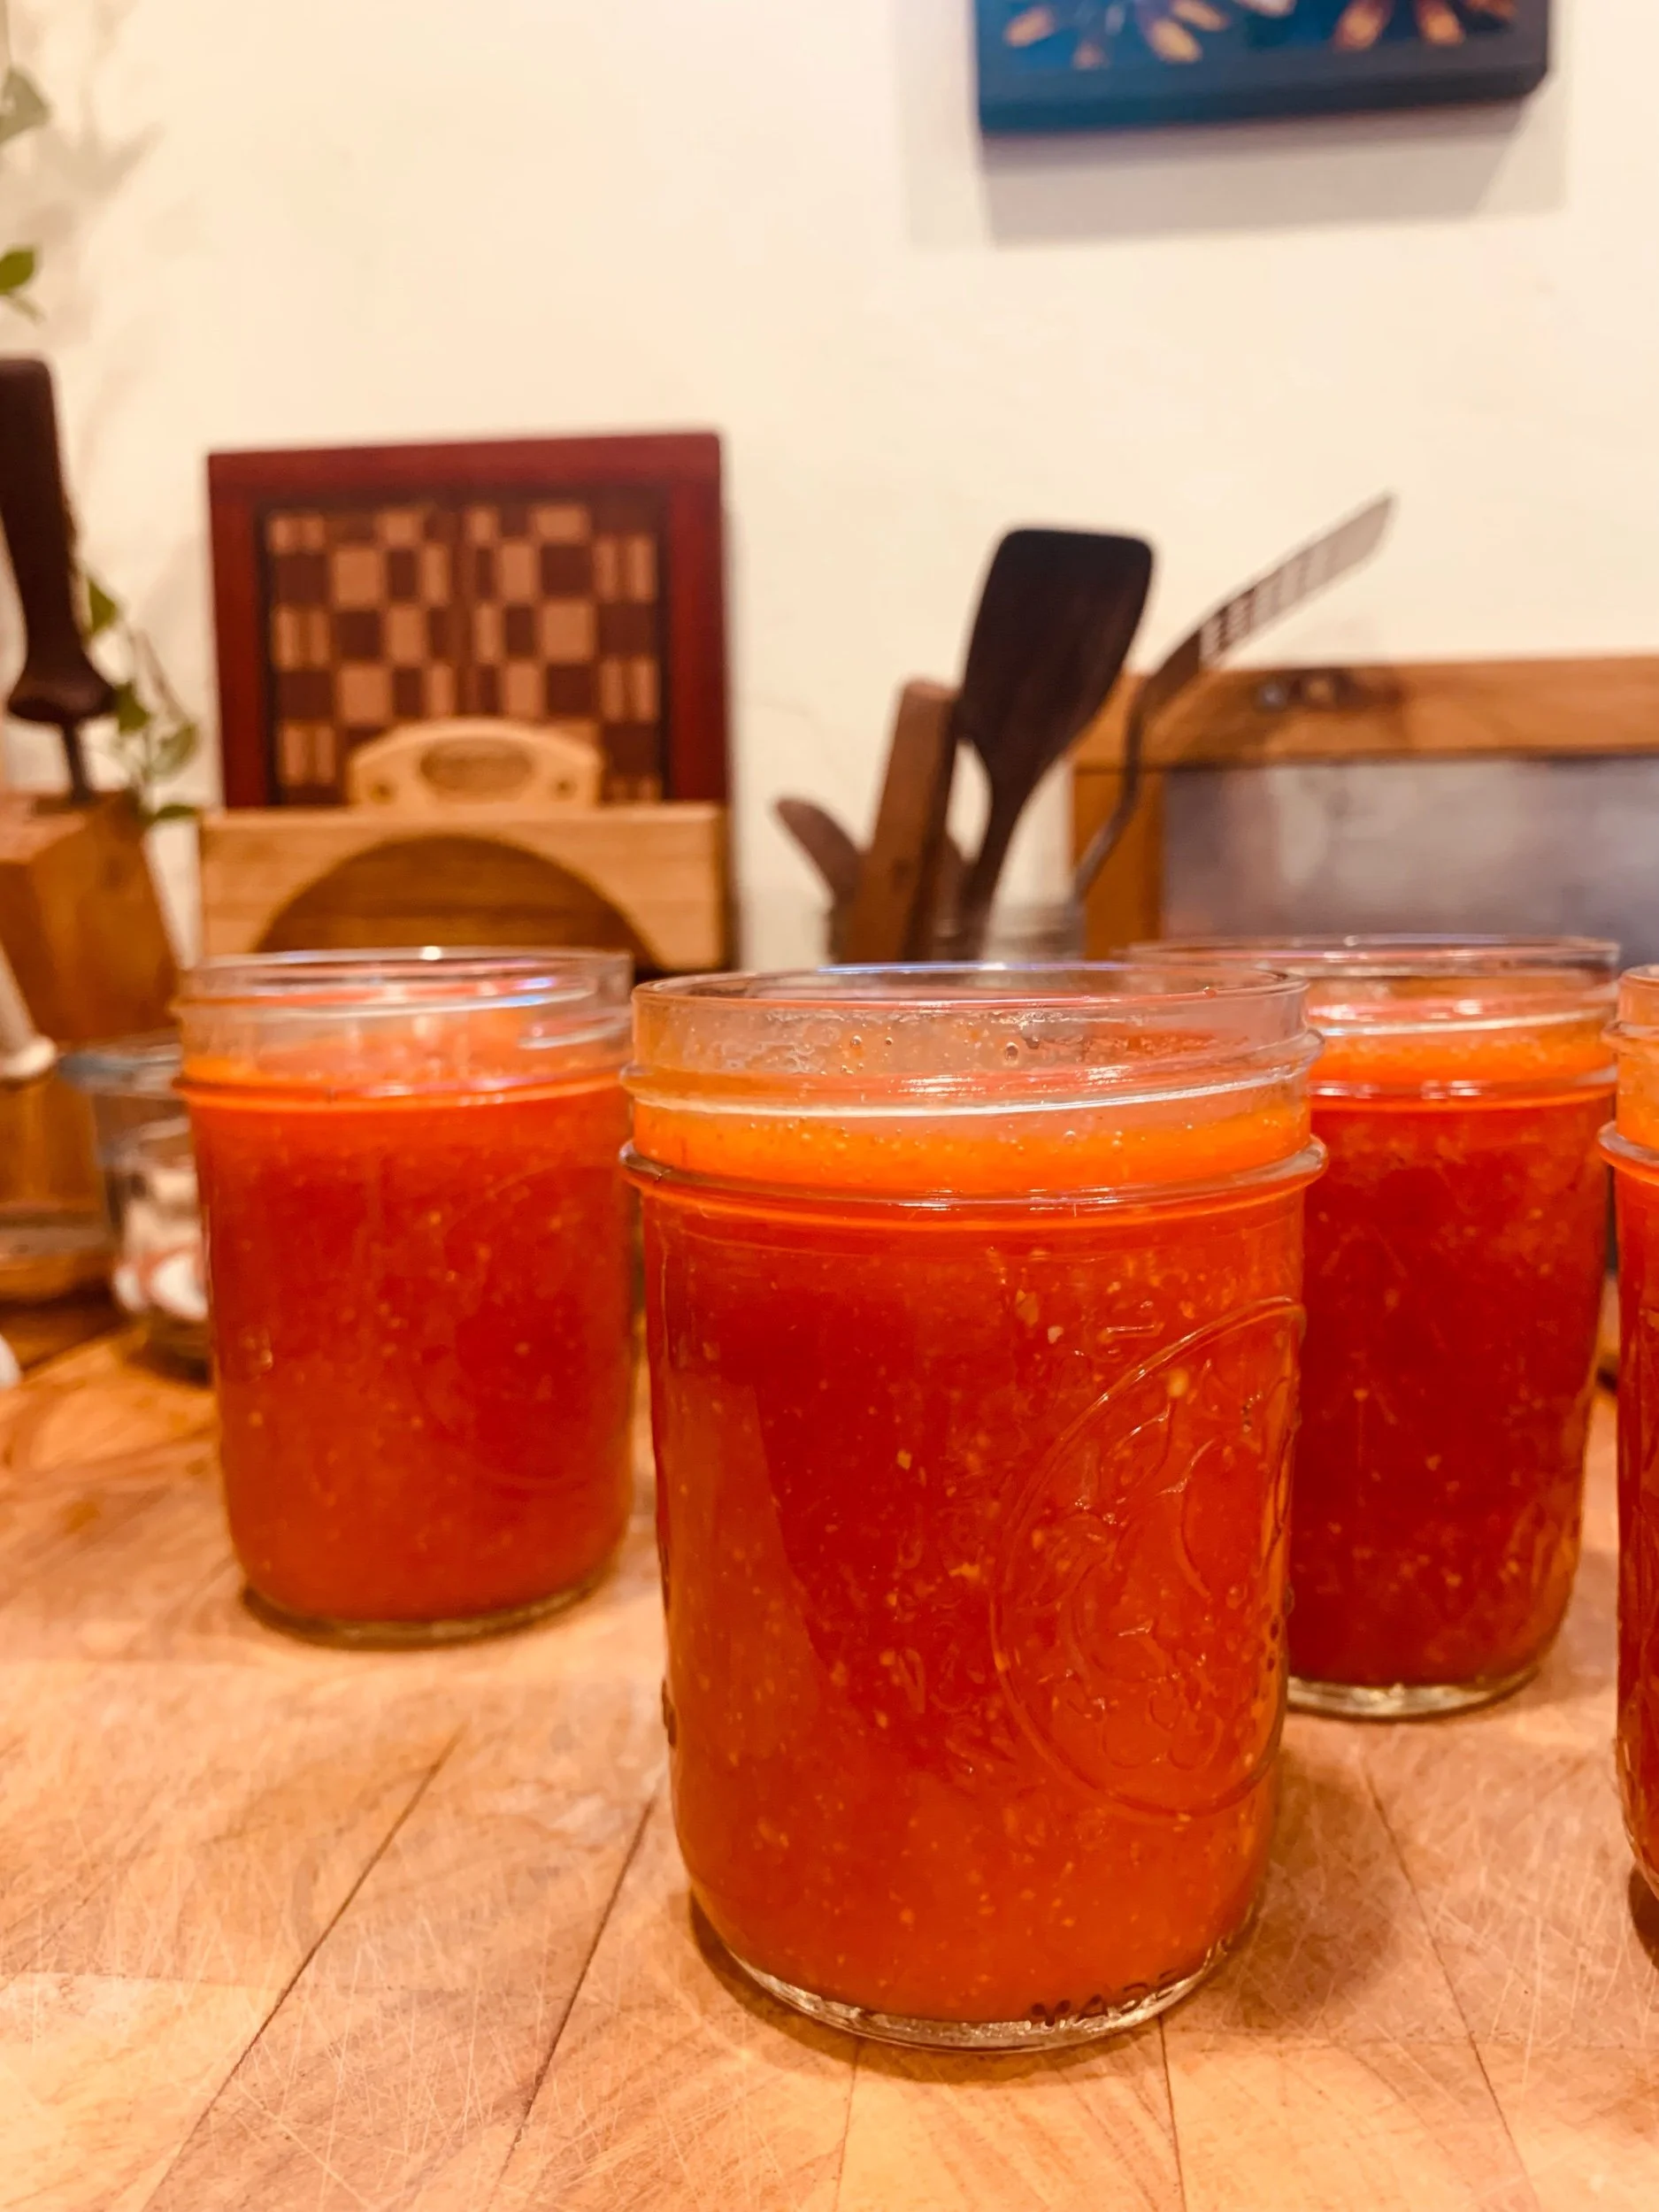
Process jars. Bring water bath back to a boil. Keep water boiling for 15 minutes. Turn off heat and allow jars to sit for an additional 5 minutes before removing. You will likely hear the satisfying “pop” of your jars sealing shortly after removing them from the water bath. Allow jars to sit undisturbed for several hours after processing to ensure that they have sealed properly. If a jar fails to seal, refrigerate it and enjoy.
Enjoy. The sauce is shelf-stable for at least 1 year. Once opened and refrigerated, the sauce has a seemingly limitless lifespan.
Marinated
Homemade roasted and marinated peppers put the standard slug-like store-bought versions to shame. This recipe transforms any pepper you have on hand into a silky, flavorful treat, delicious eaten straight from the jar, added to pizza, atop a salad or mixed into red sauce.
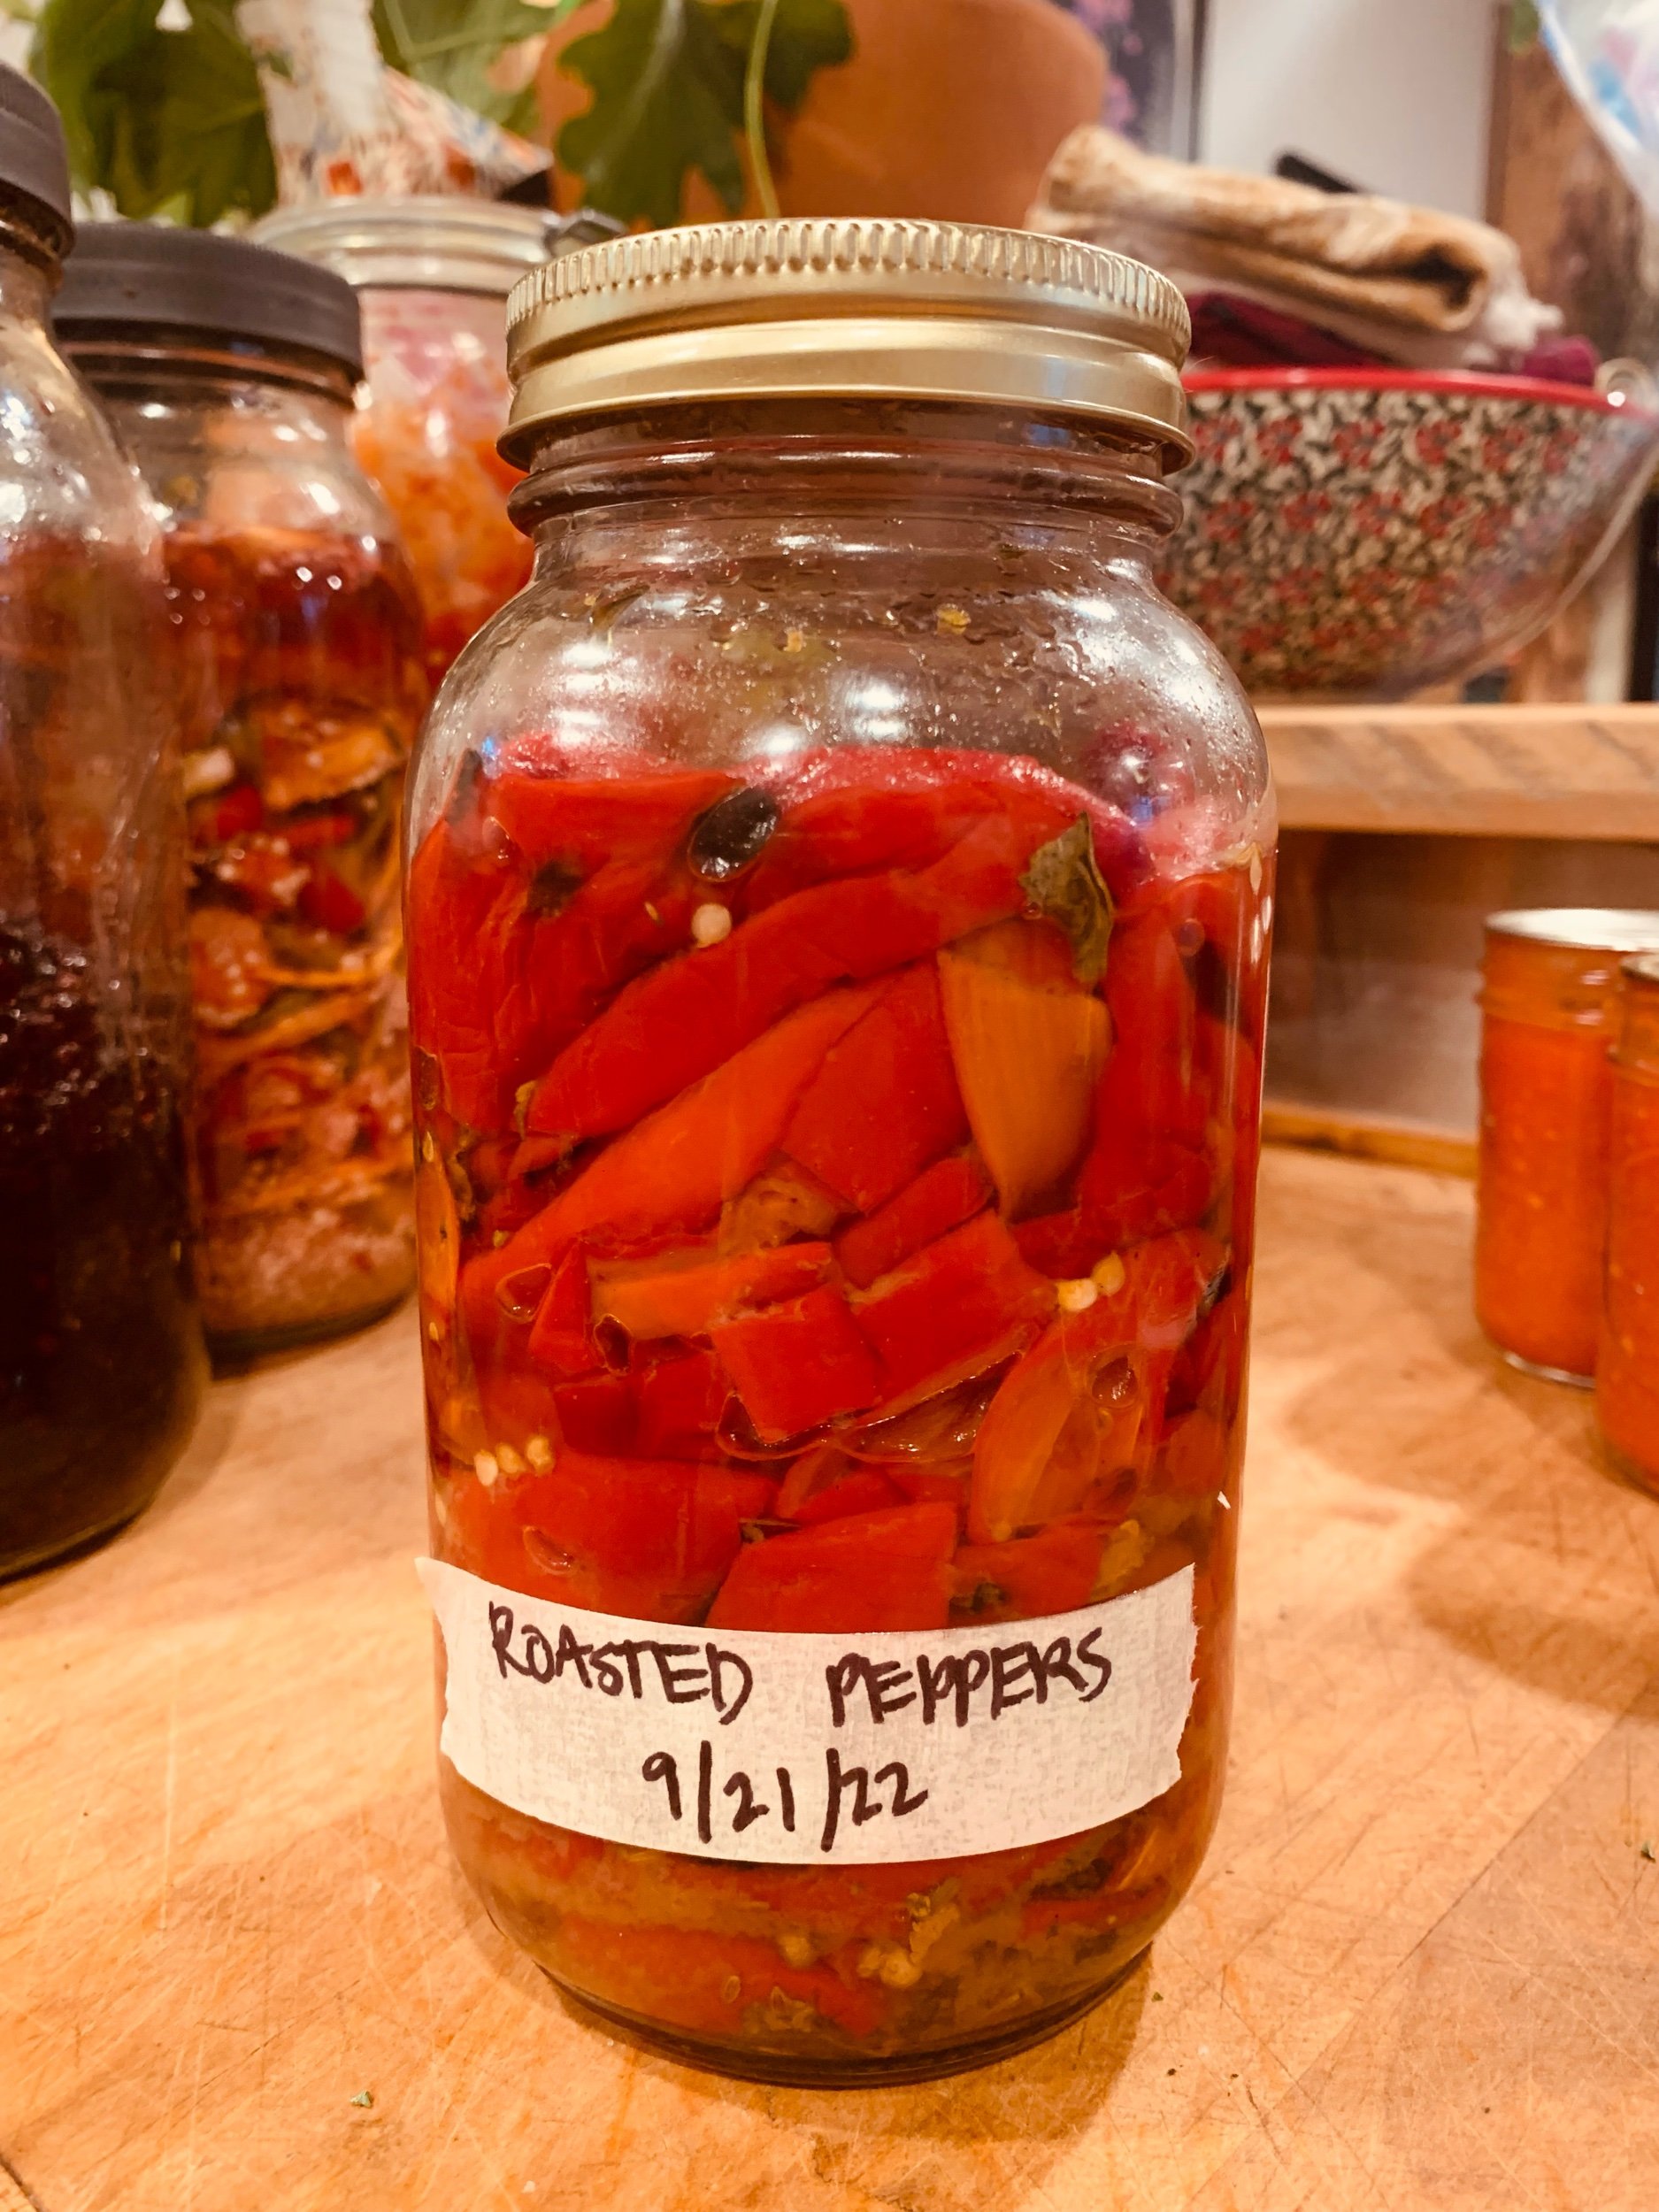
Roasted Red Peppers in Brine
INGREDIENTS
Peppers of any variety
Olive oil
Salt
Lemon juice and/or vinegar
Optional additions: dried herbs (e.g. basil, thyme, oregano), garlic, black peppercorns
TOOLS
Knife
Cutting Board
Baking sheet
Oven
Glass jar
INSTRUCTIONS
Preheat oven to 450F.
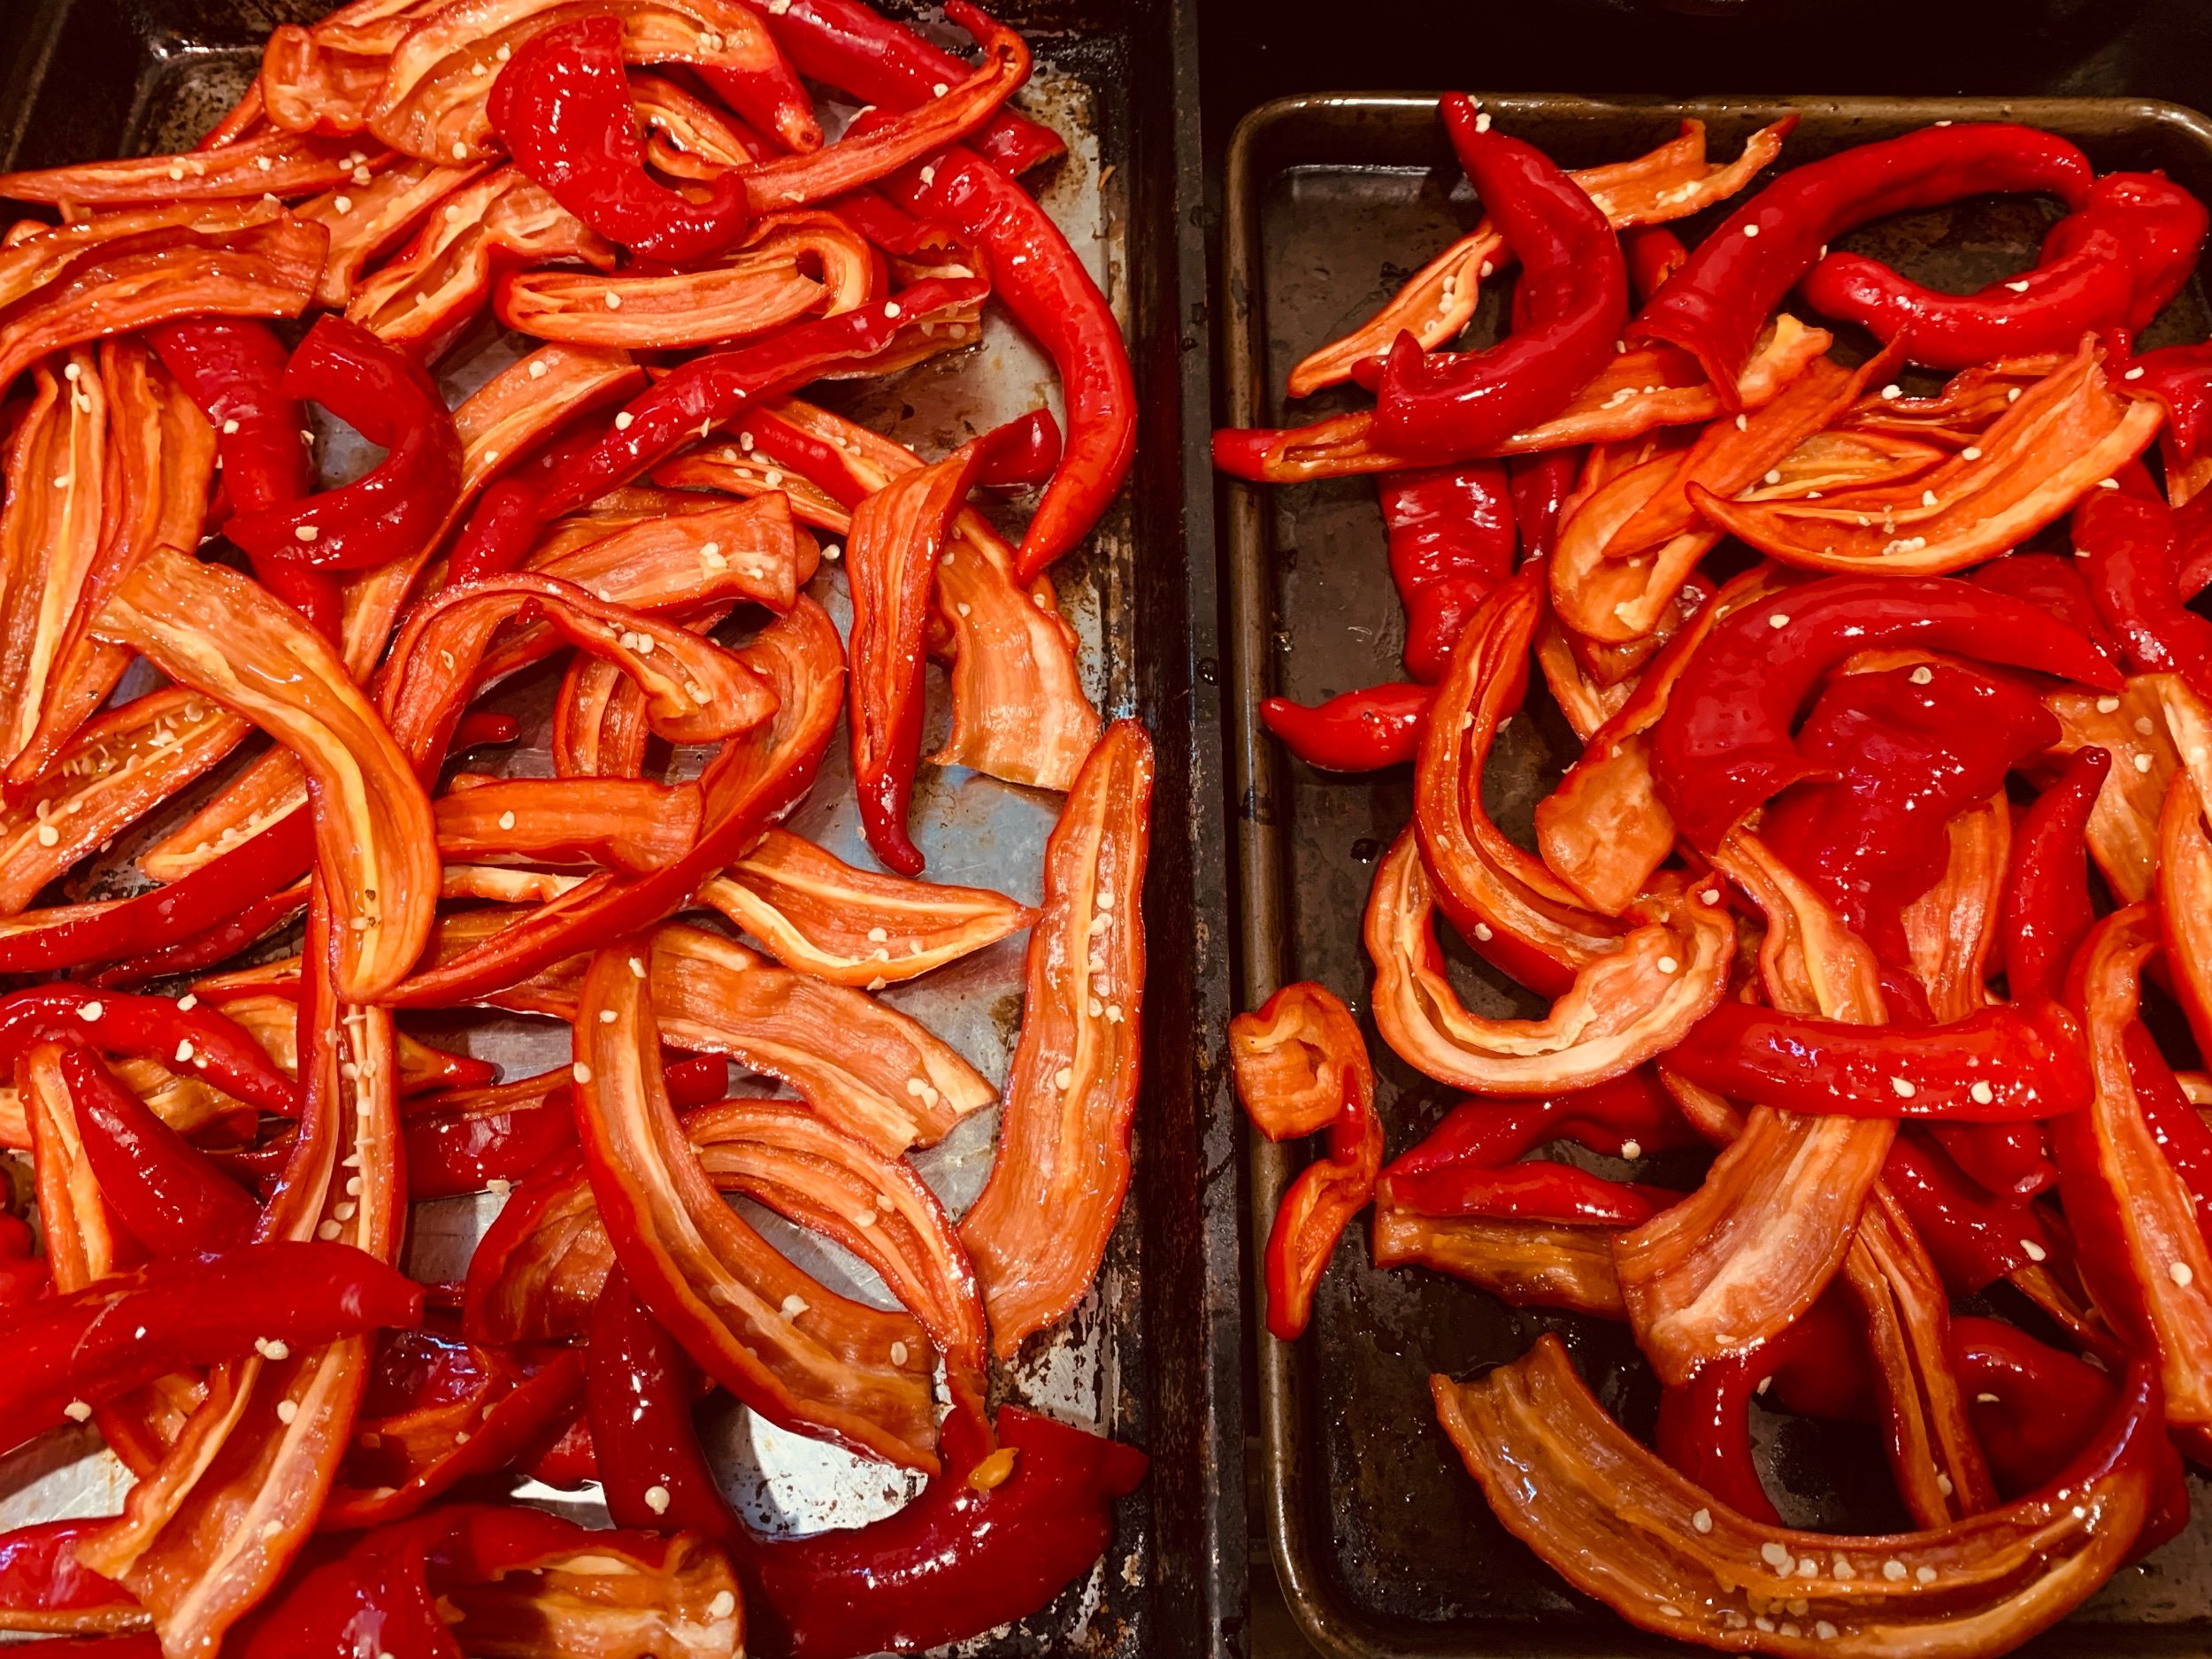
Prep peppers. Cut peppers in half and remove seeds and stems. Spread on a baking sheet in a single layer, drizzle with olive oil, sprinkle with salt and toss to coat.
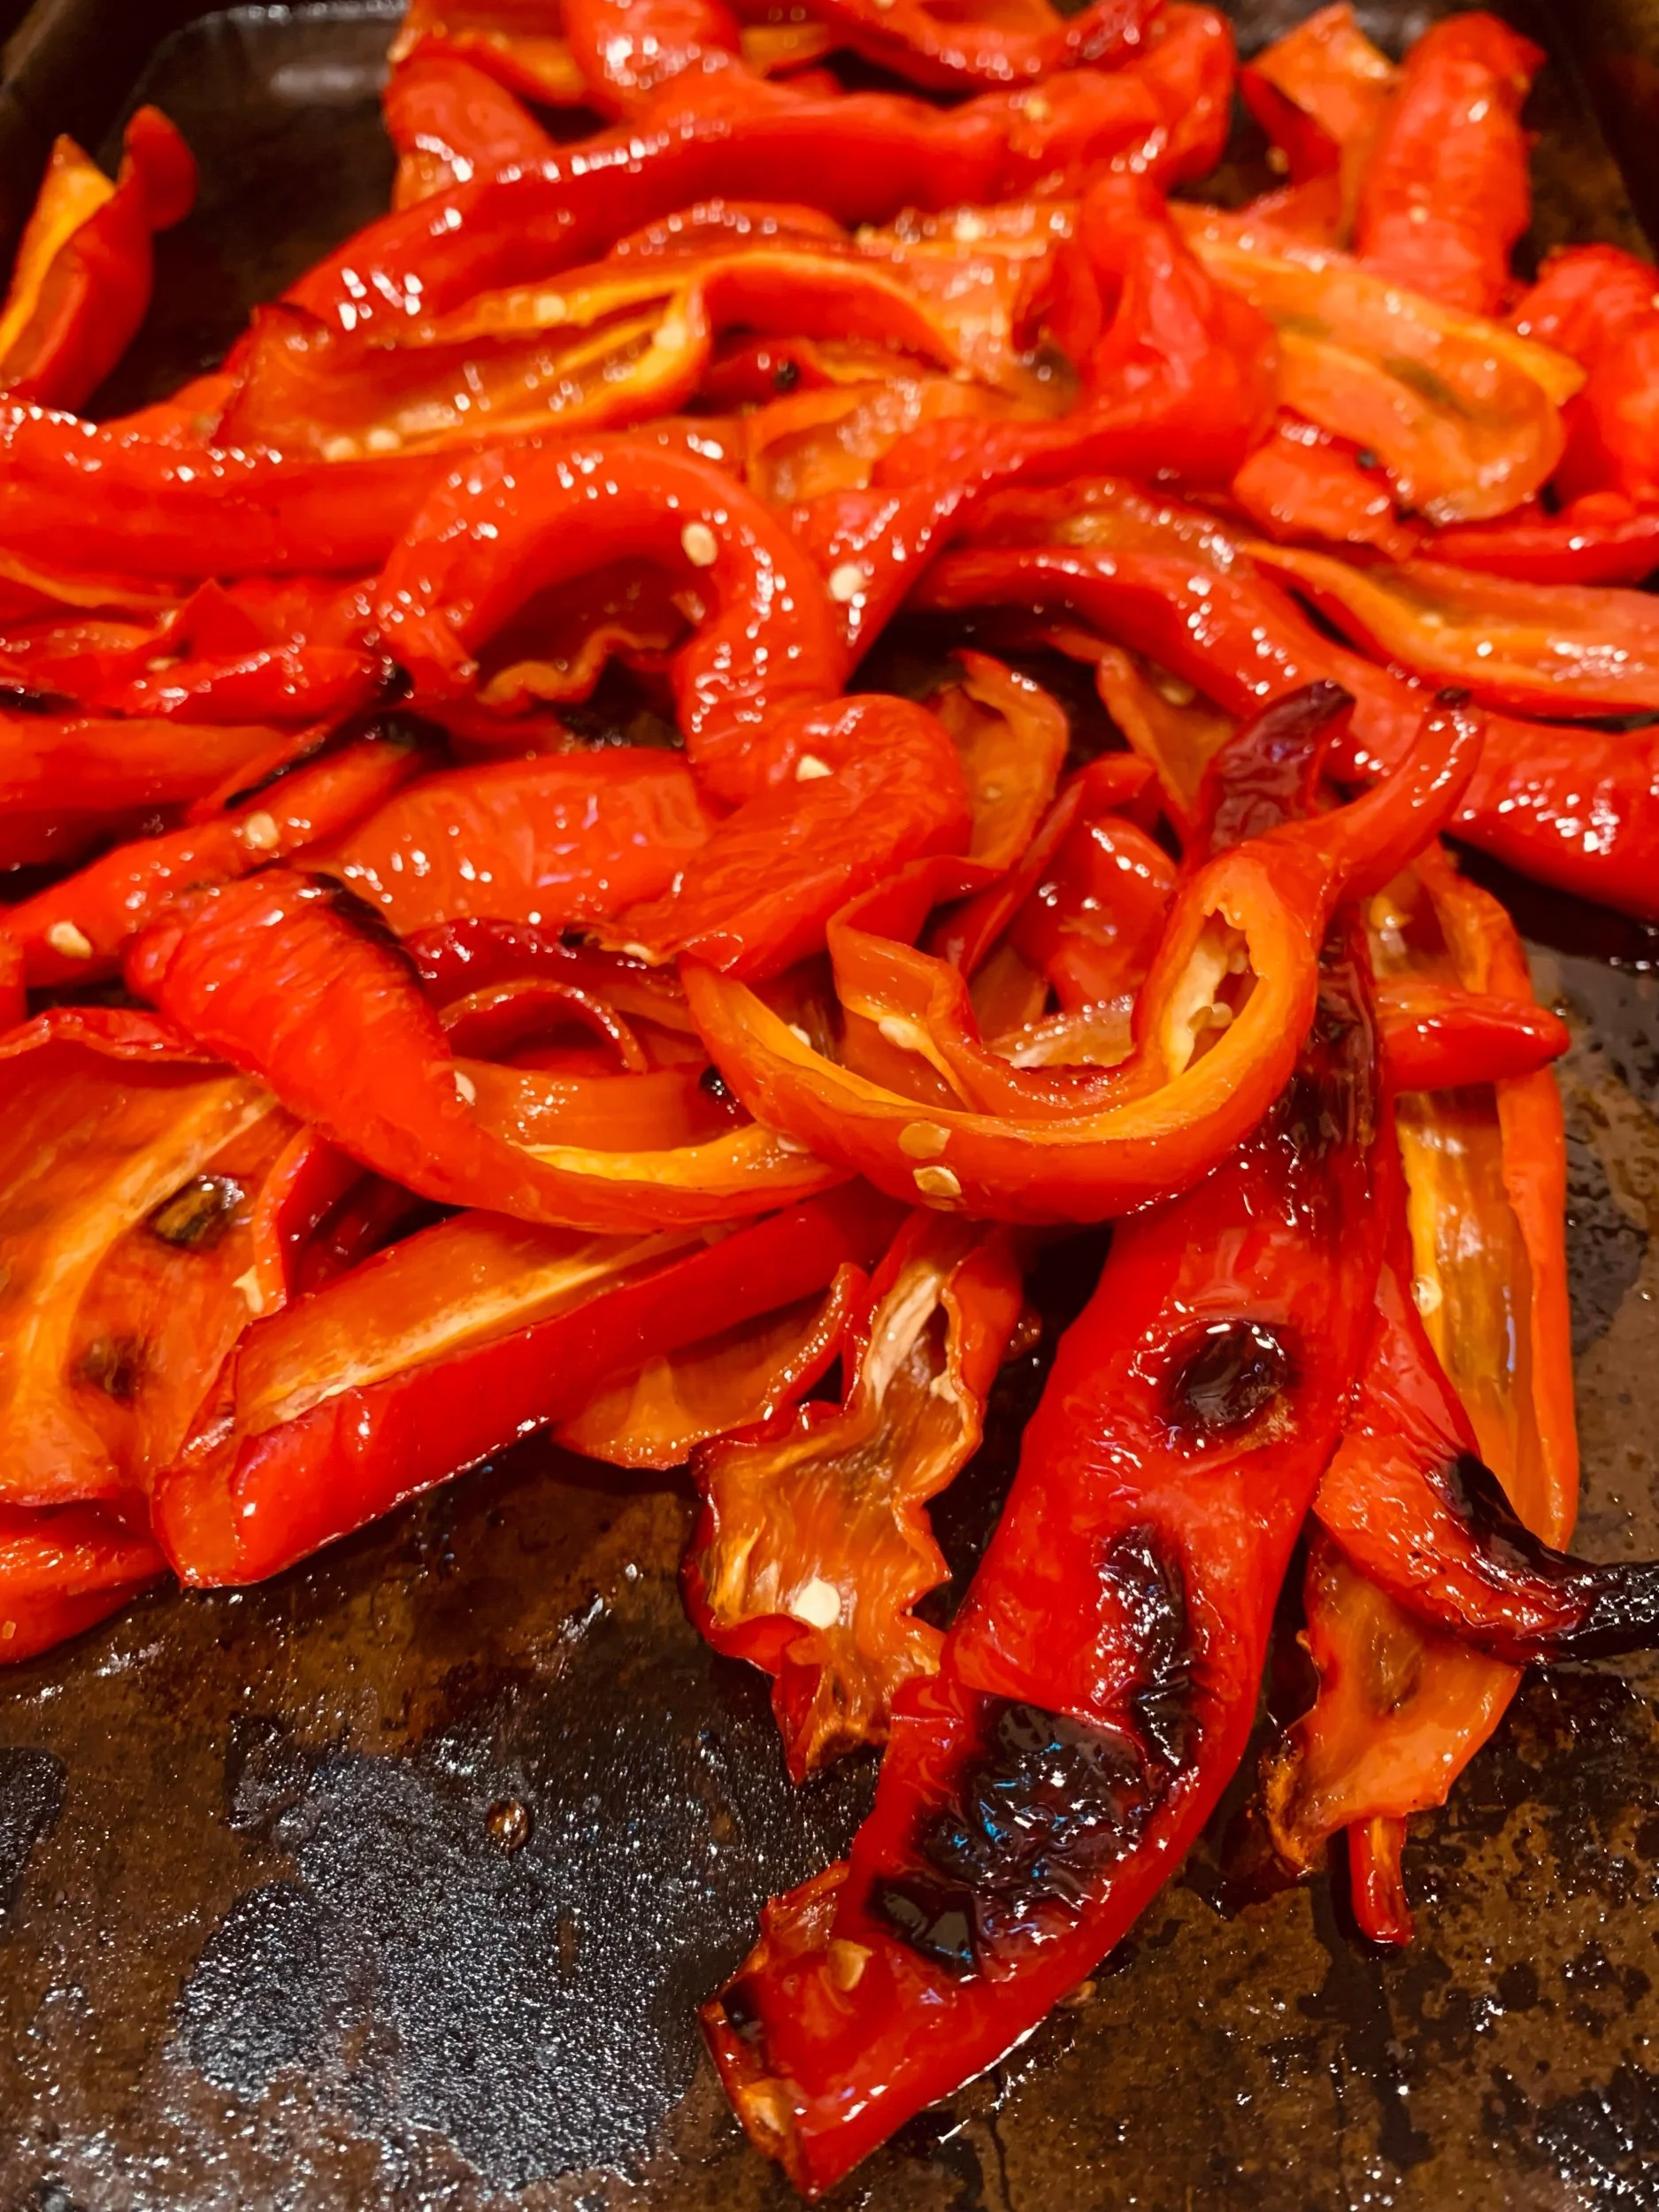
Roast peppers. Transfer baking sheet to oven and roast, stirring every 10 minutes, until peppers are tender and start to blacken (see center photo above), 20-30 minutes total. Remove from oven and let cool.
Marinate. Add salt (1/2 teaspoon for a pint jar, 1 teaspoon for a quart jar) and lemon juice or vinegar (1 tsp- pint, 2 tsp- quart) to the bottom of the jar, along with any additional ingredients. Press peppers into jar, removing as much air as possible. Top with another splash of lemon juice or vinegar and olive oil to cover. Let sit at room temperature for 8 hours or overnight, then transfer to the refrigerator.
Enjoy. Peppers should last at least 6 months in the fridge.
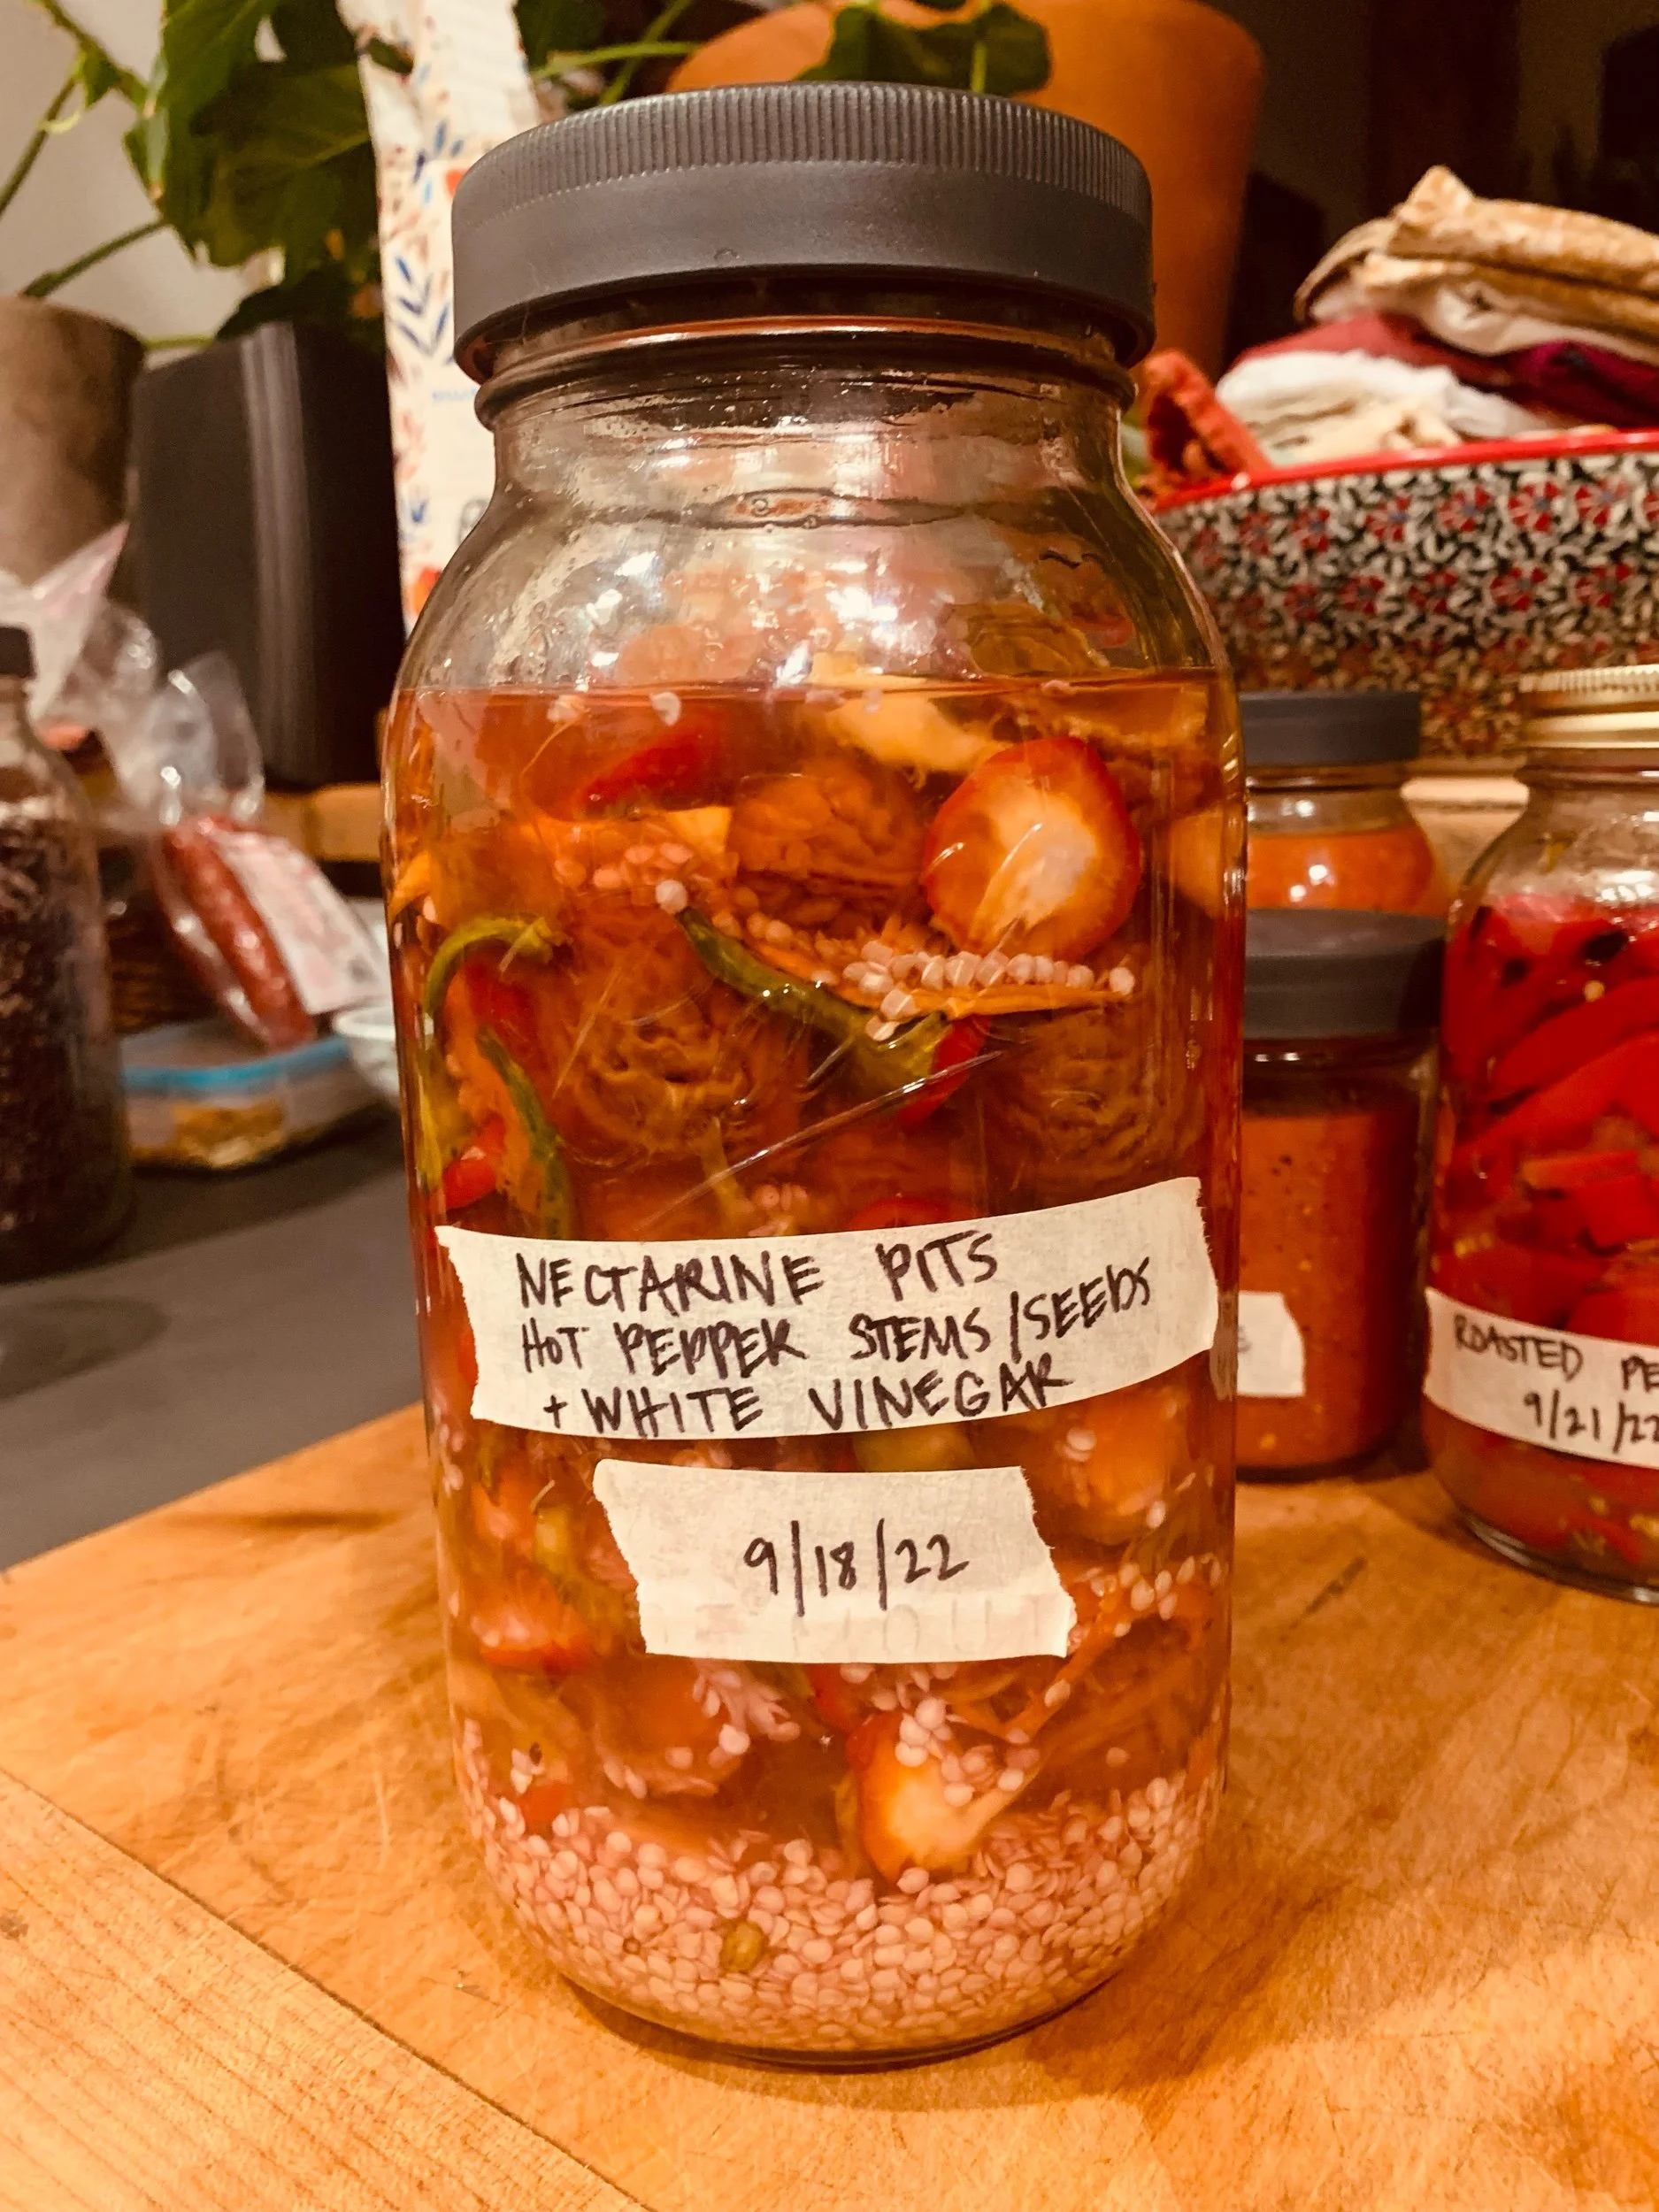
Bonus Recipe:
Pepper-infused Vinegar
INGREDIENTS
Pepper leftovers (seeds, stems, skins) either fresh or roasted
Vinegar of choice
Other optional ingredients: nectarine or peach pits.
TOOLS
Large jar with lid
INSTRUCTIONS
Place your pepper leftovers in the jar and add vinegar to cover. Lid, label and let steep for at least one month before straining.
Enjoy in dressings, marinades, and as a substitute for other vinegars.