
RECIPE: Giardiniera
The perfect PICKLE for vegetable odds and ends

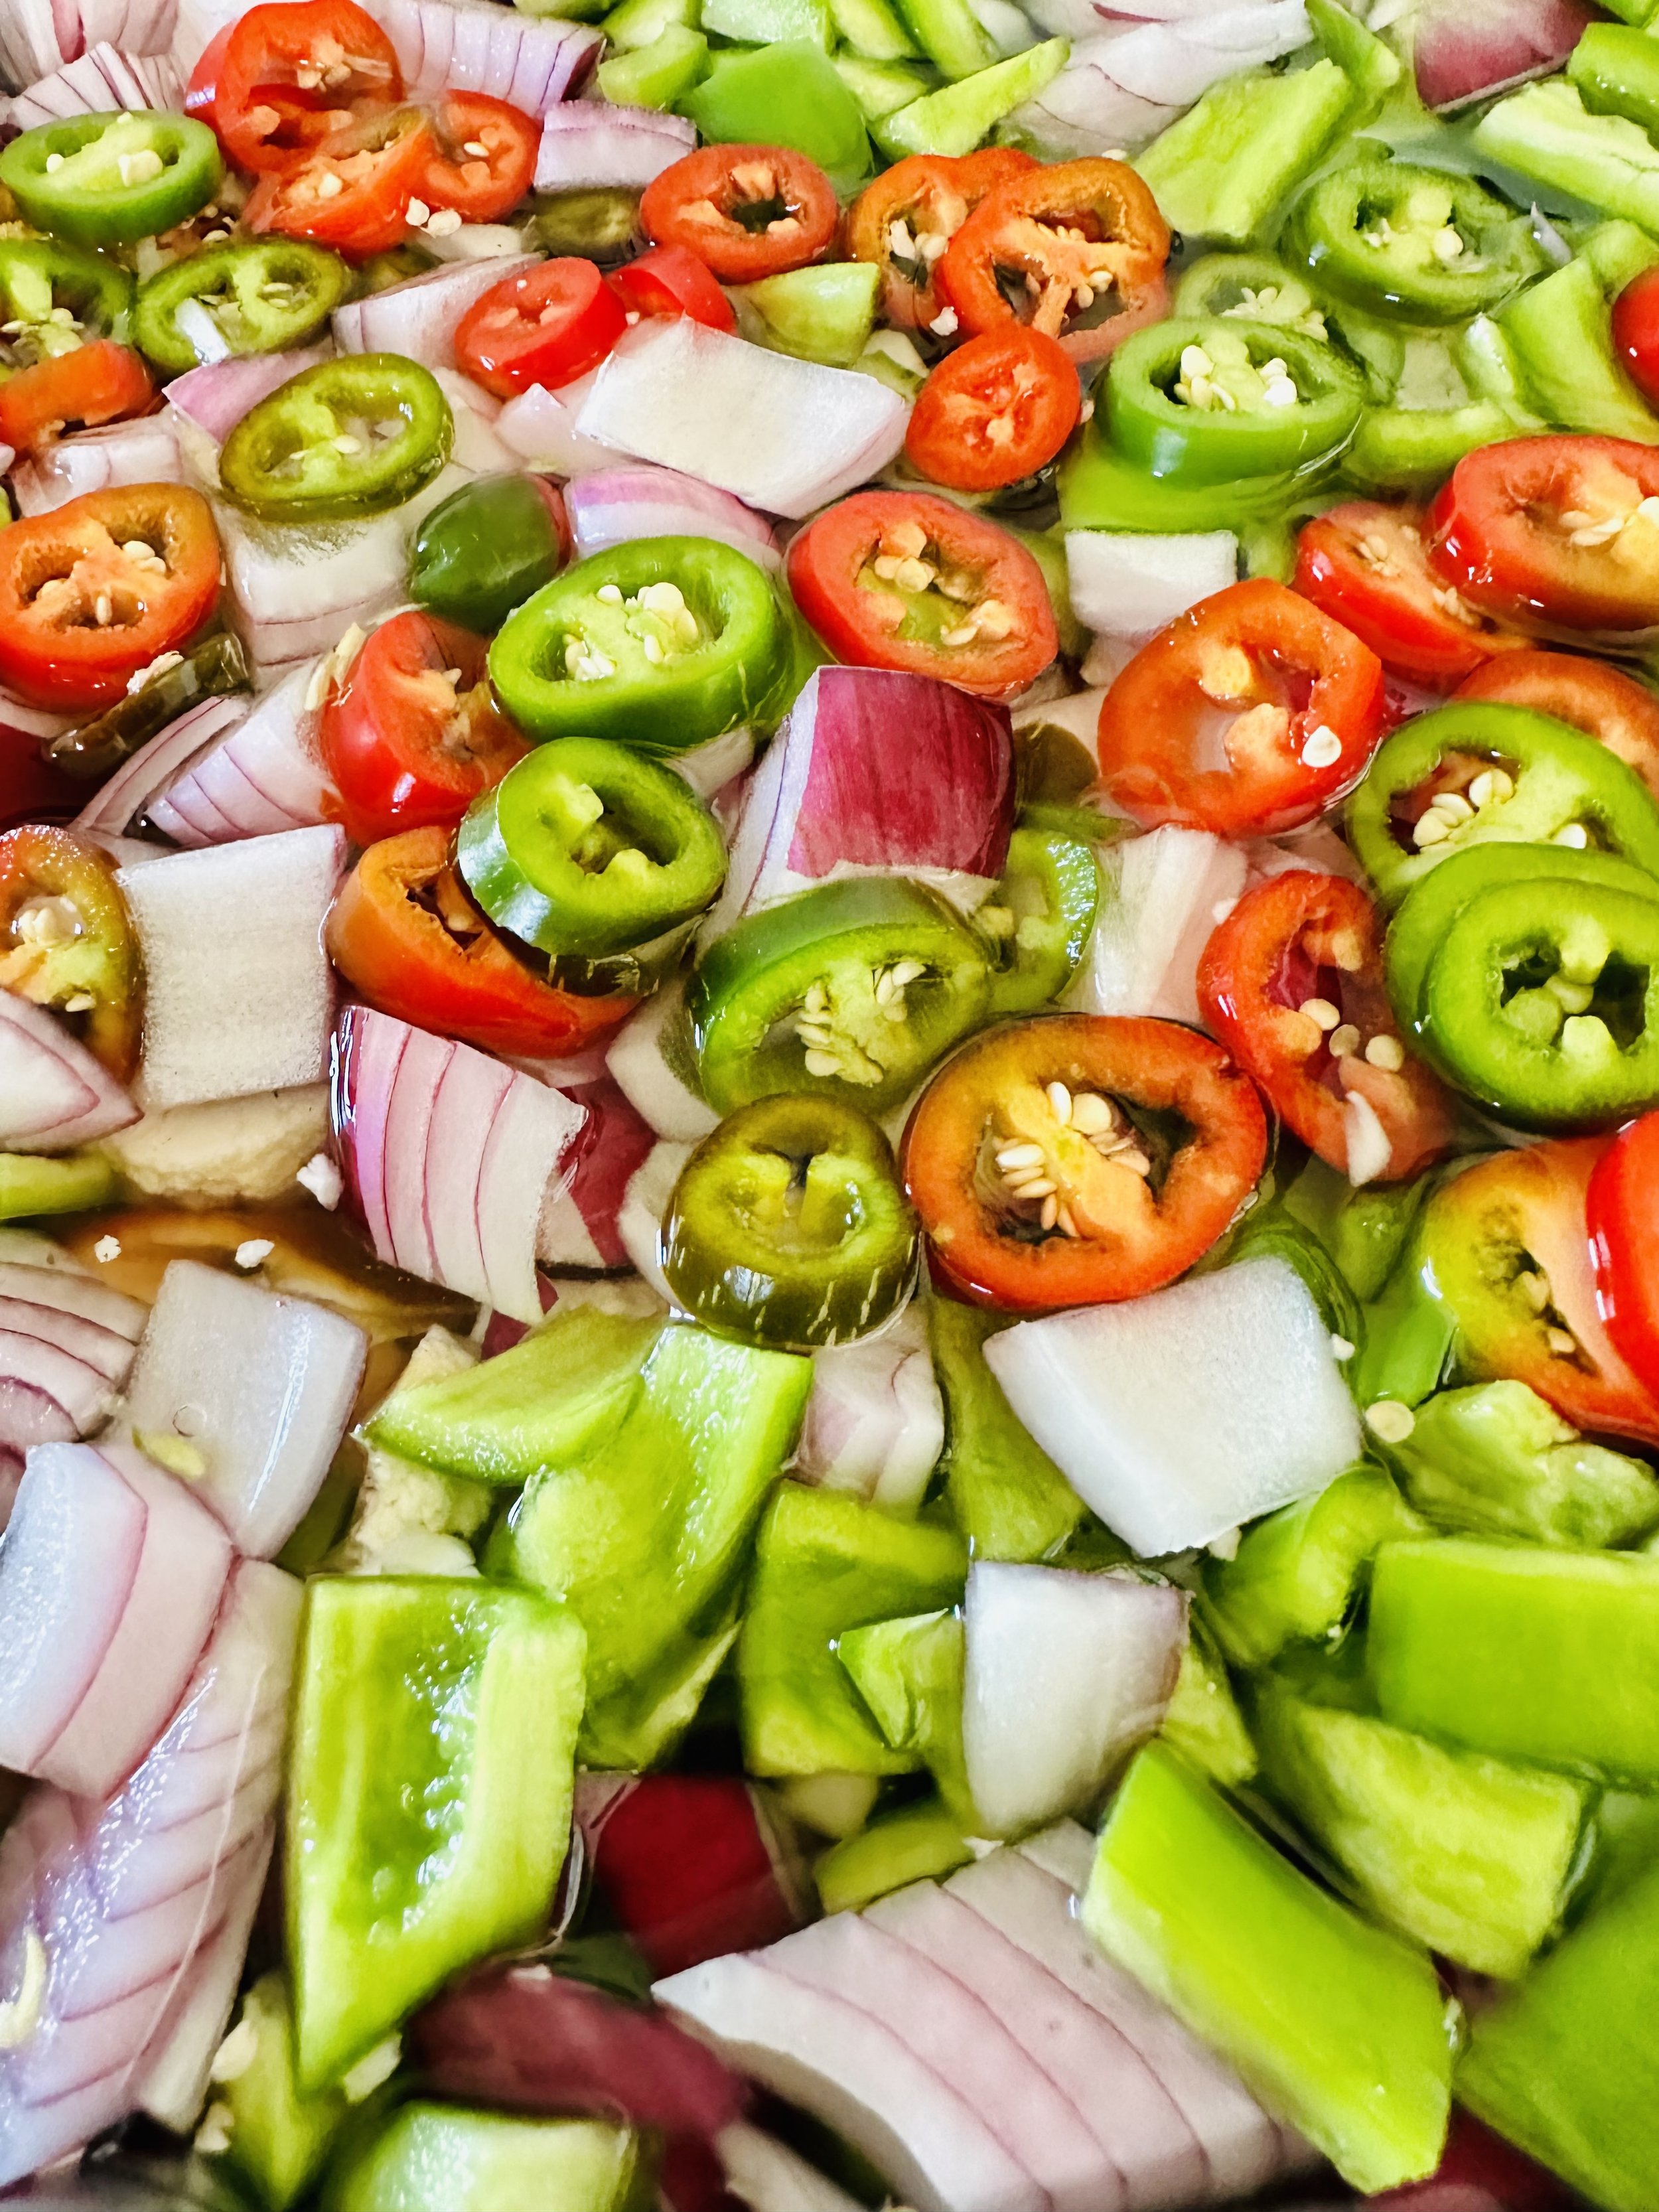
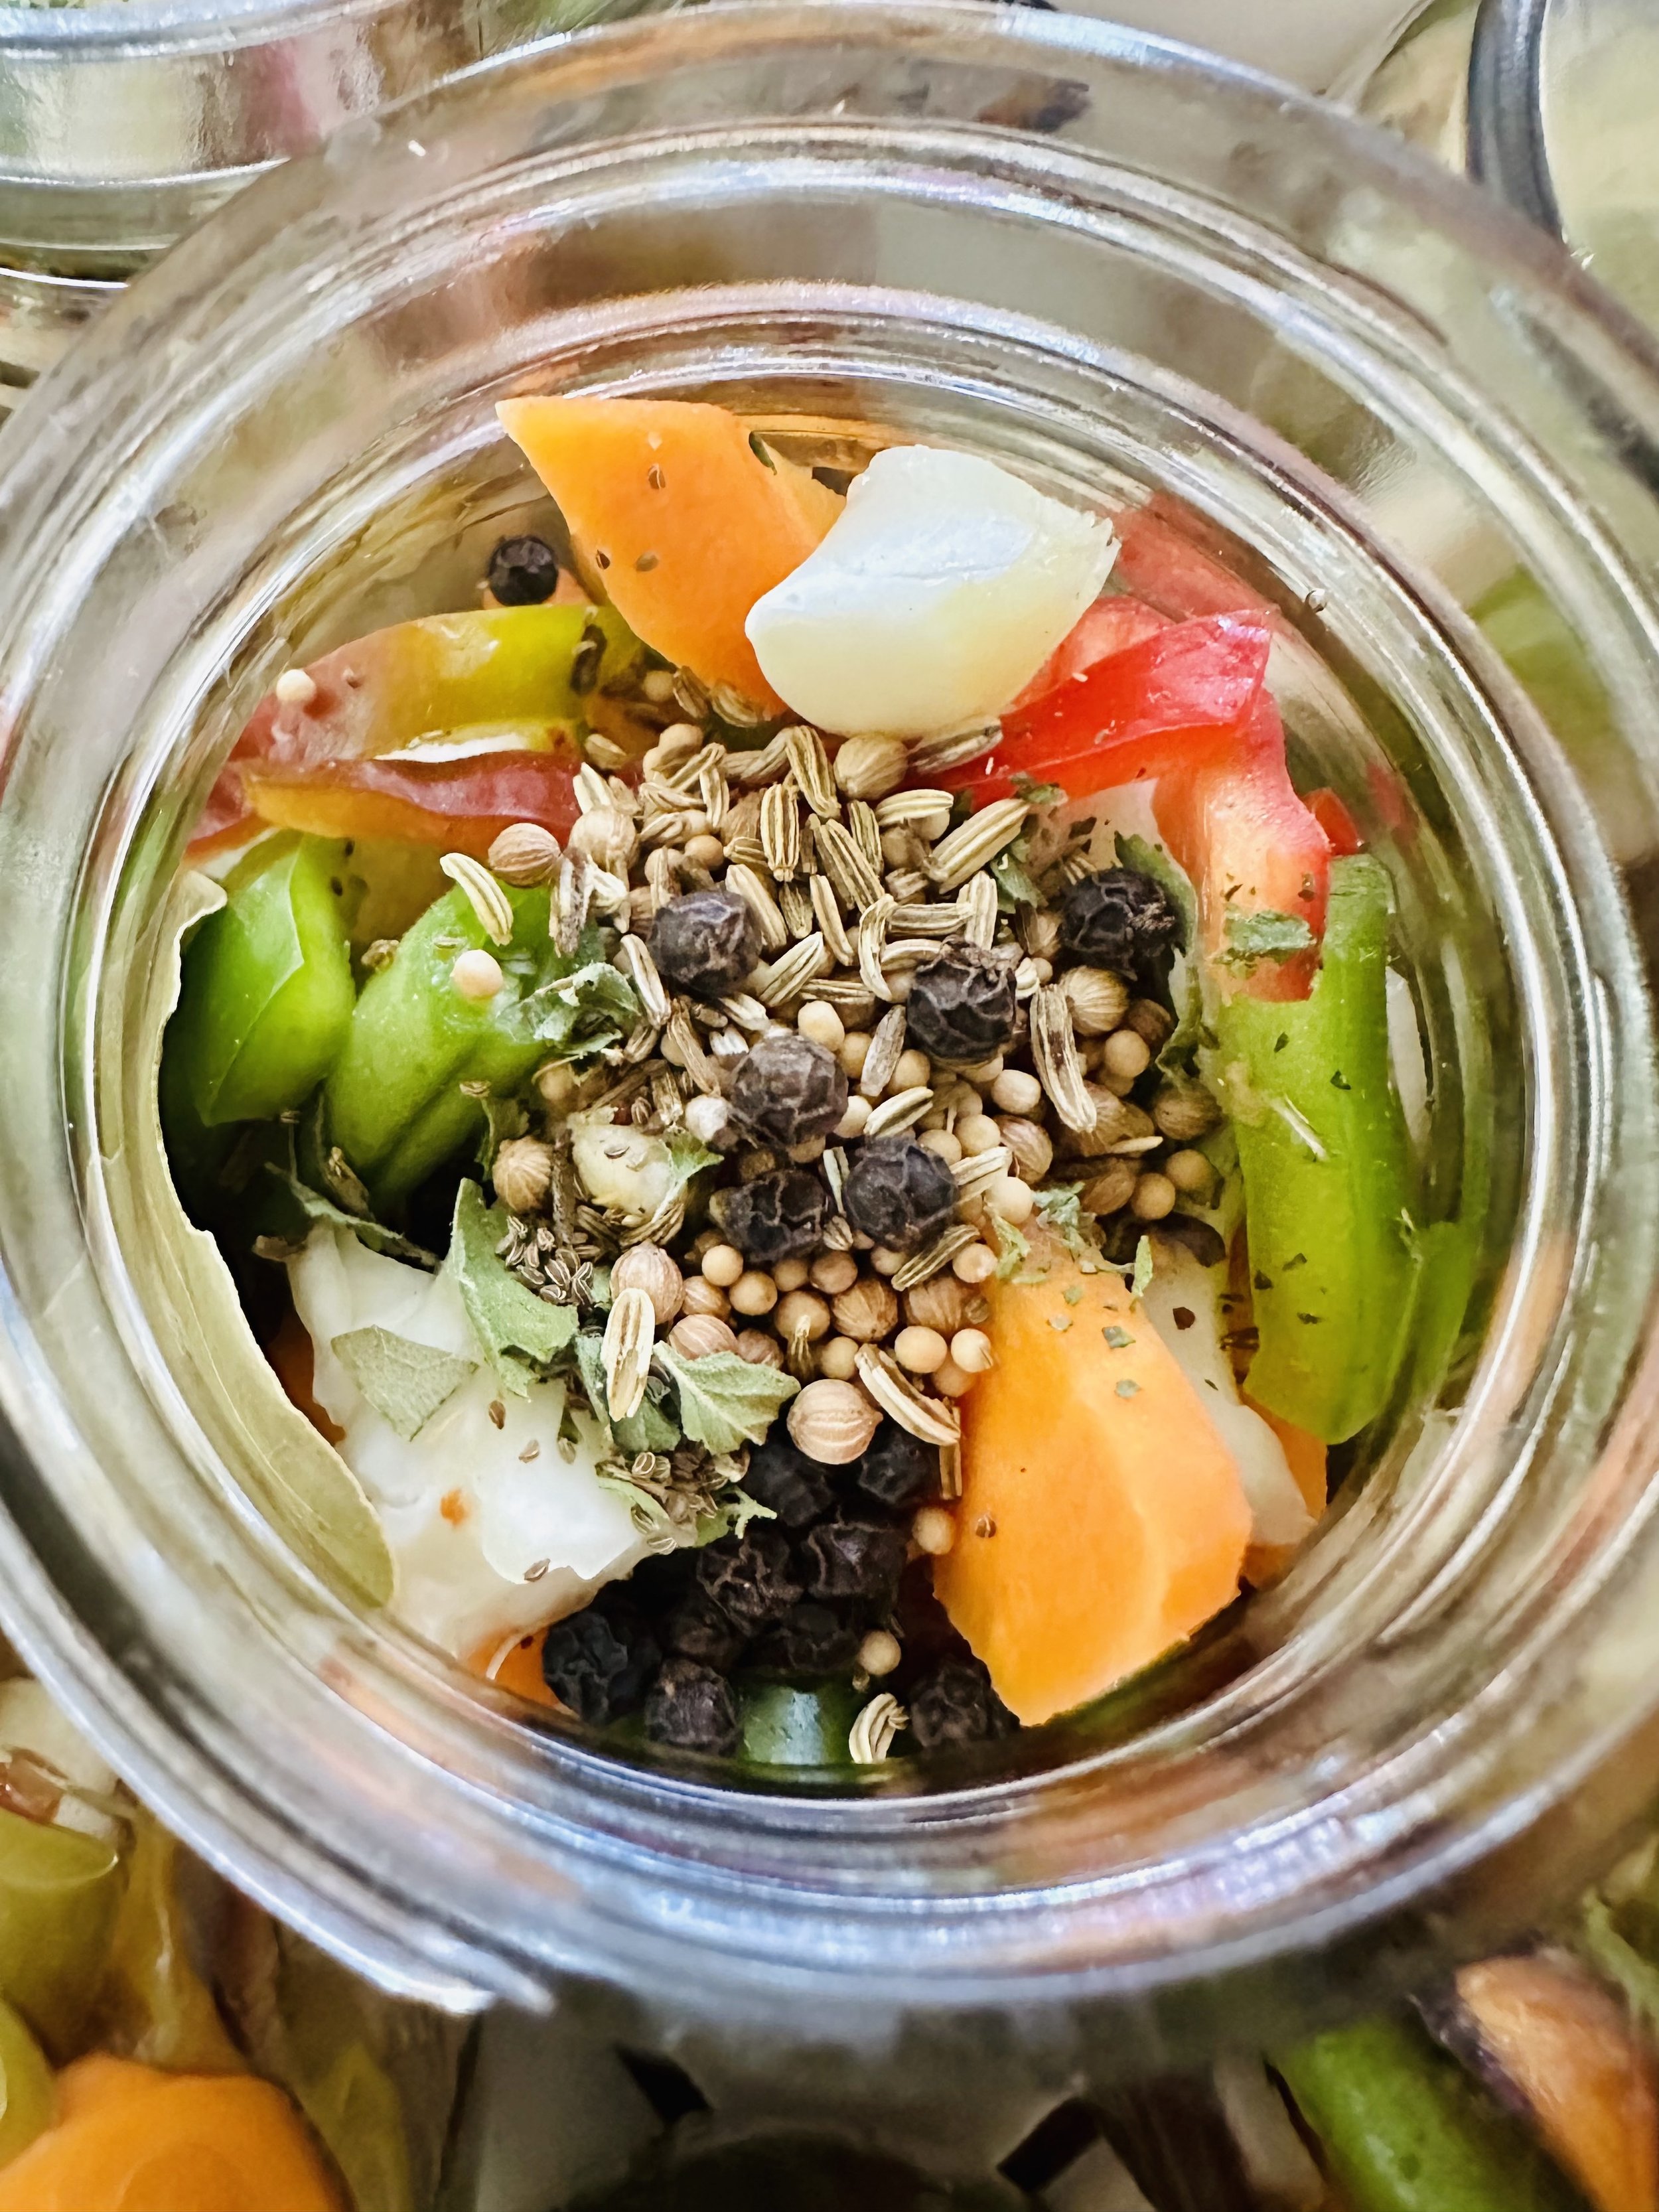
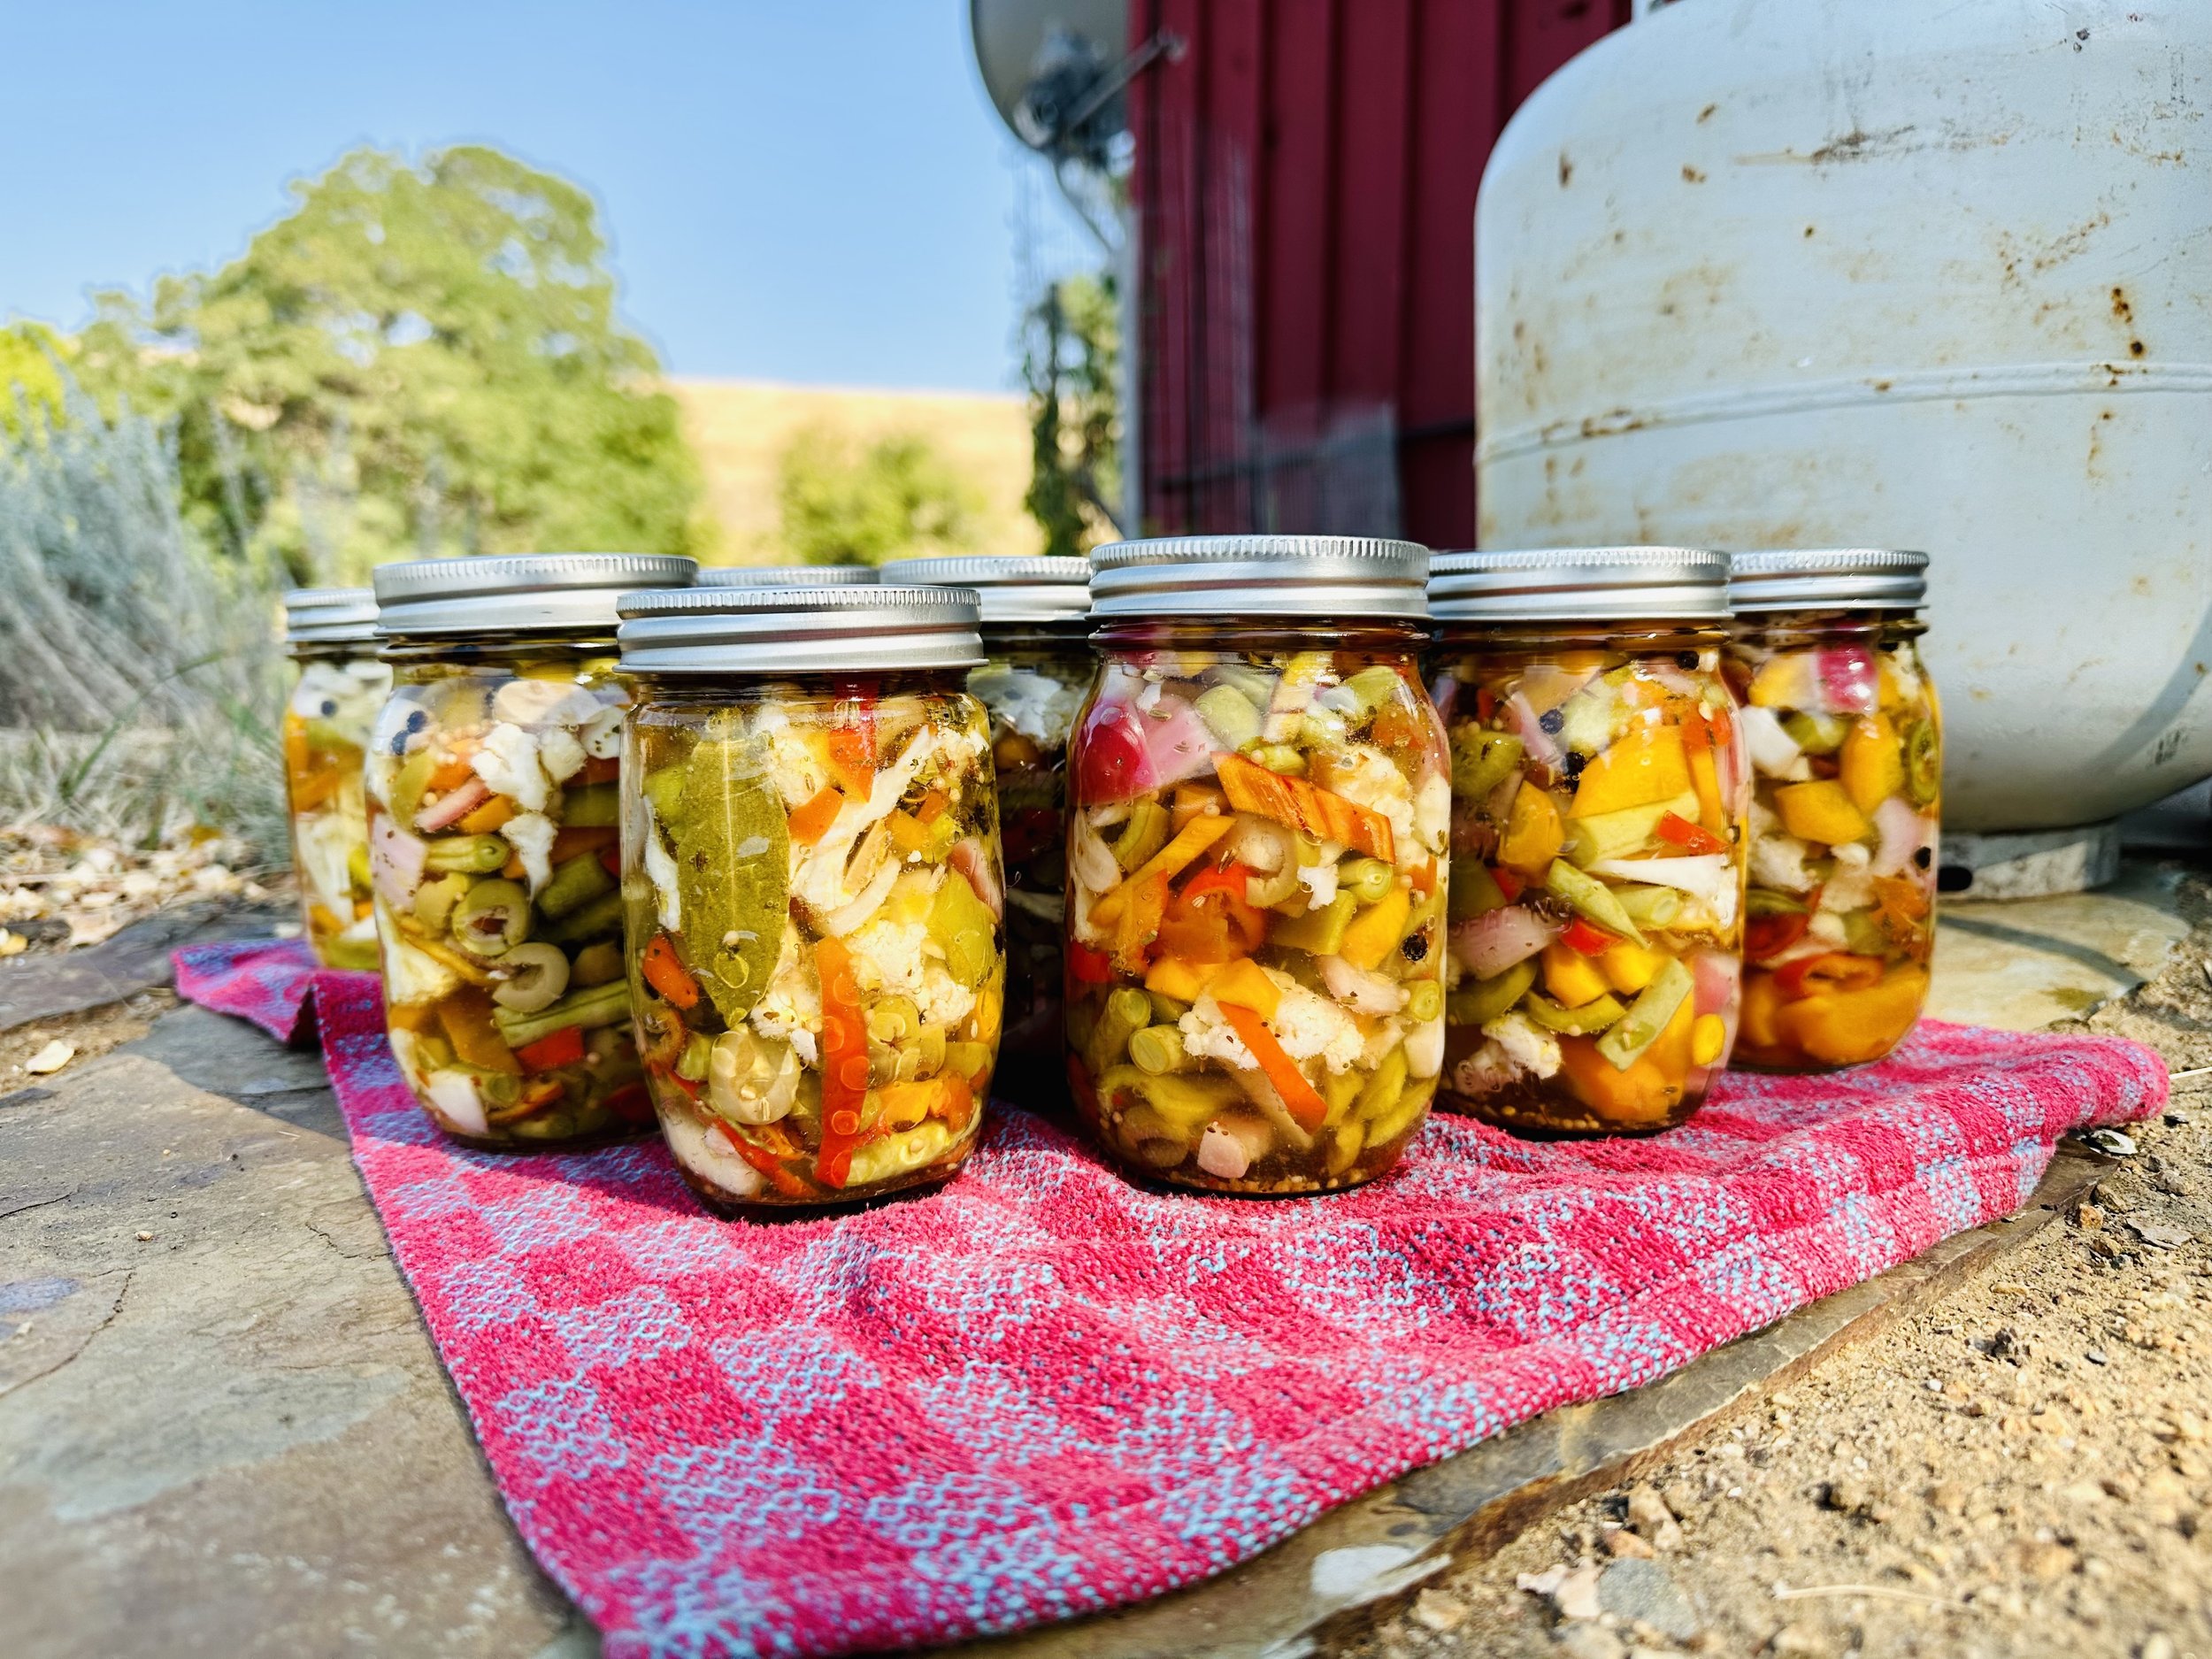
Giardiniera in the evening light. Both a delicious and beautiful way to preserve a plethora of summer vegetables.
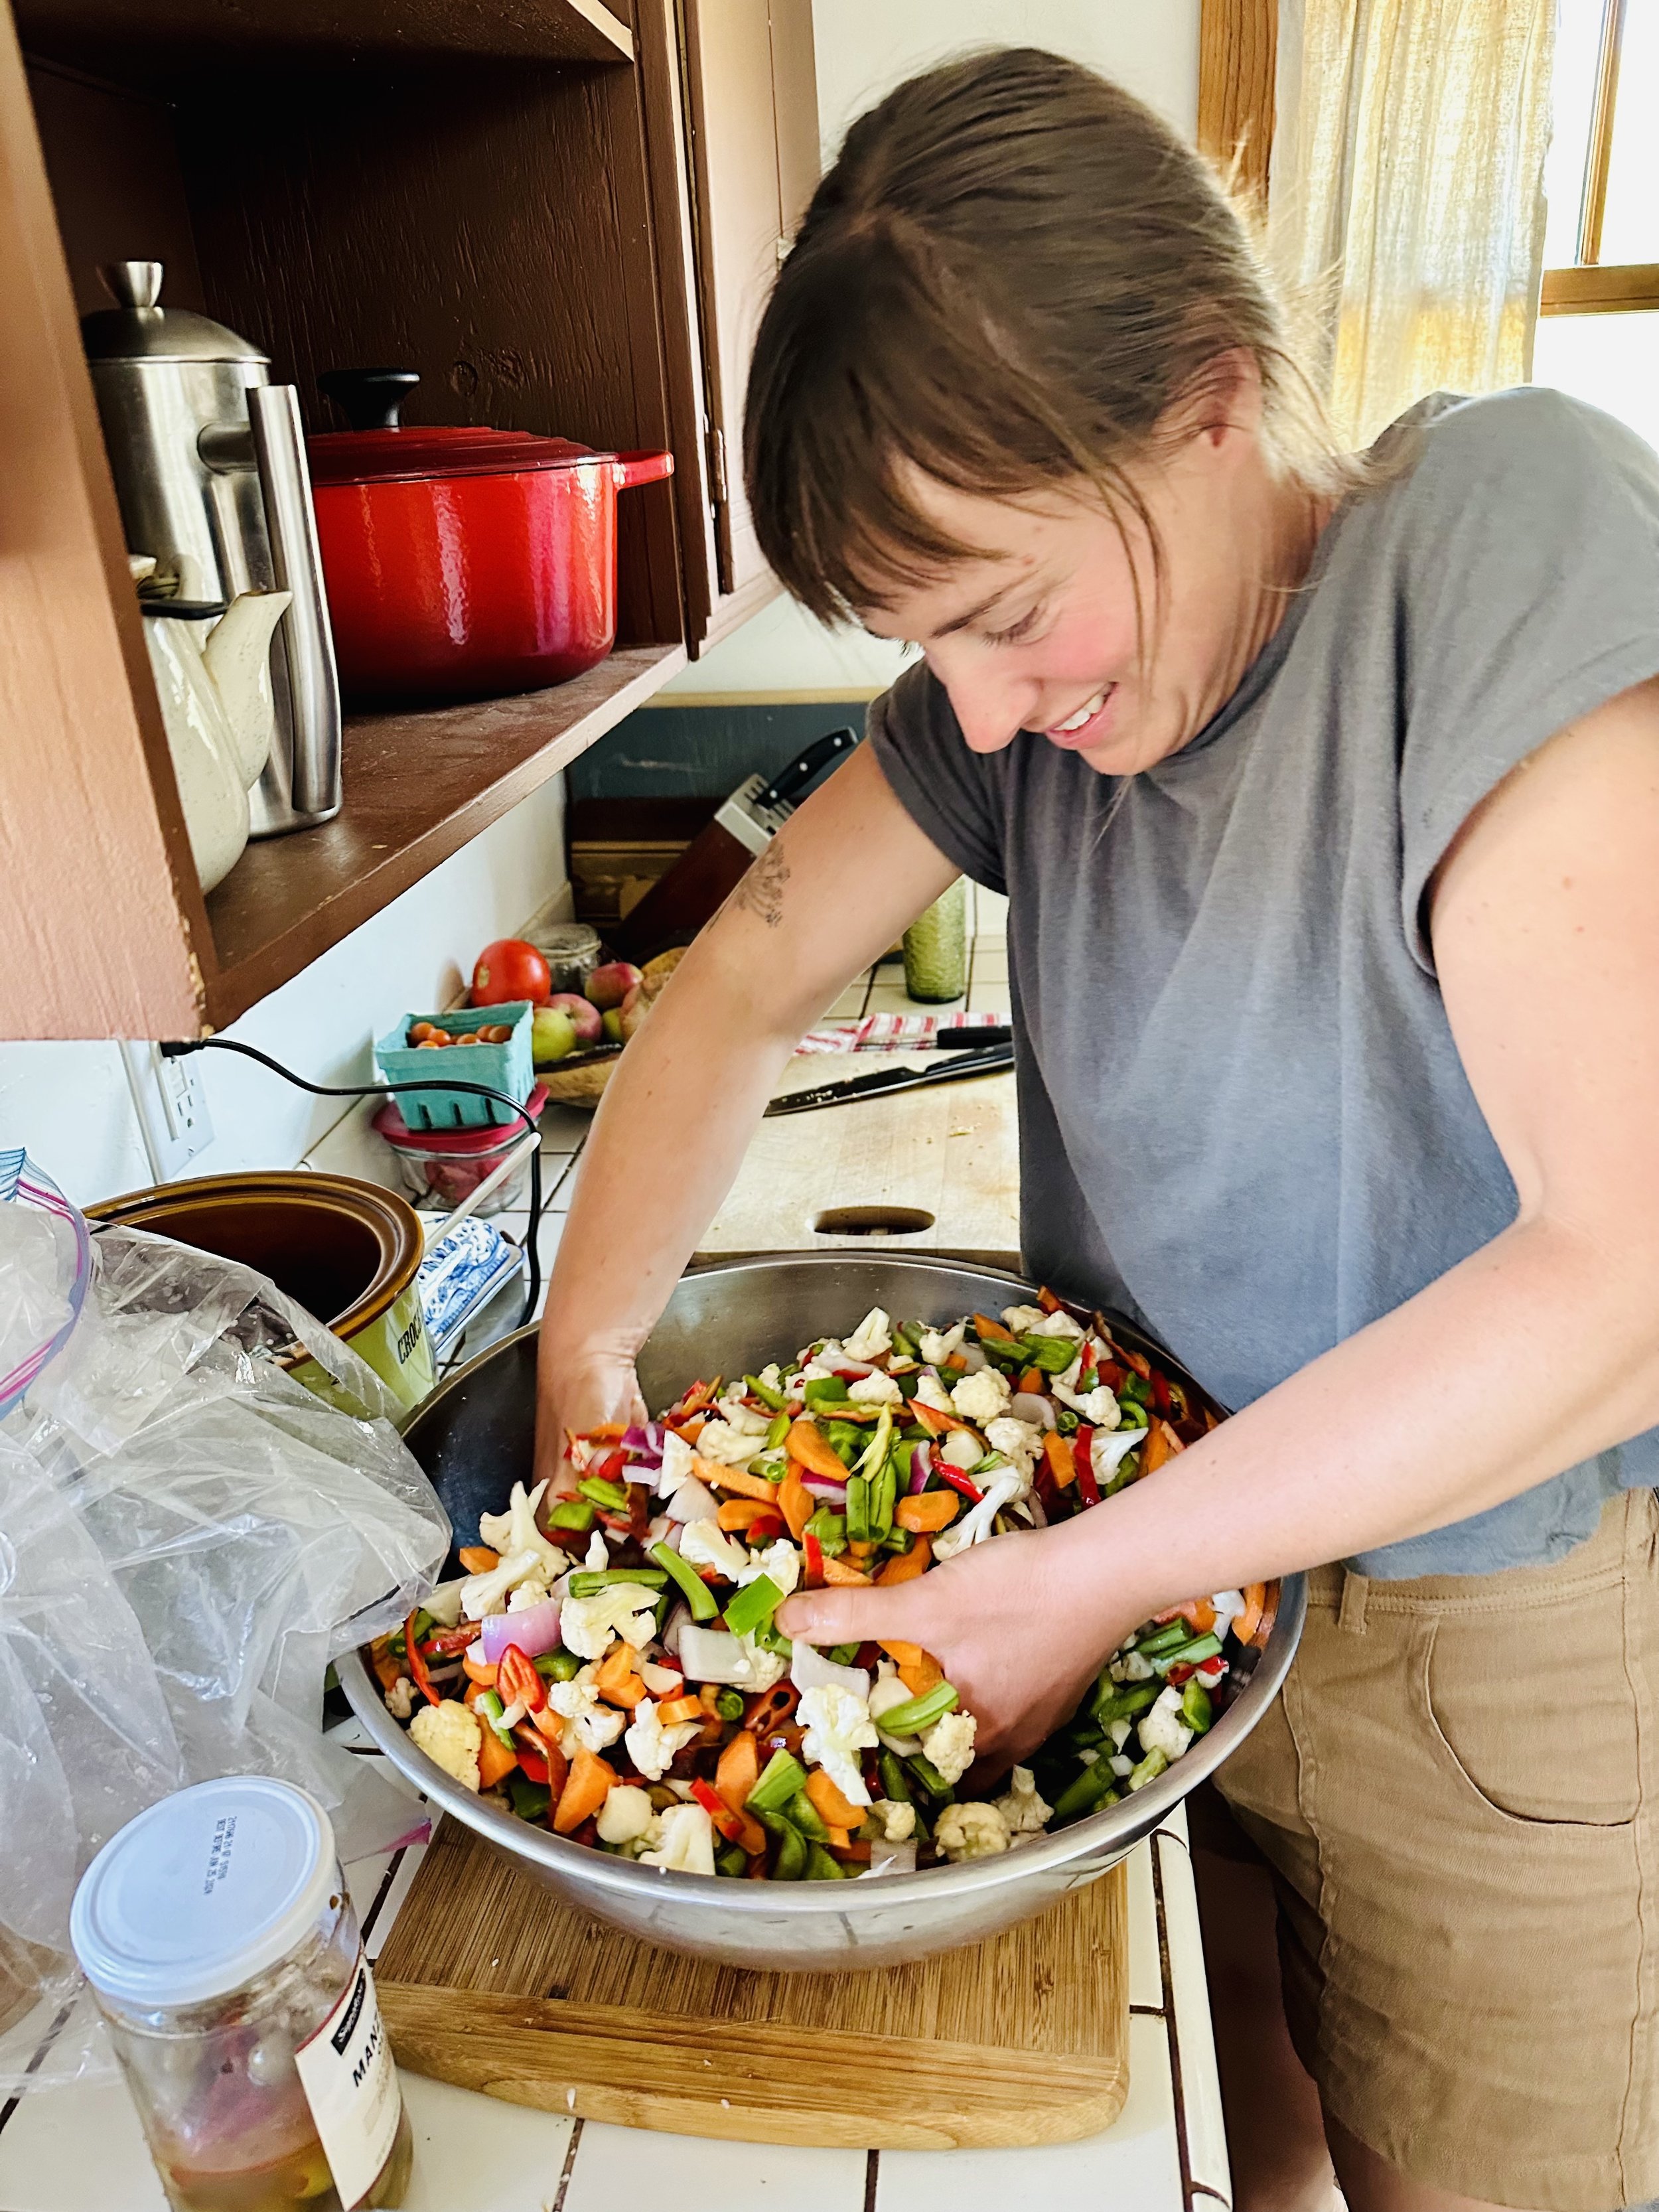
This past weekend I had a preserving date with my friend and colleague Caroline. We hemmed and hawed about what to make before deciding, due to our small amounts of many different ingredients, to make giardiniera.
Giardiniera is an Italian take on pickled vegetables.
Directly translated as “female gardener”, this is one of my favorite strategies for preserving the hodgepodge of veggies that inevitably accumulates in my refrigerator each summer.
Giardiniera is a great recipe to tackle as a team! The prep of chopping all of the veggies to a uniform size takes some time, and the process is faster and more fun with a friend on board.
While Caroline and I used a waterbath to can our pickles for a shelf-stable end product, this recipe would make a mean quick pickle! PROS: avoid the equipment and set-up needed for canning. CONS: the end product is not shelf stable and will need to be stored in the refrigerator (highly sought-after real estate this time of year).
Which Vegetables to use and How many?
This recipe is meant to help you utilize all the bits and pieces from your garden and refrigerator. I’ve listed vegetables I think lend themselves best to this preparation, and I’m sure I’ve overlooked a few. Because of this, while it might be upsetting to some, I am not providing specific vegetable quantities. How much of each depends on your personal preference and the ingredients available. So maybe we should think of it as more of a strategy than a recipe?
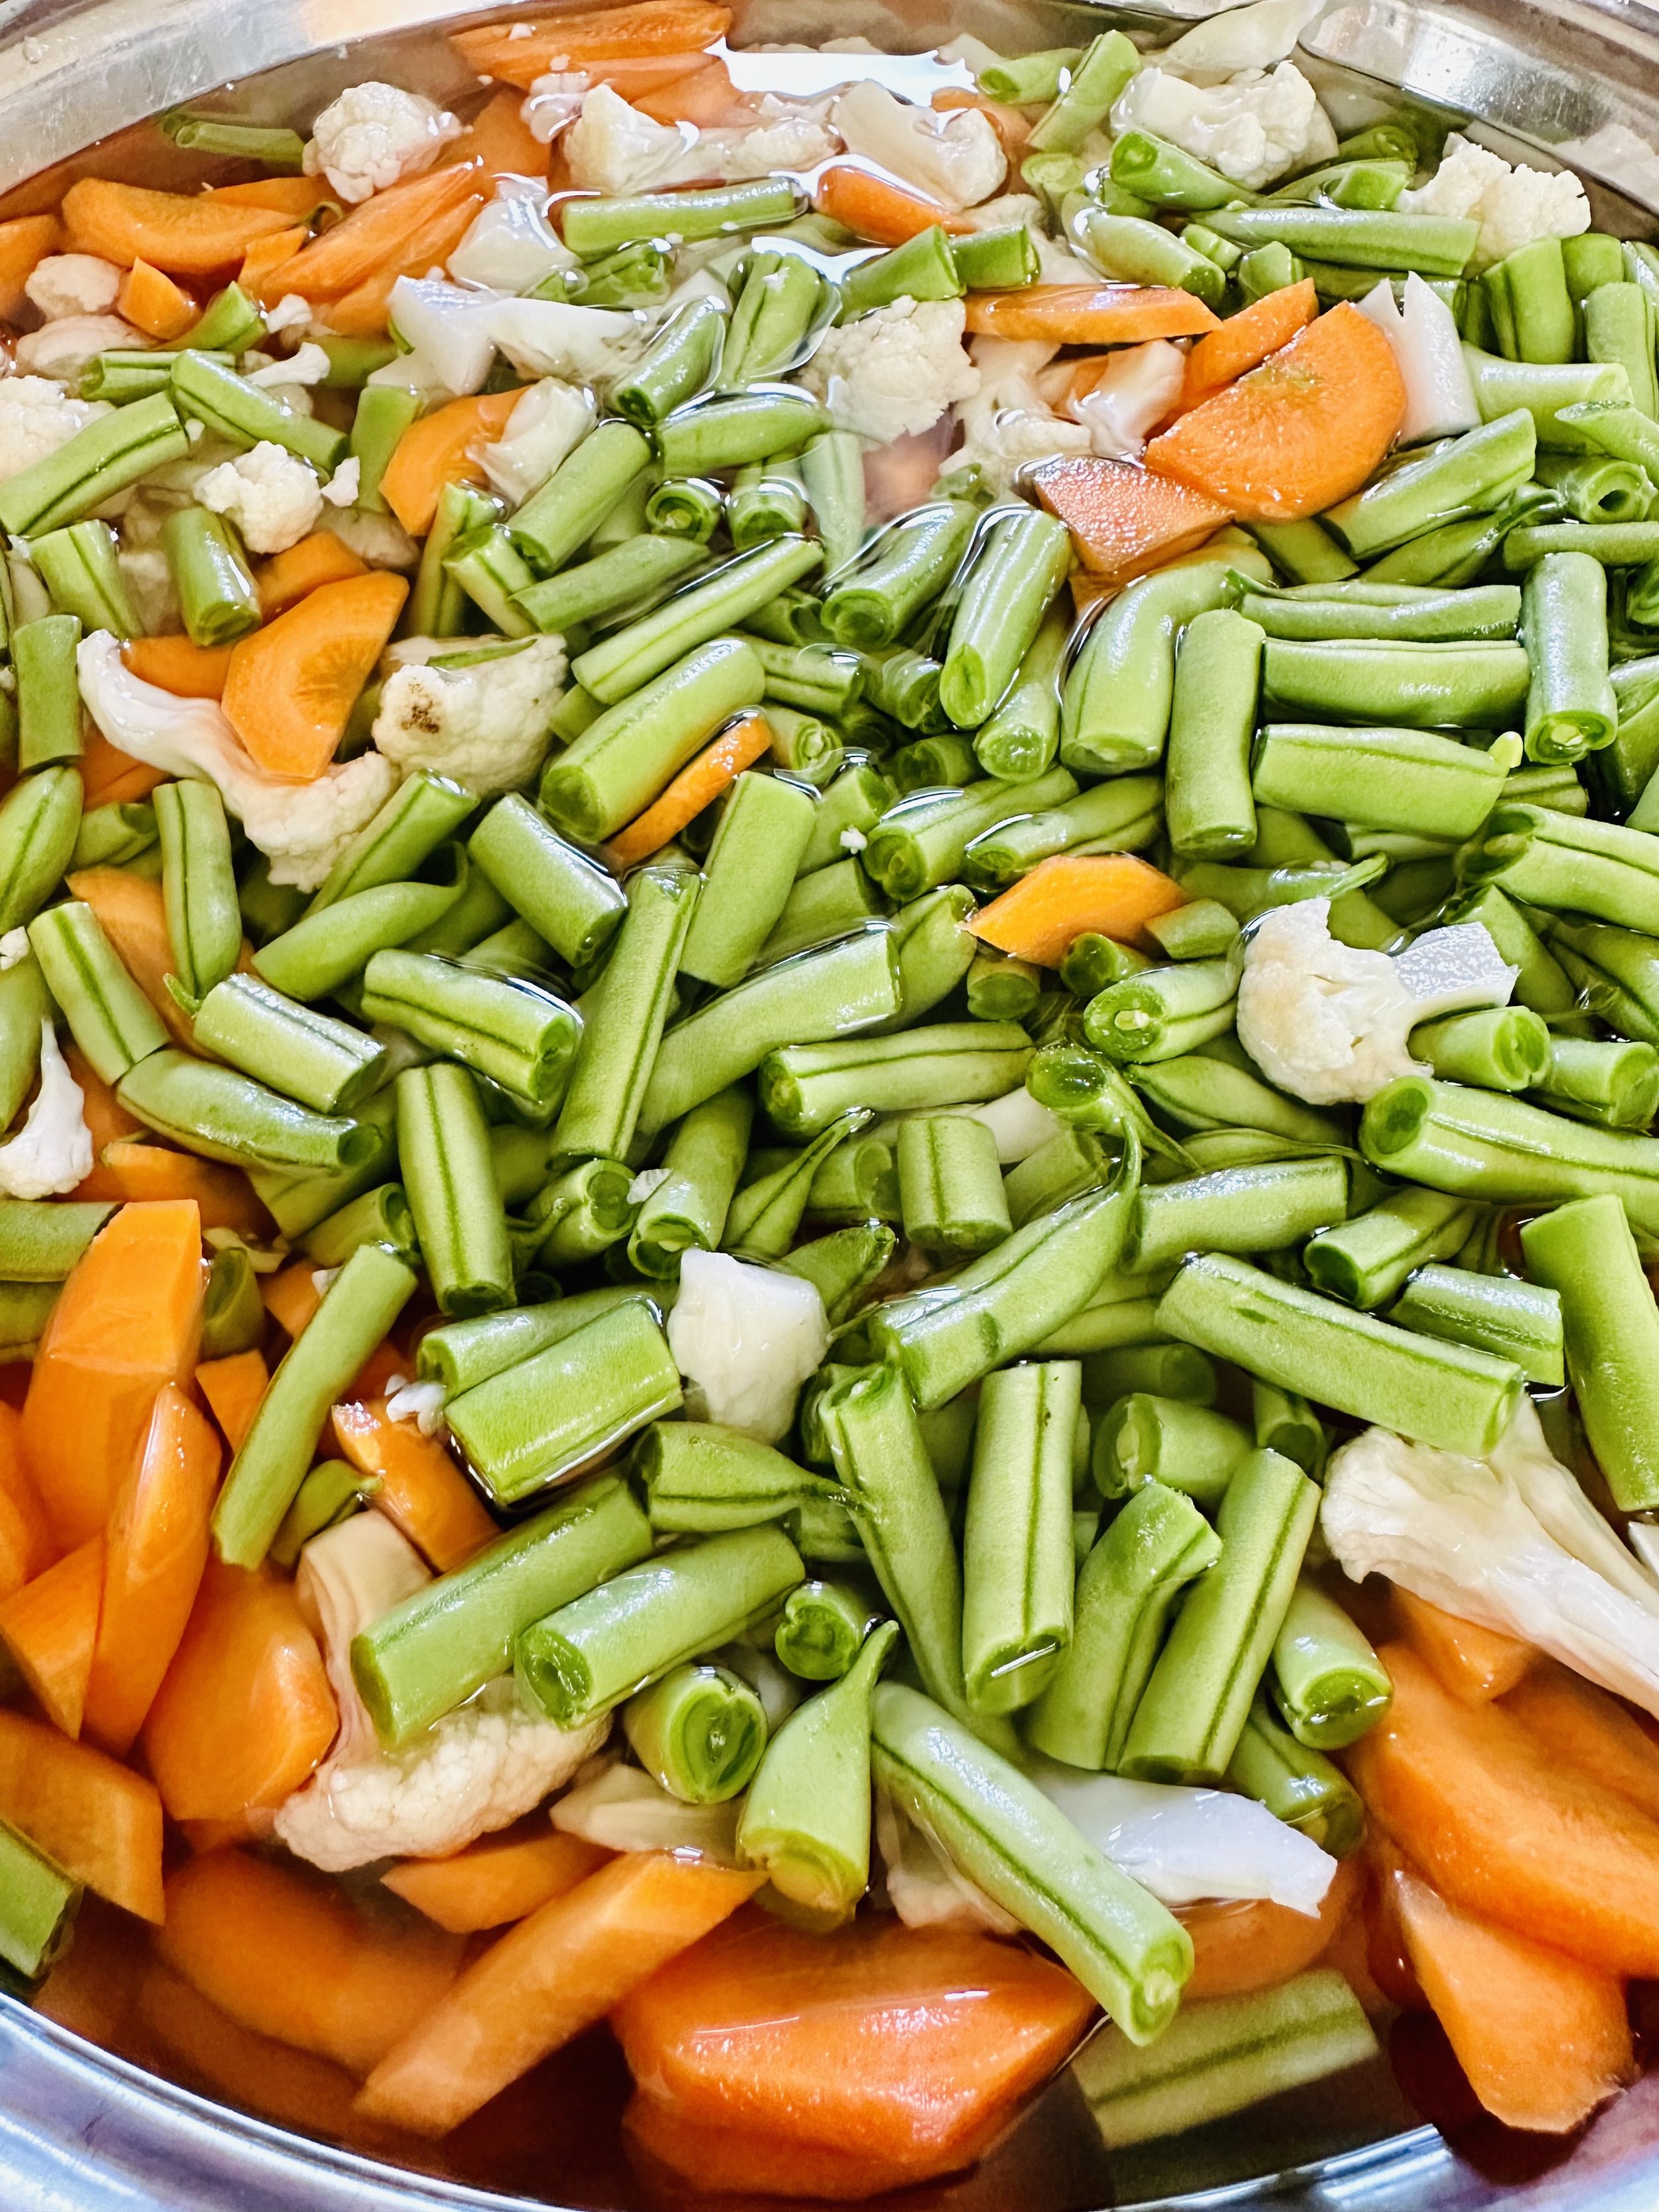
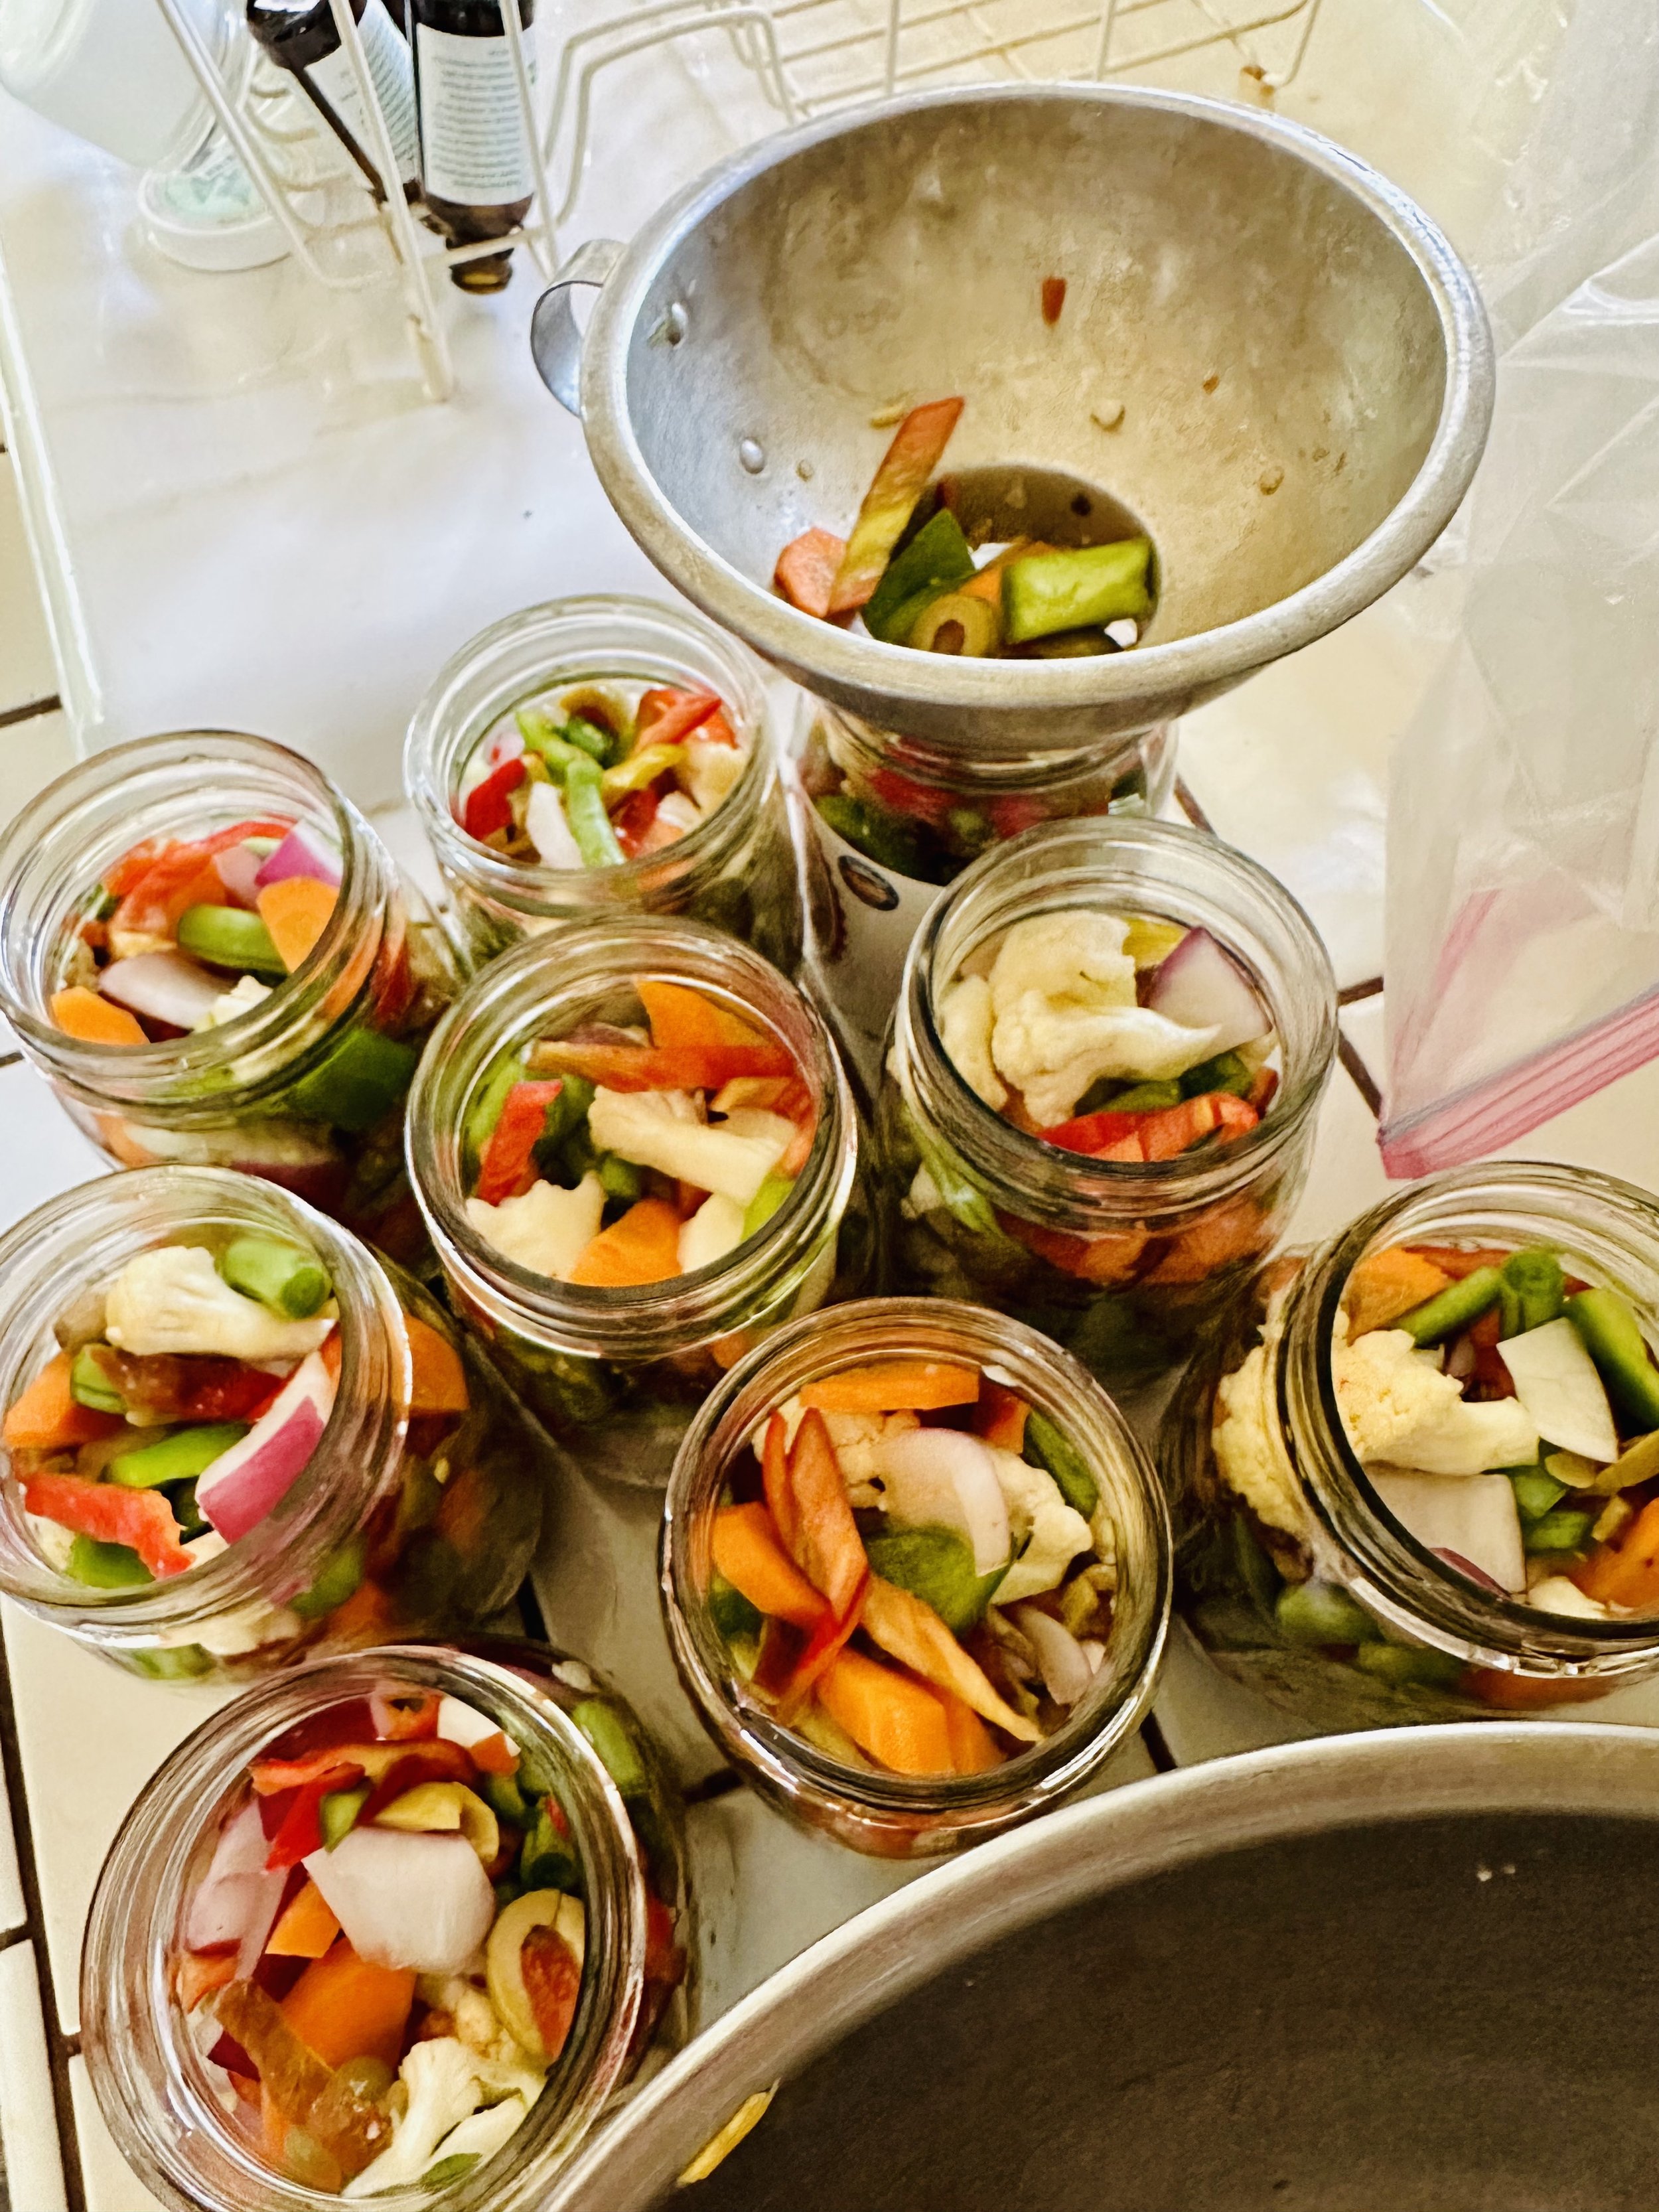
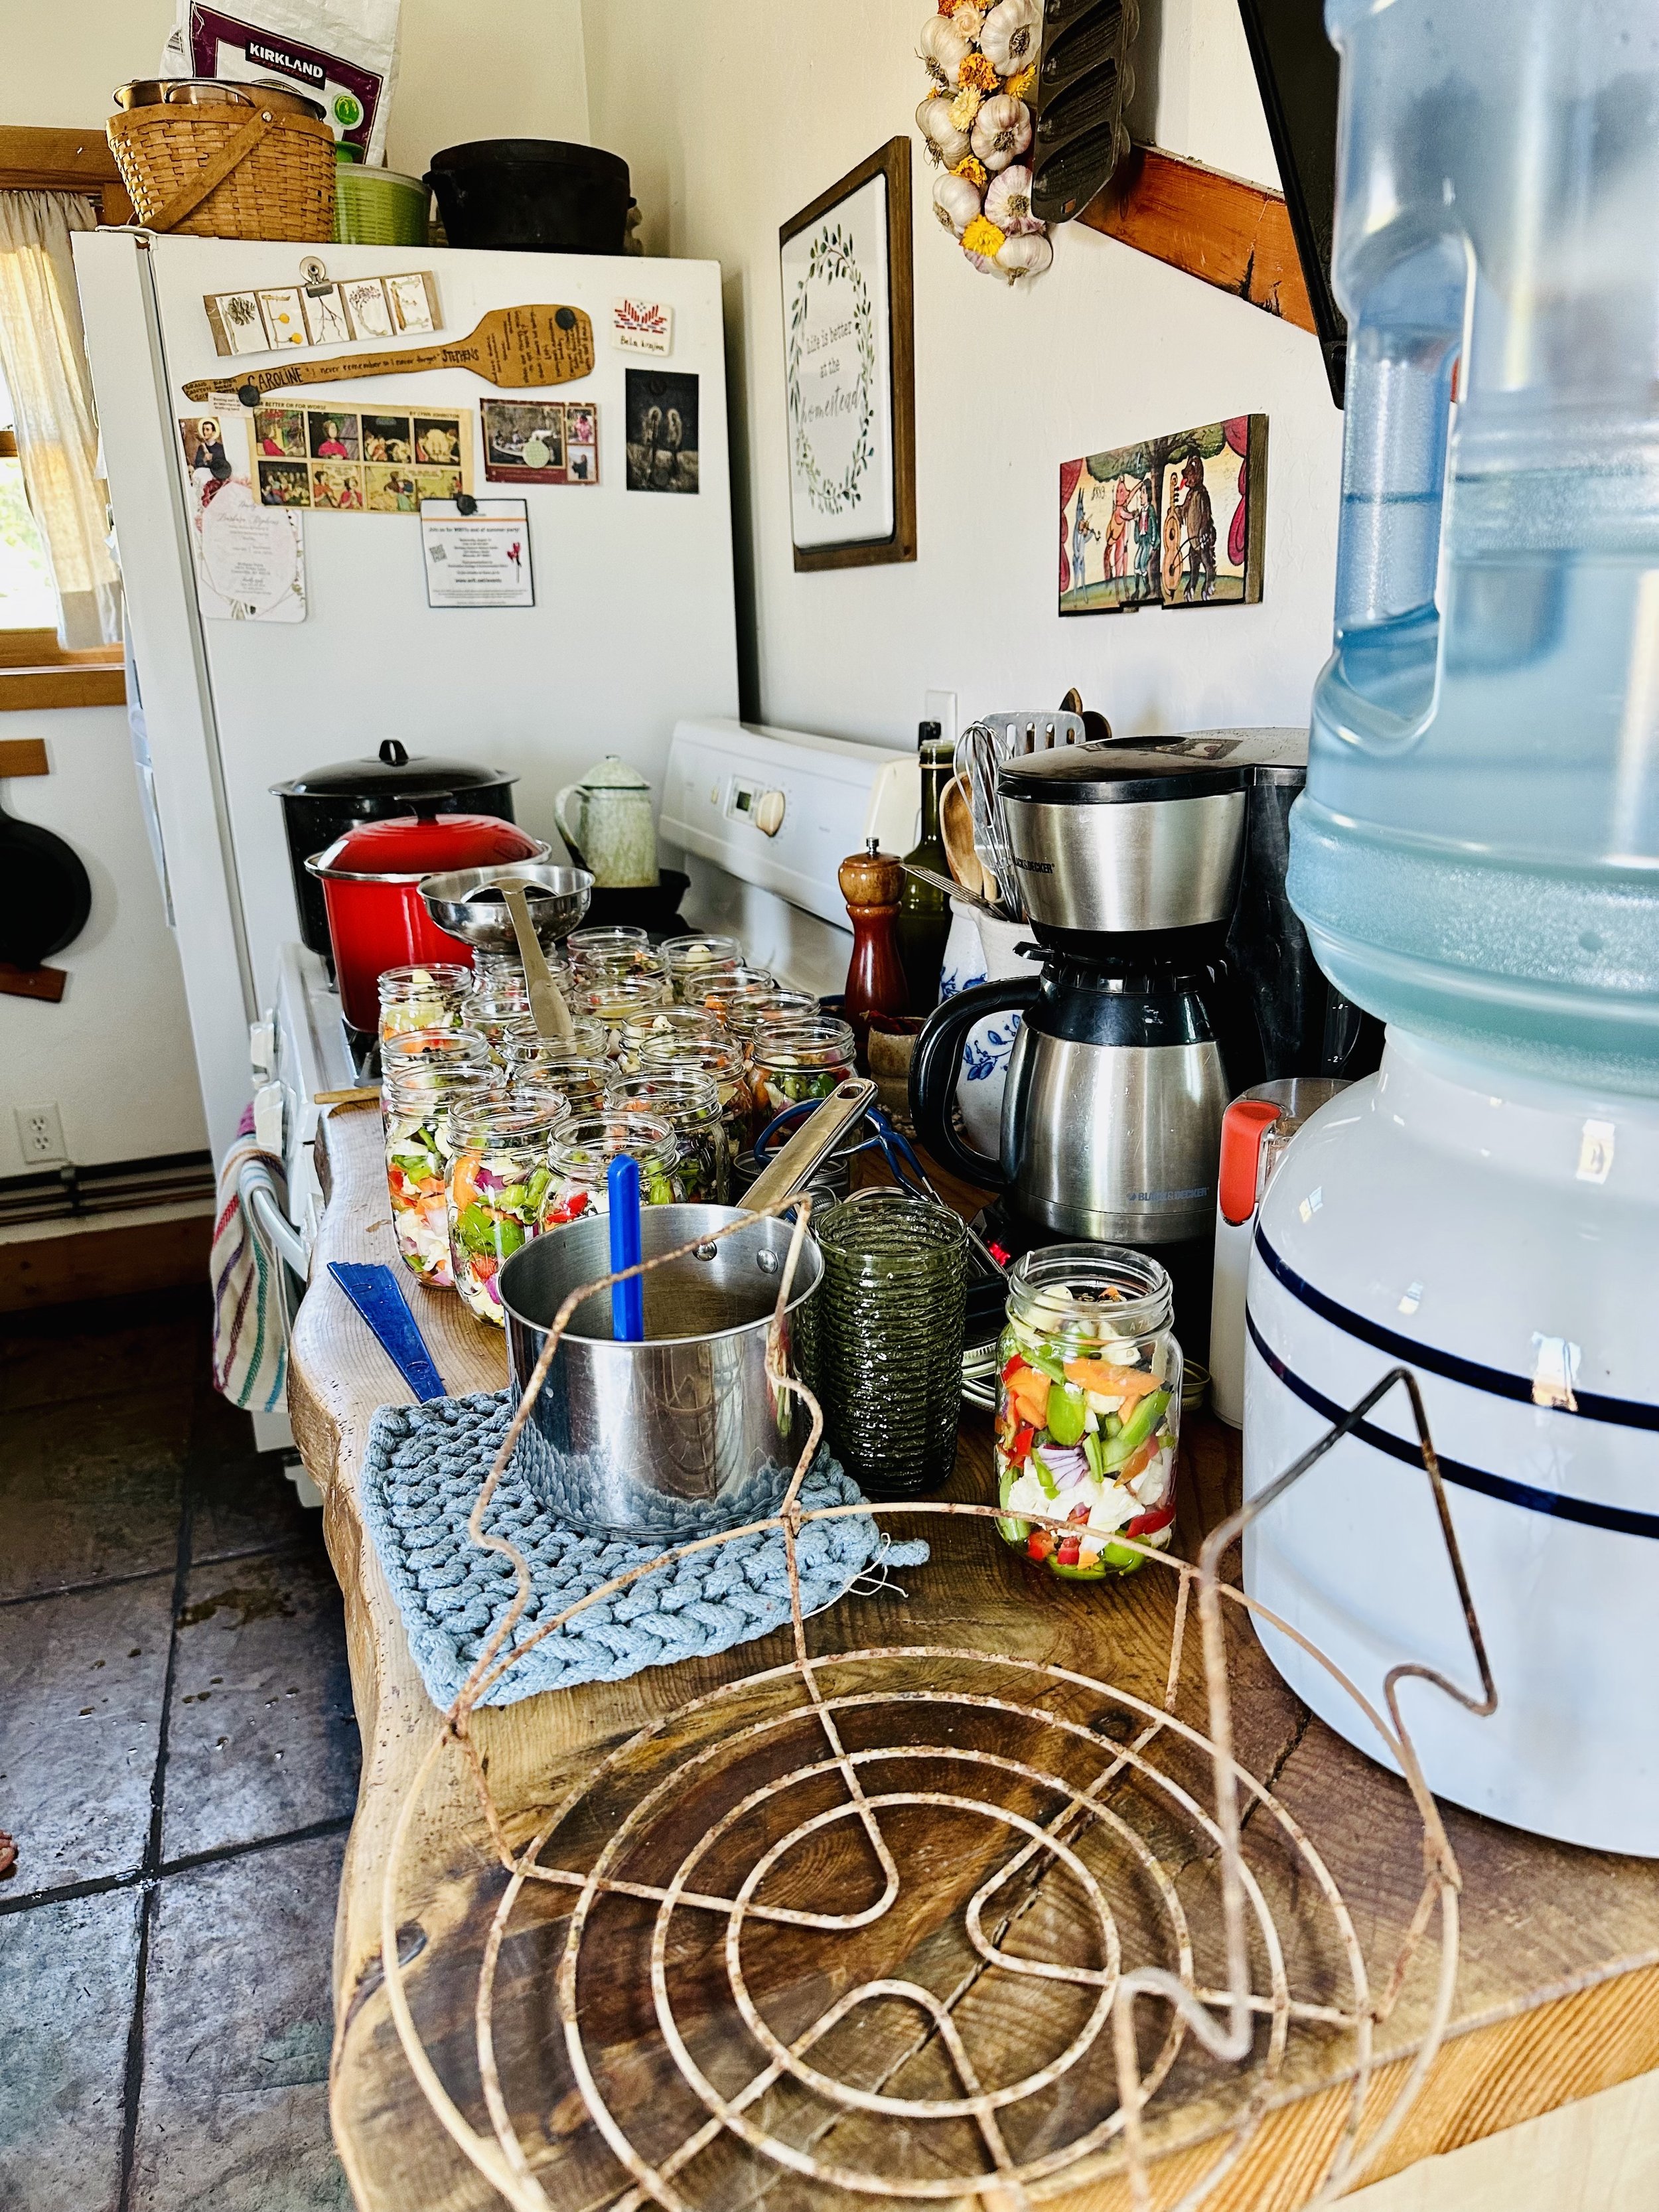
And yes, without specific quantities it is difficult to determine how many jars you’ll need for the project. Our chopped vegetables filled two large (5-quart) mixing bowls and we ended up with 21 pints of pickles. You might use your largest measuring tool to estimate how many pints you’ll be able to fill (see below for some handy unit conversions). Whatever you do, I recommend washing a few more jars than you think you’ll need…just to be safe.

Getting nerdy in the kitchen. Writing down your calculations can help to ensure an accurate, and therefore safe, measurement for your recipe.
Notes on Brine
In my experience, the amount of brine per jar is about half the total volume of the jar. For a pint-sized (16 oz.) jar of giardiniera, that’s about a half-pint (8 oz.) of brine. On a larger scale, 10 pints of giardiniera requires about 5 pints of brine. Of course there’s no harm in making a little extra brine…in fact, I’d recommend it to avoid running out mid-way through your canning project.
Brush up on your conversions. Different recipes will use different units. Being able to convert cups and ounces to pints and quarts will help you along your preservation journey.
Helpful conversions for the kitchen:
1 cup = 8 oz = 1/2 pint
2 cups = 16 oz = 1 pint
4 cups = 32 oz = 2 pints = 1 quart
4 quarts = 1 gallon
3 teaspoons = 1 tablespoon
4 tablespoons = 1/4 cup
now on to the good stuff…
RECIPE: Giardiniera
Adapted from Homemade Giardiniera, daringgourmet.com
INGREDIENTS
VEGETABLES- determine amounts by what you like and what you have on hand
Green Beans
Carrots
Zucchini
Cauliflower
Onions
Hot Peppers
Sweet Peppers
Green Olives (a delicious addition if you like olives!)
BRINE
Equal parts water and distilled white vinegar
Final amount calculated after jars are filled with vegetables.
1 tablespoon sea salt/quart of brine
AROMATICS- amount per pint of giardiniera; based on original recipe…adjust to your preference!
1 bay leaf
1/2 clove garlic
1/2 teaspoon oregano
1/2 teaspoon coriander seed
1/4 teaspoon black peppercorn
1/4 teaspoon hot pepper flakes
1/4 teaspoon yellow mustard seed
1/4 teaspoon fennel seed
1/8 teaspoon celery seed
1 tablespoon olive oil
INSTRUCTIONS
Wash and prep vegetables. Chop to your liking and combine in a large bowl. Chunky vegetables result in pickles perfect for a relish tray, while finely diced veggies are delicious as a spread or topping for sandwiches.
OPTIONAL ADDED STEP: Toss chopped vegetables with a generous amount of salt (enough so that they are very salty to taste), cover with water and let sit for 6 hours or overnight. This keeps your vegetables extra crisp and is a good idea if you’re using veggies less than SUPER fresh.
Prepare lids and jars. Wash jars with hot soapy water. Place lids in a small saucepan, add water to cover and bring to a boil on the stovetop. Turn off and let sit in water until needed.
OPTION: place jars in oven with the light on to keep warm.Prepare waterbath. Fill waterbath half-way and bring to a boil. Turn heat to the lowest setting.
Pack jars. Add vegetables to jars (draining beforehand if necessary). Pack tightly without bruising. Keep a little more than a half-inch of space between the vegetables and the rim of the jar.
Make brine. Now that you know how many jars you’re using, you can calculate how much brine you’ll need. (Reminder: brine will be about half of the total volume of the jars.) Add equal parts water and vinegar, and one tablespoon of salt per quart of this mixture, to a large pot. Bring to a boil, then reduce to low heat to keep warm.
Add aromatics. Measure aromatics into each jar, finishing with olive oil.
Add brine. Maintain a half-inch of headspace (space between liquid and the rim of the jar).
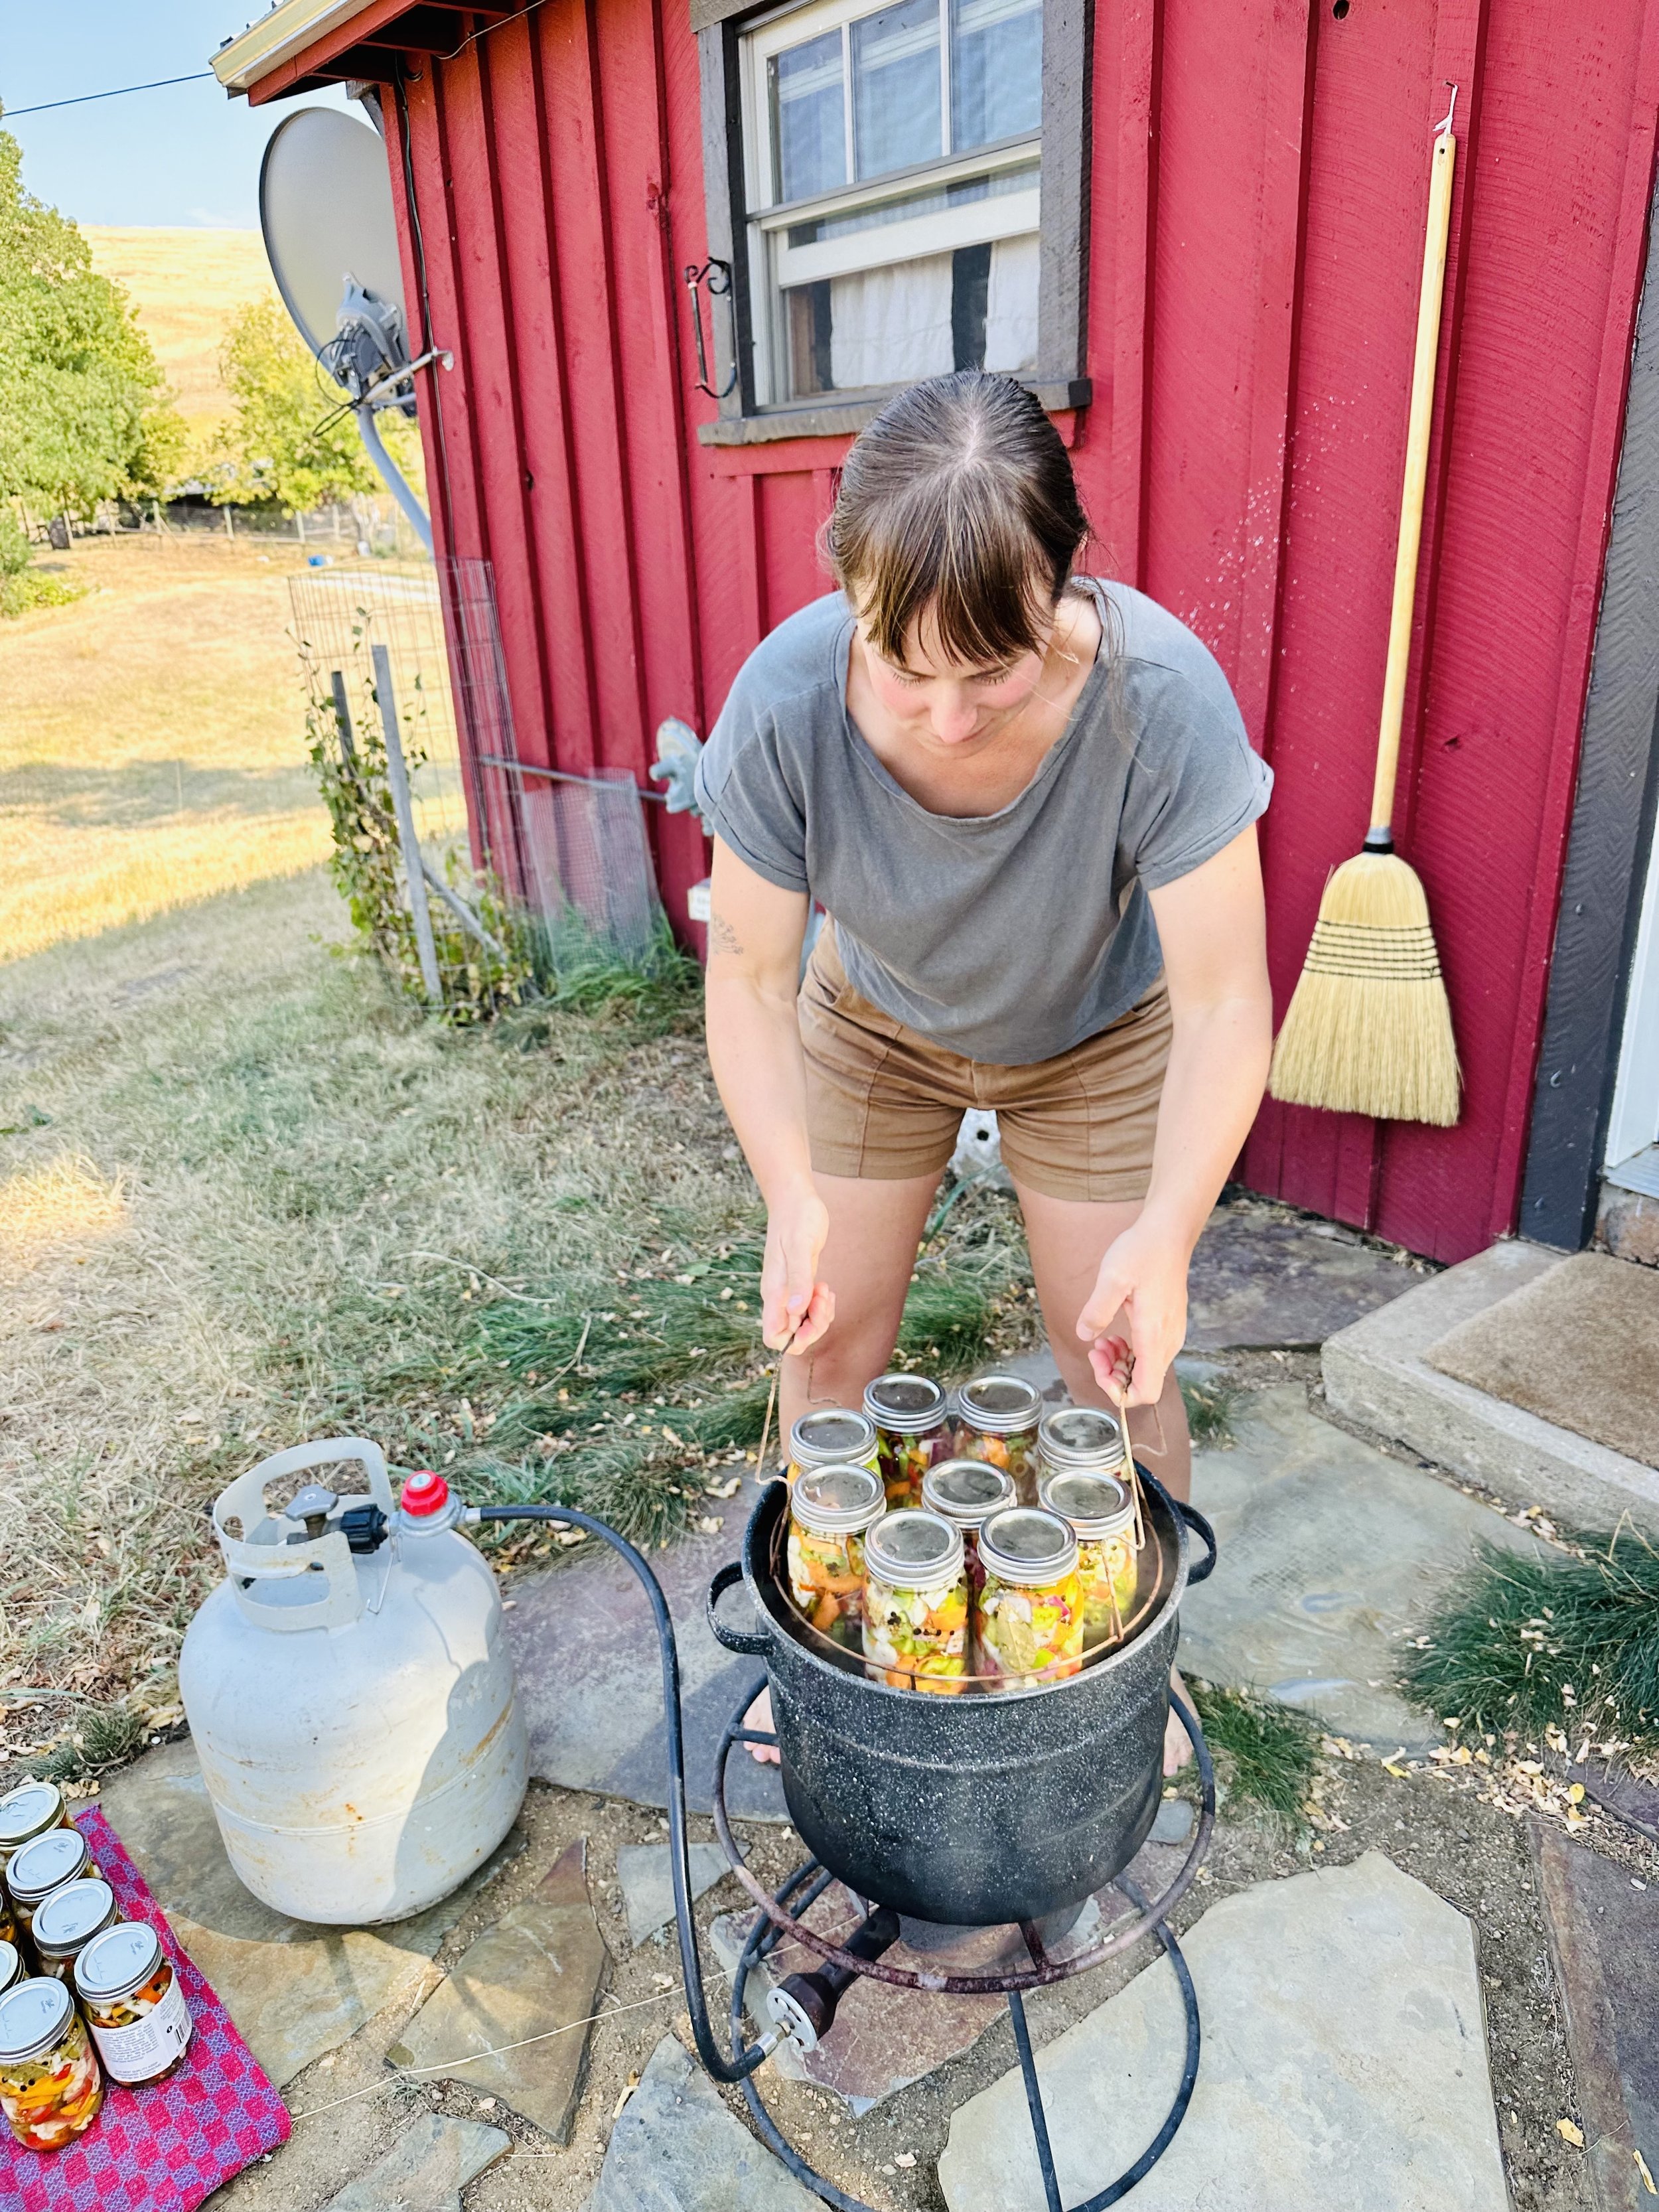
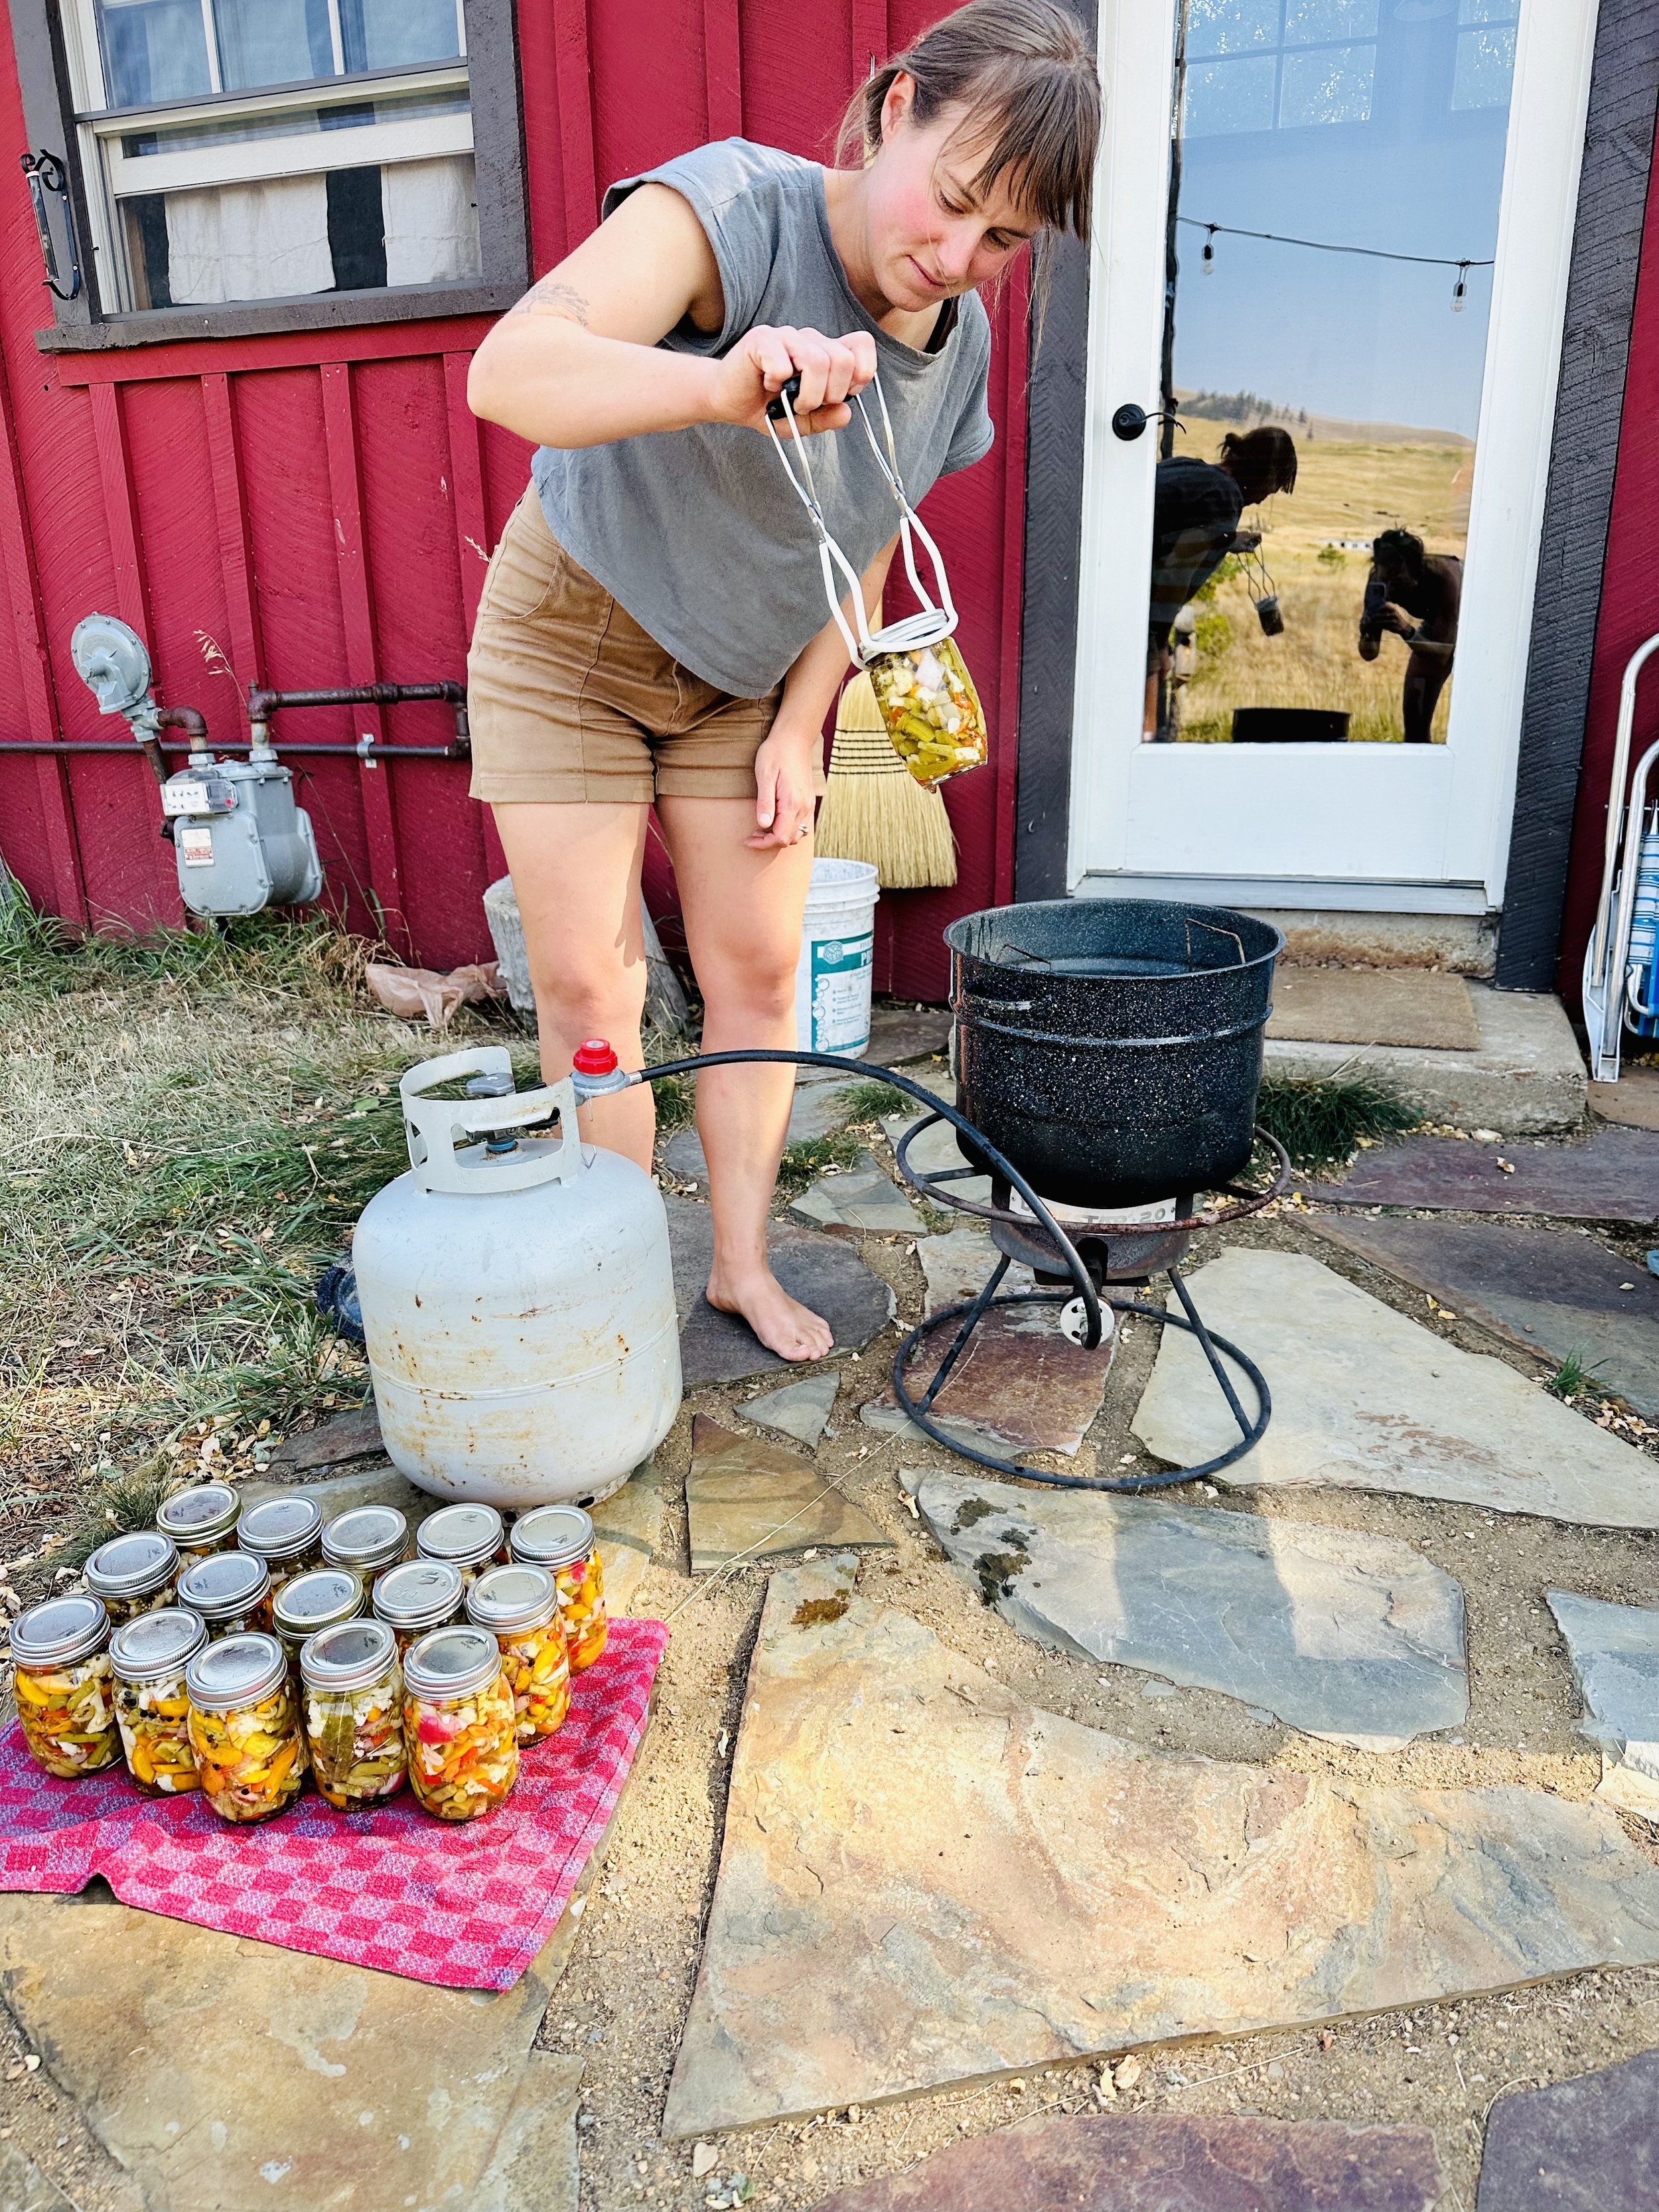
NOTE: Add brine to only as many jars as can fit in the canner at a time. Standard canners can hold 8-9 pints at a time.Transfer to waterbath. Wipe rims of jars with a clean towel. Place lid and screw on canning ring to fingertip tight. Fill rack (if using) with jars and transfer to waterbath. Make sure that jars are submerged by at least 1 inch of water.
Process jars. Bring waterbath to a rolling boil. Once boiling, start timer for 10 minutes. When time is up, turn off heat, allow jars to rest in canner for 3-5 minutes before removing, then remove with jar lifters.
Allow jars to sit undisturbed until sealed. Once sealed, rings should be removed. Store giardiniera out of direct sunlight. We recommend waiting a few weeks before eating to allow flavors to infuse.
bon appetit!
NOTE: While no toes were scalded in the making of this recipe, we encourage you to take caution when working around large pots of boiling water.
Additional Resources:
For more information on canning basics:
For more seasonal preservation recipes from our blog, The Real Dirt: