
Winter Storage Vegetables 101
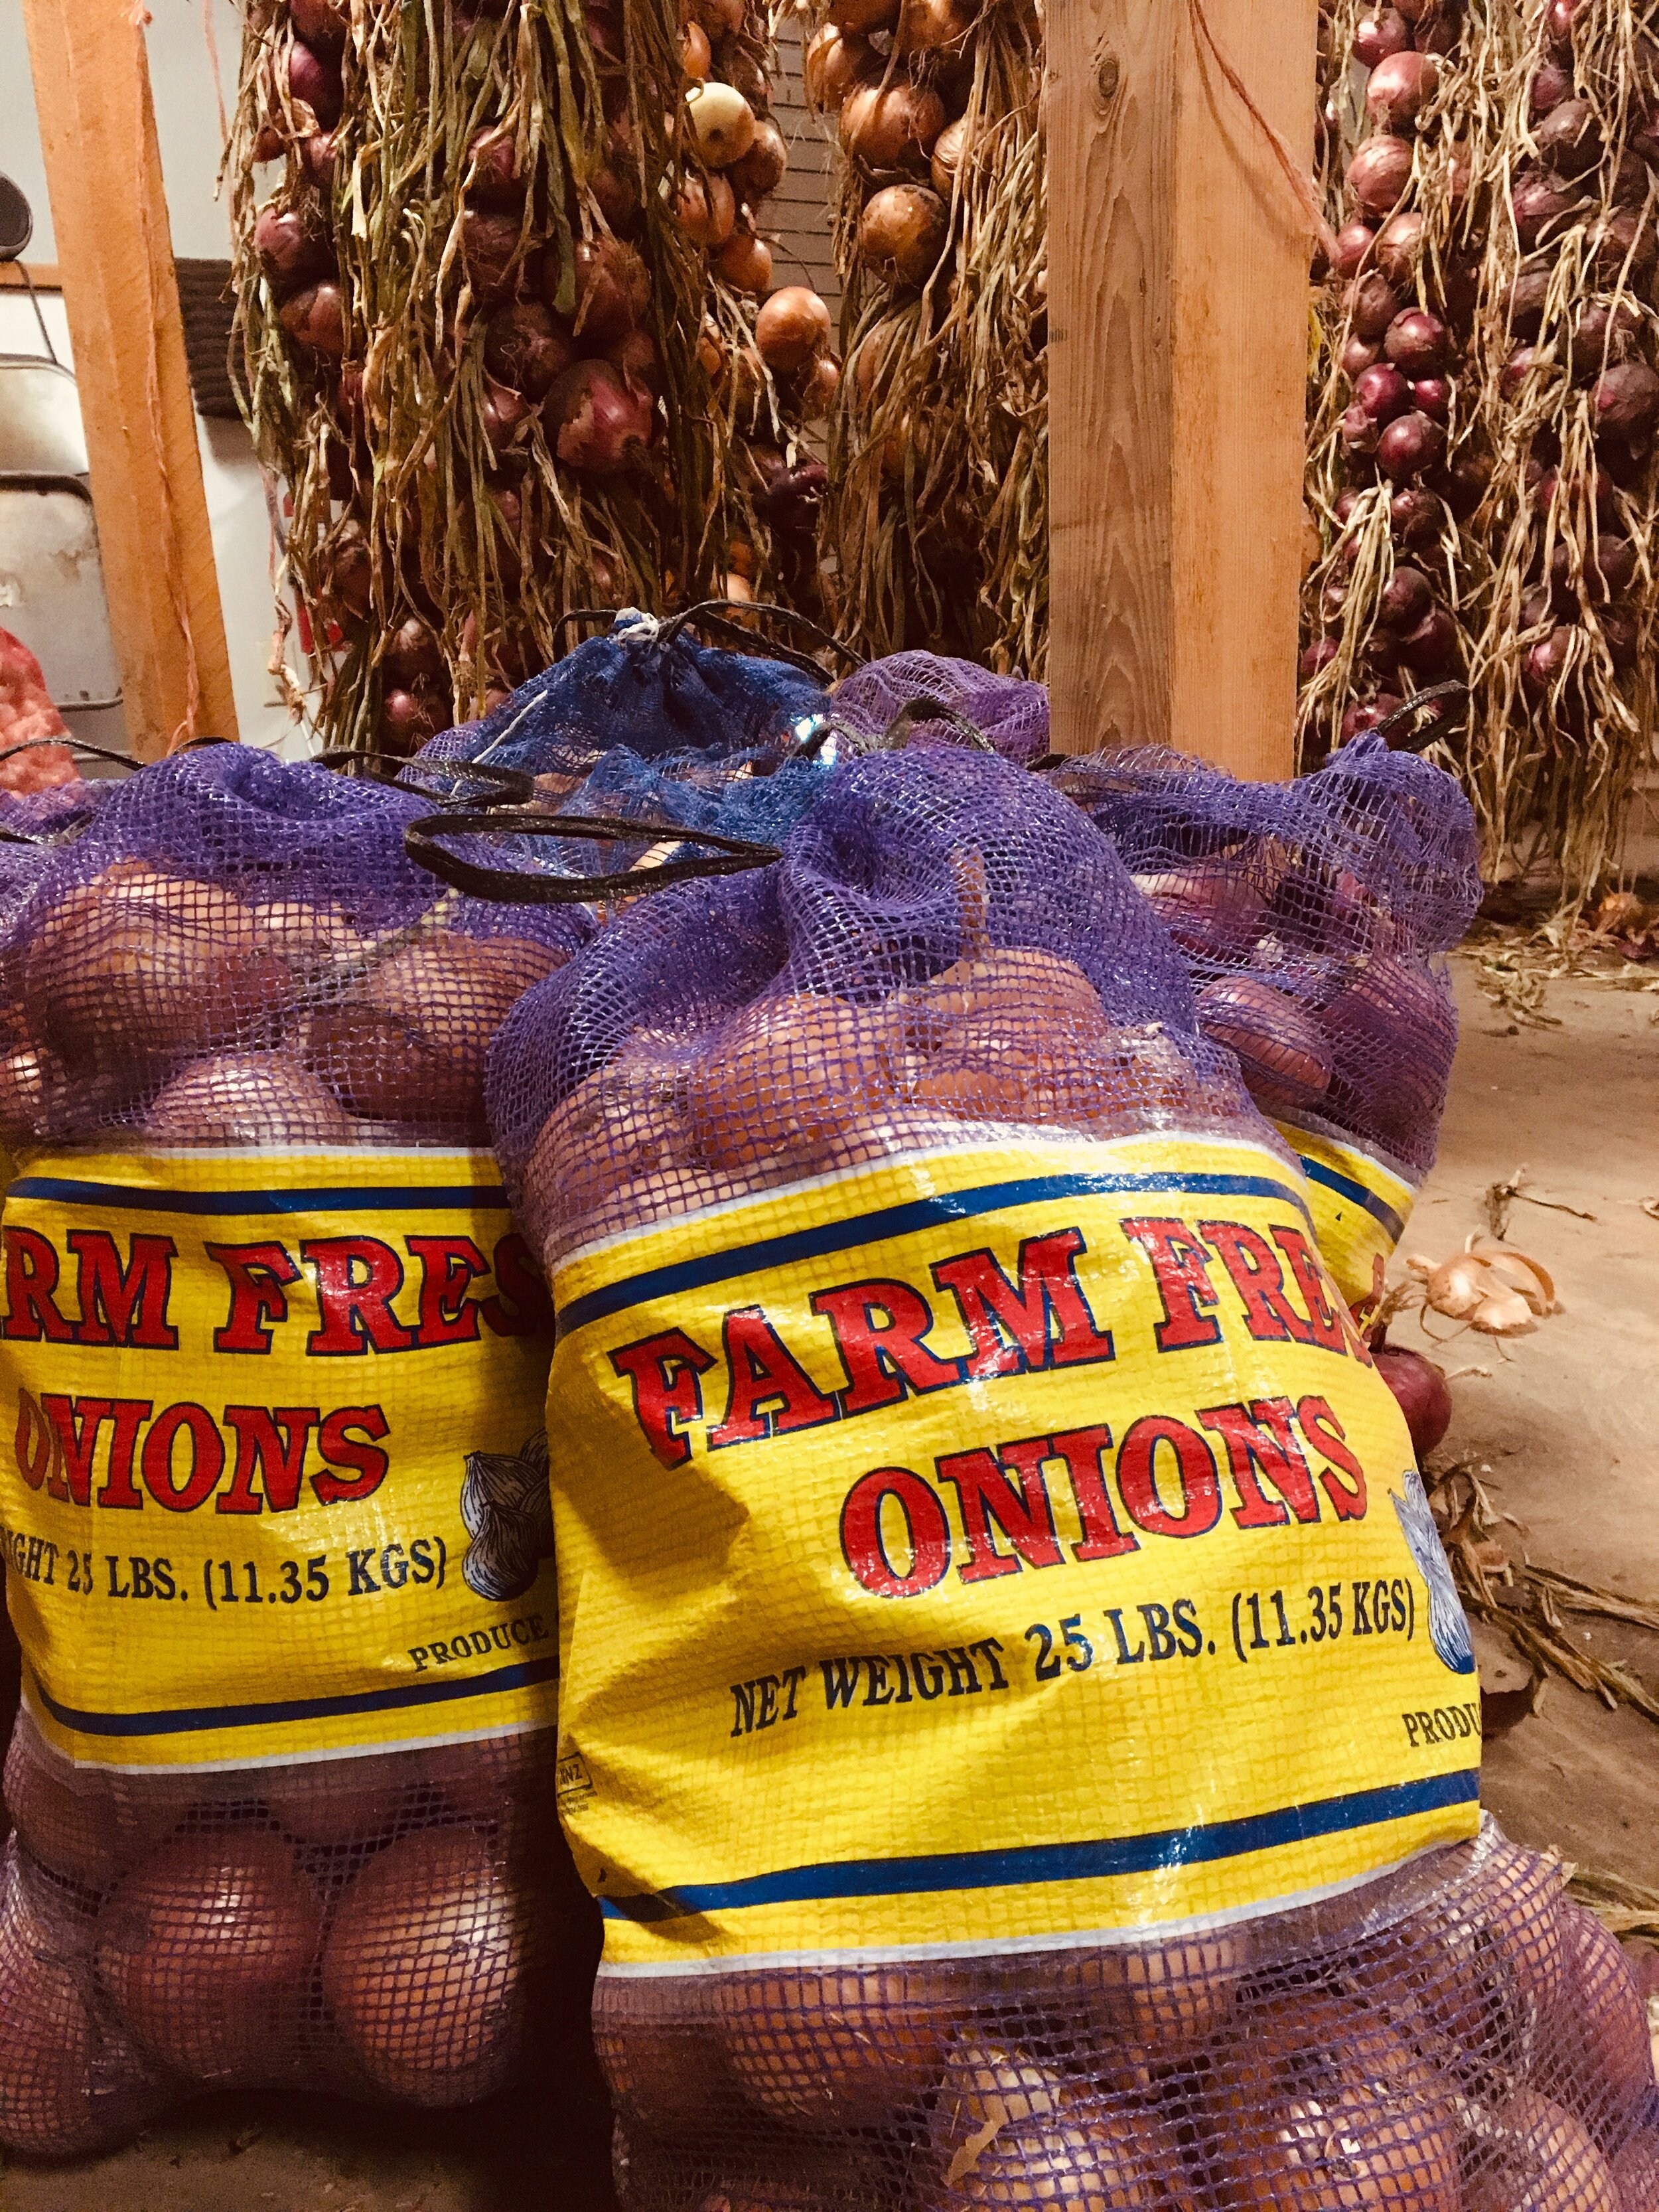
Bulk Bag of onions, available at the Fall Veggie Sale. In the background hang curing onions
4 steps to keep your veggies fresh through the winter
On our farms, the final weeks of fieldwork are full of digging. Potatoes and carrots, parsnips and celeriac…these hearty crops are the last to be harvested and the final addition to the pantry as we prepare for a long winter.
Broadly termed “winter storage vegetables,” certain crops are well suited for long-term storage, lasting up to six months if properly cared for. Some, for instance onions and winter squash, require curing—allowing skins to harden and excess moisture to dissipate—before long-term storage. If you’re buying your veggies, say at our annual fall veggie sale, your farmers took care of the curing process. Other crops, especially roots like carrots and parsnips, can be dug up, washed (or not, depending on your storage technique) and immediately stored.
Once your veggies leave the farm, providing the proper storage conditions ensures that your food will stay fresh and delicious as long as possible. While this may feel like a daunting task, breaking it down into four steps will help manage it! By attending to a few key details, you will be one step closer to your dream of being an unstoppable locavore!
Step One: Collect your Bounty
Calculating how much food your household consumes each week will help in estimating your vegetable needs for the winter. However, be realistic with your estimations! Eating potatoes every day might seem manageable in November, but how will you feel come February? Accurately calculating will allow you to consume your food at a comfortable pace without waste.
One strategy is to list each item-_carrots, beets, garlic, winter squash, etc.—and do some basic math. If your household eats two pounds of carrots per week, that’s eight pounds per month, and forty pounds for five months. As you can see, the numbers add up quickly!
Use this worksheet to calculate the appropriate amount of vegetables to put away for your household. Pro tip: bring your calculations to our annual Fall Veggie Sale!
Step Two: Create the Right Habitat
Determining where to store your veggies is a crucial step for successful locavores. While forty pounds of carrots might get you through till springtime, keeping your carrots in good condition requires proper storage.
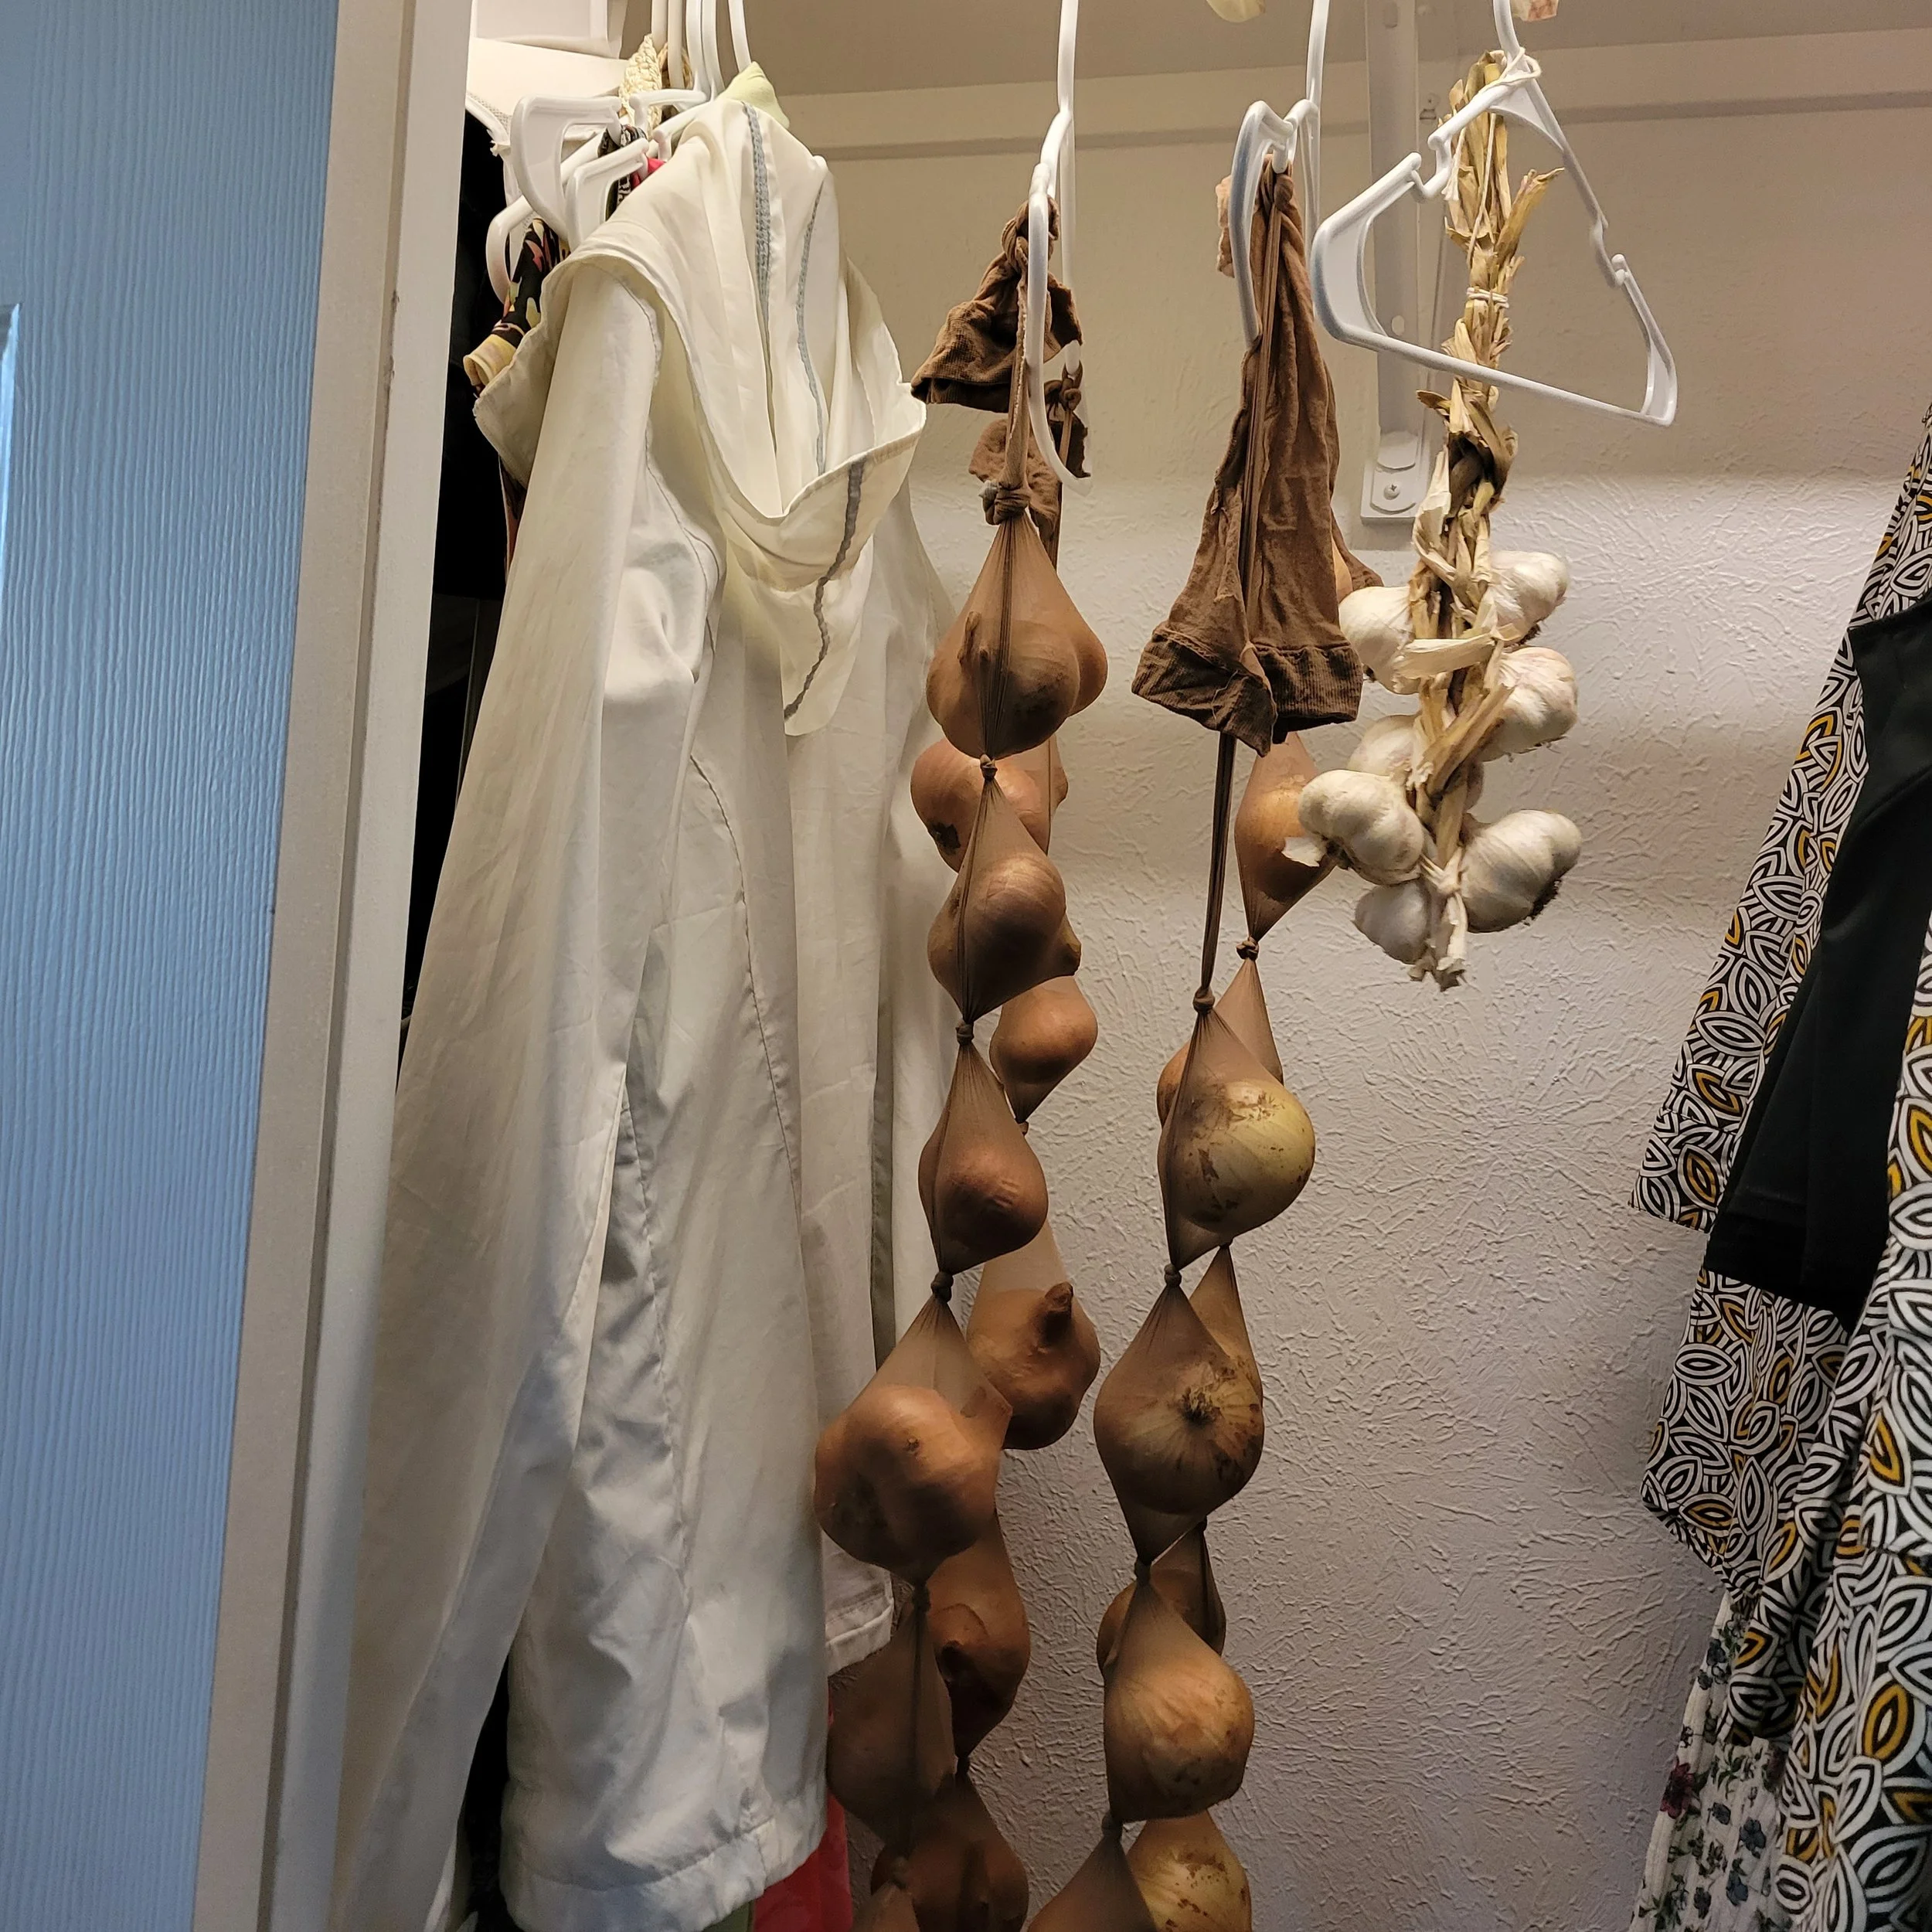
Speaking of getting creative… one of our community gardeners stores her onions in pantyhose hanging in the closet! You can try this method with potatoes and small squash as well! Just tie a knot between vegetables to contain any rot or spoilage that may occur. You can also just hang your onions in a mesh bag, but it is harder to detect spoilage that may occur, so we suggest splitting them up into smaller bags or boxes.
Fruits and vegetables are made up of living tissues that continue to ripen and decay after being harvested. This continuous change is due to physiological processes that are sensitive to temperature and relative humidity (RH). By manipulating these variables you can create ideal habitats for each crop, thus extending the life of your food. Using a thermometer with a humidity gauge will help you to become familiar with the various microclimates within your home. Be aware- temperatures higher or lower than the stated threshold can lead to premature sprouting and spoilage, so take time to gauge the temperature and RH while choosing the appropriate habitat. However, if you live in a space where you are not able to create the perfect habitat, please don’t despair! We are outlining ideal storage temperatures, but if you live in a 2nd story apartment without access to a shed, garage, or basement, you will still be able to keep most things fine for at least 2-3 months (depending on a myriad of factors).
A few general rules for storage: keep out of direct sunlight; keep in a place with stable temperatures; group crops based on storage needs.
Specific storage requirements
Cold temperatures (32-40°F), high RH (98-100%):
Carrots
Beets
Rutabaga
Celeriac
Kohlrabi
Cabbage
Parsnips
Turnips
These can be stored in a refrigerator wrapped in plastic with a few holes to allow for respiration. If you lack refrigerator space but have another cool space- think garage, mudroom or basement- you might consider storing such vegetables in damp sand or sawdust, a technique that can effectively regulate humidity and temperature. This article provides a detailed tutorial for sand storage. This blog with Molly Bradford provides a detailed video tutorial on sawdust storage.
Cool temperatures (40-60°F), moderate RH (50-70%):
Winter squash (prefer 50-55°F)
Onions
Garlic
Potatoes (prefer closer to 40°F, and high RH (90-95%)
Get creative with storage. What cool, dry habitats already exist in your home? Basements can be cool with little temperature fluctuation, but they also tend to be humid. Mud rooms are another great option, so long as they don’t get too cold. A closet with an outside wall could have a unique climate that may work for some of your veggies. Consider creating a microclimate by cracking a window or hanging tarps to create a storage space. This article is full of creative ideas to maximize your storage options- you could even try rigging up a makeshift cellar outside by burying a bucket or cooler in your yard! Consider revisiting Winter Storage Veggies with Molly Bradford for her tips and tricks for keeping veggies fresh.
A few notes on winter squash

Sunshine, Buttercup and Delicata squash, curing in the loft at the River Road.
Winter squash are a favorite storage vegetable of mine, and I’ve learned the hard way of the differing life-spans between varieties. As I collect my squash, I consider their varied shelf-lives to determine how many of each to store and when to eat them.
Cucurbita pepo
Think delicata, spaghetti and small pumpkins- are ready to eat right out of the field and have a shorter shelf life, between 2 and 3 months.
Cucurbita maxima
Buttercup, Sweet Meat, Marina Di Chioggia, Sunshine and Kabocha…are of these varieties are delicious straight from the field (though Sweet Meats in particular benefit from a month or two of ripening in storage) and can last up to 4 months. Their thinner skins can increase their chance of spoilage, so keep a close eye for soft spots and mold as winter progresses.
Cucurbit moschata
Butternuts are our longest lasting squash. Their hard rinds enable them to be stored for 6-plus months making them a great candidate for long Montana winters.
Squash storage tips
Winter squash enjoy temperatures between 50 and 55°F (tolerating up to 60°F) and 50-70% RH. Keeping space between each (e.g. spaced out on a shelf or in a box with pieces of cardboard or newspaper between each) can prevent the build up of moisture that results in rot. Then, if one squash goes, it won’t spread its funk to the others.
Step Three: Check in

Parsnips, washed and ready for long-term storage.
When properly prepped and stored, your vegetables have the potential to last you well into the next year’s growing season. That being said, they can’t be expected to make it through on their own. Inevitably you will encounter rot, ooze and mold in your travels down the locavore’s path. This might happen if a vegetable is damaged prior to storage, or it could be an indicator of an improper storage habitat. By checking on your veggies every week or so- an easy task since you’ll be making regular visits to pull food from your pantry- you can catch these messy situations before they become disastrous.
As winter progresses, your carrots and potatoes might start to look sad and shriveled. Be not discouraged! Unless you see obvious signs of spoilage, they are probably still good for eating. A tip from our friend Molly: rehydrate your veggies in a water bath overnight to plump them up before use. If you find veggies starting to rot in your stores, remove them immediately and salvage what is still edible.
Step Four: Stick to Your Plan
Make sure to stick to the pact you made with yourself when you invested in all of your storage veggies. The most important part of being a locavore is eating local food!
Let’s take a moment to acknowledge the value of seasonal eating. If you’re reading this, you’re likely engaged in the act of eating local, seasonal foods. Fully investing in our local food system means that we give up impulse buying and employ creativity. Instead of buying cucumbers in January, let’s challenge ourselves to find new ways to consume the foods we’ve put away for the long winter. Not only does this benefit our local food system, but it makes that cucumber much sweeter come July!
Additional Resources:
Winter Storage Veggies with Molly Bradford: a comprehensive video tutorial of our friend’s winter storage methods including storing root veggies in sawdust.
What is Sand Storage for your Root Vegetables?: a detailed tutorial for storing root vegetables in sand. The same principles stand if you choose to swap sand for sawdust.
How to Harvest, Cure and Store 20 Storage Crops: an analysis of vegetables, how to prep them for storage, and their preferred storage habitats.
Storage Conditions: Fruits and Vegetables: an in-depth look at the effects of temperature and humidity on vegetables with tables detailing ideal storage for a wide range of crops.
***BONUS RECIPE****

Carrots, washed and ready for long-term storage.
Curried Carrot & Red Pepper Soup
Total time: 1 hour; Serves 4-6
Just the color of this soup warms me from head to toe. While I’ve listed specific ingredients, I encourage you to improvise. Swap the onion for shallots or leeks. Supplement the carrots with winter squash. Coconut milk can be replaced with any milk, yogurt, or eliminated entirely. Peppers are a farm freezer fave- they can be frozen whole or in pieces- and bring incredible flavor and color to winter dishes.
INGREDIENTS
Coconut or Neutral Cooking Oil, 2 T.
Onion, 2 c. chopped
Red Pepper, 2 c. chopped
Jalapeno, 1-2 finely diced
Carrot, 4 c. chopped
Curry Powder, 1 T.
Coriander, 1 tsp.
Cumin, 1 tsp.
Chili or Cayenne Powder, to taste
Coconut Milk, 14 oz.
Salt, to taste
Lime juice, to taste
INSTRUCTIONS
Heat oil in a 4+ quart soup pot over medium heat. Add onions, red peppers and jalapeno, cooking until the vegetables lose their structure, 15-20 minutes. Stir frequently and adjust heat to avoid scorching.
Add carrots, spices and enough water to cover vegetables. Bring to a boil, then cover and simmer until carrots are tender, 10-20 minutes depending on carrot-chunk size.
Turn off heat. Add coconut milk, salt and a splash of lime juice. To salt, I stir in 1-2 tsp., let it infuse, taste and add more if desired.
Using a blender, immersion blender, or food processor, puree soup to desired consistency. Add water as needed to reach desired consistency.
Return soup to low heat and taste, adding salt and/or lime if desired.
Enjoy with a garnish of finely chopped greens, a chunk of hearty bread, or as is.
Roasting Option: Roast carrots and red peppers to deepen flavor.
Preheat oven to 375°F.
Cut carrots into 1-inch chunks and peppers into quarters. Toss with a drizzle of oil and arrange in a baking dish. Roast, stirring every 15 minutes, until tender but not charred. Remove any blackened skin from peppers.
Add carrots and peppers to cooked onions and jalapeno and continue with recipe.